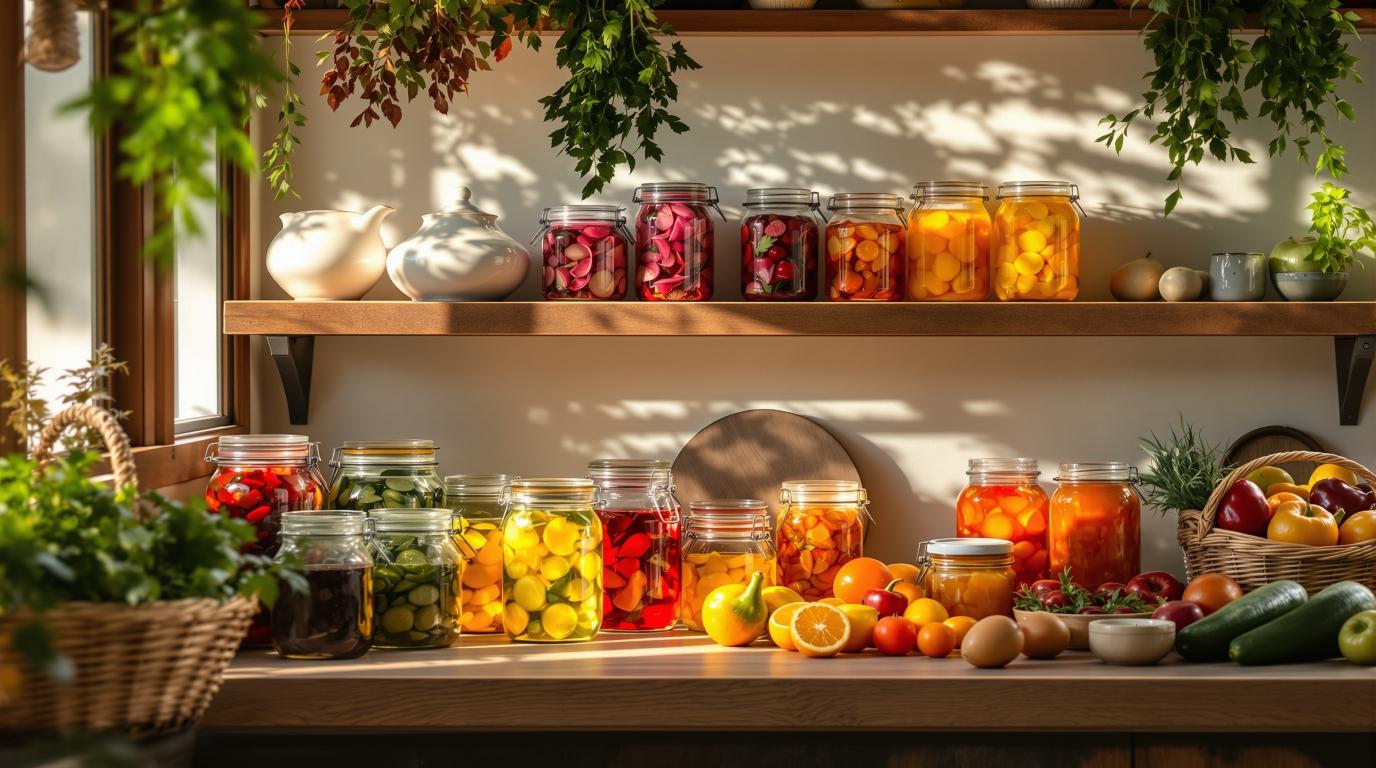
Have you ever thrown away perfectly good food because it spoiled before you could use it? Or wished you could enjoy summer’s fresh tomatoes in the middle of winter?
Food preservation solves both problems.
Preserving food isn’t just for homesteaders with root cellars and acres of gardens. It’s for anyone who wants to save money, reduce waste, and enjoy delicious food year-round. Whether you picked up too much produce at the farmers market or want to make your grocery budget stretch further, learning basic preservation skills changes everything.
The best part? You don’t need fancy equipment or special training. Many preservation methods use tools you already own. And the skills you’ll learn have been passed down for generations—they’re proven, reliable, and surprisingly simple once you understand the basics.
In this complete guide, you’ll learn everything you need to start preserving food at home. We’ll cover the easiest methods first, explain what equipment you actually need, and walk you through each process step-by-step. You’ll discover which methods work best for different foods, how to avoid common mistakes, and most importantly, how to keep everything safe.
Ready to stop wasting food and start filling your pantry with preserved goodness?
Understanding Food Preservation
What Is Food Preservation?
Food preservation is simply the process of treating food so it lasts longer than it normally would.
Fresh strawberries? They’ll last maybe five days in your fridge. But freeze them, and they’ll keep for months. Make them into jam, and they’ll sit happily in your pantry for a year.
That’s preservation—extending the life of food so you can enjoy it later.
Why Food Spoils
To understand preservation, you need to know why food goes bad in the first place.
Three main culprits cause food to spoil:
1. Bacteria, molds, and yeasts
These tiny organisms love food as much as we do. They grow on food, breaking it down and creating the smells, textures, and tastes we associate with spoiled food. Some microorganisms are harmless (or even beneficial, like in yogurt). Others can make you seriously sick.
2. Enzymes
These are natural chemicals inside food that cause it to ripen, then rot. Ever noticed how a banana goes from green to yellow to brown to black? That’s enzymes at work. They break down the food’s structure over time.
3. Oxidation
When food is exposed to air, chemical reactions occur. This is why cut apples turn brown or why oils go rancid. Oxygen interacts with the food, changing its color, flavor, and texture.
How Preservation Works
Every preservation method fights these spoilage causes in different ways:
Freezing slows down bacteria and enzyme activity so much that food stays fresh for months.
Canning kills bacteria with heat, then seals food in airtight containers so new bacteria can’t get in.
Drying removes the moisture bacteria need to grow.
Pickling creates an acidic environment where most harmful bacteria can’t survive.
Fermentation encourages “good” bacteria that crowd out harmful ones.
Each method has a different strategy, but the goal is the same: stop spoilage and keep food safe to eat.
A Brief History
Our ancestors didn’t have refrigerators or grocery stores. Preservation wasn’t a hobby—it was survival.
Ancient people dried meat and fish in the sun. They buried root vegetables in cool earth. They discovered that salt and smoke kept food edible for months. These methods developed over thousands of years through trial and error.
When winter came, preserved food meant the difference between life and death.
Today, we have modern advantages. We understand the science behind preservation. We have equipment that makes the process easier and safer. But we’re using the same fundamental techniques humans have relied on for millennia.
Why Preserve Food Today?
You might be thinking: “Why bother? I can just buy food from the store year-round.”
True. But here’s why preservation still matters:
Save money: Buy produce when it’s cheap and abundant, preserve it, and eat it later. One bushel of tomatoes in August can fill your pantry with sauce, salsa, and canned tomatoes at a fraction of store prices.
Reduce waste: Americans throw away about 40% of the food they buy. Preservation means less food in the trash and more in your belly.
Eat better: Preserved food from your kitchen has no weird preservatives or excess sodium. You control what goes in.
Build self-sufficiency: When you know how to preserve food, you’re less dependent on grocery stores and supply chains.
Enjoy seasonal foods year-round: Strawberries in December. Tomato sauce in February. Summer flavors whenever you want them.
It’s satisfying: There’s something deeply fulfilling about looking at a shelf full of jars you preserved yourself.
Choosing Your First Preservation Method
Let’s be honest: looking at all the preservation methods can feel overwhelming. Canning, freezing, drying, fermenting, pickling—where do you even start?
Questions to Ask Yourself
Before you dive in, answer these questions. Your answers will guide you to the right method.
What foods do you want to preserve?
Different foods work better with different methods. If you have a ton of berries, freezing or jam-making makes sense. Got cucumbers? Pickling is your friend.
How much space do you have?
Living in an apartment with a tiny freezer? Canning might be better than freezing. Have a basement? Root cellaring could work great.
What’s your budget?
Some methods are nearly free (freezing uses bags you probably have). Others require equipment investment (pressure canning needs a special pot).
How much time do you have?
Freezing is fast. Canning takes an afternoon. Fermenting requires days of waiting but little active work.
What equipment do you already own?
A freezer? Boom, you can start freezing today. A big pot? You’re halfway to water bath canning.
Quick Method Comparison
Let me break down the major methods so you can compare:
Freezing:
- Ease: Very easy
- Equipment: Freezer, bags/containers
- Cost: Almost free
- Time: Minutes per batch
- Best for: Almost everything
Refrigerator Storage (extended):
- Ease: Easiest
- Equipment: Refrigerator, containers
- Cost: Free
- Time: Minutes
- Best for: Short-term preservation
Dehydrating:
- Ease: Easy to moderate
- Equipment: Dehydrator, oven, or sun
- Cost: $0-$150
- Time: Hours (mostly unattended)
- Best for: Fruits, herbs, jerky
Water Bath Canning:
- Ease: Moderate
- Equipment: Large pot, jars, tools
- Cost: $50-$100 to start
- Time: Half-day projects
- Best for: High-acid foods (jams, pickles, tomatoes)
Pressure Canning:
- Ease: Advanced
- Equipment: Pressure canner, jars, tools
- Cost: $150-$300 to start
- Time: Half-day projects
- Best for: Low-acid foods (vegetables, meat)
Pickling/Fermenting:
- Ease: Easy to moderate
- Equipment: Jars, weights
- Cost: Very low
- Time: Days to weeks (mostly waiting)
- Best for: Vegetables, some fruits
Best First Methods for Beginners
If you’re brand new to preservation, start here:
#1: Freezing
Why? You already have a freezer. The learning curve is gentle. Results are reliable. You’ll build confidence quickly.
#2: Simple pickling (refrigerator pickles)
Why? No special equipment. Fast results. Hard to mess up. Delicious outcome.
#3: Dehydrating (if you have a dehydrator or oven)
Why? Straightforward process. Low risk. Great for snacks.
Once you’re comfortable with these, move on to:
#4: Water bath canning (jams and high-acid foods)
Why? Opens up shelf-stable options. Moderate equipment investment. Impressive results.
Save pressure canning for later. It requires more knowledge about safety, and you should be comfortable with other methods first.
Method #1: Freezing (The Easiest Start)
Why Freezing Is Beginner-Friendly
Freezing is the preservation method with the most forgiving learning curve.
Think about it: you’ve been using your freezer your whole life. You know how to put things in it. Preservation-level freezing just adds a few extra steps to maximize quality and prevent waste.
Advantages of freezing:
- Uses equipment you already own
- Works for almost all foods
- Maintains flavor and nutrition well
- Quick and easy process
- Forgiving of small mistakes
- No specialized knowledge required
What You Need
Here’s your freezing equipment list:
Essential:
- A working freezer (ideally at 0°F or below)
- Freezer bags (heavy-duty, zipper-top)
- Containers (plastic or glass, freezer-safe)
- Permanent marker (for labeling)
Helpful but optional:
- Vacuum sealer (prevents freezer burn better)
- Large pot (for blanching vegetables)
- Cookie sheets (for flash-freezing)
- Freezer tape (sticks better than regular tape in cold)
Total cost if you’re starting from scratch? Maybe $20-30 for bags and containers.
What Freezes Well (And What Doesn’t)
Excellent for freezing:
- Most berries and fruits
- Most vegetables (after blanching)
- Meat, poultry, fish
- Bread and baked goods
- Soups and stews
- Cooked rice and grains
- Butter and cheese (hard types)
- Herbs (in oil or water)
Not good for freezing:
- Lettuce and salad greens (turn mushy)
- Cucumbers (watery and limp when thawed)
- Raw potatoes (texture changes)
- Cream-based sauces (may separate)
- Eggs in shells (they crack)
- Mayonnaise (separates)
- Fried foods (get soggy)
Step-by-Step Freezing Process
For fruits (berries, sliced fruit):
Step 1: Wash and dry fruit thoroughly.
Step 2: Remove any stems, pits, or inedible parts.
Step 3: Flash-freeze (optional but recommended): Spread fruit in a single layer on a cookie sheet. Freeze for 2-3 hours until solid. This prevents fruit from clumping together.
Step 4: Transfer frozen fruit to freezer bags. Remove as much air as possible.
Step 5: Label with contents and date.
Step 6: Freeze up to 8-12 months.
For vegetables:
Step 1: Wash vegetables thoroughly.
Step 2: Cut into uniform pieces.
Step 3: Blanch (this is important!): Boil water in a large pot. Submerge vegetables for 2-5 minutes (time varies by vegetable). Immediately plunge into ice water to stop cooking.
Step 4: Drain and pat dry.
Step 5: Flash-freeze if desired (see fruit instructions).
Step 6: Pack into freezer bags, remove air, label, and freeze.
For cooked foods (soups, casseroles, etc.):
Step 1: Cool food completely before freezing.
Step 2: Portion into meal-sized containers.
Step 3: Leave headspace (about 1 inch) for expansion.
Step 4: Label with contents, date, and reheating instructions.
Step 5: Freeze up to 3-4 months.
Blanching Basics for Vegetables
You might be wondering: what’s blanching and why does it matter?
Blanching means briefly boiling vegetables, then immediately cooling them in ice water.
Why blanch? It stops enzyme activity. Without blanching, frozen vegetables continue to age, losing color, flavor, and nutrients. Blanched vegetables stay vibrant and tasty for months.
Blanching times by vegetable:
- Green beans: 3 minutes
- Broccoli: 3 minutes
- Corn (cut kernels): 4 minutes
- Carrots (sliced): 2 minutes
- Peas: 1.5 minutes
Don’t skip this step for vegetables. It makes a huge difference in quality.
Preventing Freezer Burn
Freezer burn happens when food is exposed to air in the freezer. Ice crystals form on the food’s surface, drying it out and ruining texture and flavor.
How to prevent it:
- Remove ALL air from bags (squeeze out every bit)
- Use vacuum-sealed bags if possible
- Wrap foods in multiple layers
- Don’t overpack your freezer (air needs to circulate)
- Keep freezer at 0°F or below
- Use foods within recommended time frames
Storage Times for Frozen Foods
Frozen food stays safe indefinitely, but quality decreases over time.
Recommended storage times:
- Fruits and vegetables: 8-12 months
- Ground meat: 3-4 months
- Whole poultry: 12 months
- Fish: 6 months
- Bread: 3 months
- Soups and stews: 2-3 months
- Cooked meals: 2-3 months
Thawing Safely
Never thaw food on the counter at room temperature. Bacteria love that.
Safe thawing methods:
- In the refrigerator (slowest but safest)
- In cold water (change water every 30 minutes)
- In the microwave (cook immediately after)
- Cook from frozen (works for many foods)
Common Mistakes and Fixes
Mistake: Freezing food in packaging from the store.
Fix: Repackage in freezer-safe containers or bags. Store packaging isn’t designed for long-term freezing.
Mistake: Not labeling frozen foods.
Fix: Always label with contents and date. Mystery freezer items are the worst.
Mistake: Freezing foods past their prime.
Fix: Freeze food at peak freshness. Freezing doesn’t improve quality—it preserves it.
Mistake: Refreezing thawed food.
Fix: Only refreeze if food was thawed in the refrigerator and still contains ice crystals. Otherwise, cook it first, then freeze the cooked dish.
Cost: Almost Free
Freezing is the most budget-friendly preservation method. You already have a freezer. A box of freezer bags costs $5-10 and lasts for dozens of preservation sessions.
Even if you invest in a vacuum sealer ($50-100), the convenience and improved quality pay for themselves quickly.
Method #4: Canning – Water Bath (First Canning Method)
What Is Water Bath Canning?
Water bath canning is the process of preserving high-acid foods by processing filled jars in boiling water.
The heat kills bacteria, molds, and yeasts. As the jars cool, a vacuum seal forms, keeping new microorganisms out. The result? Shelf-stable food that lasts a year or more.
When to Use Water Bath (High-Acid Foods)
Water bath canning ONLY works for high-acid foods.
High-acid foods include:
- Fruits (apples, berries, peaches, pears)
- Fruit juices
- Jams, jellies, preserves
- Pickled vegetables (the vinegar makes them acidic)
- Tomatoes (with added acid—lemon juice or citric acid)
- Salsas (with proper proportions)
- Chutneys and relishes
Why only high-acid foods? Acid prevents the growth of Clostridium botulinum, the bacteria that causes botulism. Botulism is deadly, and it can’t be detected by smell, taste, or sight.
High-acid environments (pH below 4.6) stop botulism bacteria. Boiling water (212°F) kills other spoilage organisms in high-acid foods.
Low-acid foods like vegetables and meat require higher temperatures that only pressure canning achieves.
Essential Equipment (Affordable Starter Kit)
You need:
Large pot (water bath canner):
Any large, deep pot works if it’s tall enough for 1-2 inches of water to cover jars plus 1-2 inches of space above water level. Purpose-made water bath canners ($30-50) include a rack, but aren’t required.
Canning jars:
Use real canning jars (Ball, Kerr, Mason brands). They’re designed to withstand heat and repeated use. Sizes: half-pint, pint, or quart depending on what you’re canning. ($8-15 per dozen)
New lids:
The flat metal lids with rubber sealing compound. These are one-time use. Never reuse lids. ($2-3 per dozen)
Rings (bands):
The threaded metal rings that hold lids in place during processing. These are reusable. Come with jars initially.
Jar lifter:
Looks like oversized tongs with rubber grips. Safely removes hot jars from boiling water. ($8-12)
Funnel:
Wide-mouth funnel designed for canning jars. Keeps jar rims clean. ($3-5)
Bubble remover/headspace tool:
Plastic or silicone tool that removes air bubbles and measures headspace. ($3-5)
Clean towels:
For wiping jar rims and handling hot jars.
Timer:
Essential for accurate processing times.
Total starter cost: $50-80 if you have a large pot already, $80-130 with new canner.
Safety Principles (Botulism Prevention)
Let’s talk about safety because it’s critical.
Botulism is serious. It’s a deadly form of food poisoning caused by toxins from C. botulinum bacteria. The bacteria form spores that survive boiling. Those spores grow in low-acid, oxygen-free environments (like improperly canned food) and produce deadly toxin.
How to prevent botulism:
- Only water bath can high-acid foods. This can’t be said enough.
- Follow tested recipes exactly. Don’t improvise. Don’t adjust ingredient ratios. Tested recipes have been scientifically verified as safe.
- Add acid to tomatoes. Tomatoes are right on the borderline of safe acidity. Always add lemon juice or citric acid as recipes direct.
- Process for the full time. Don’t shorten processing times.
- Check seals. Improperly sealed jars aren’t safe.
- When in doubt, throw it out. If a jar doesn’t seal, or if you see mold, cloudiness, or off-smells when you open it, discard the food.
Step-by-Step Water Bath Process
Step 1: Prepare your workspace
Set out all equipment. Wash jars, lids, and rings in hot soapy water. Keep jars hot in a low oven or dishwasher.
Step 2: Prepare your food
Follow your tested recipe exactly. Prepare jam, pickles, or whatever you’re canning.
Step 3: Fill jars
Using your funnel, fill hot jars with hot food, leaving appropriate headspace (usually ½ inch, but follow recipe). Remove air bubbles with your tool by sliding it around the inside of the jar.
Step 4: Wipe rims
Use a clean, damp cloth to wipe jar rims. Any food residue prevents proper sealing.
Step 5: Apply lids and rings
Center lid on jar. Screw ring on fingertip-tight—snug but not cranked down hard.
Step 6: Process jars
Place jars in canner with water covering jars by 1-2 inches. Bring to a full rolling boil. Start timer. Process for time specified in recipe.
Step 7: Remove and cool
Turn off heat. Let jars sit in canner 5 minutes. Remove jars with jar lifter and place on towel. Don’t retighten rings. Let cool 12-24 hours undisturbed.
Step 8: Check seals
Press center of lid. If it doesn’t flex, it’s sealed. Sealed jars can be stored. Unsealed jars go in the fridge and should be used within a week.
Step 9: Label and store
Remove rings (they can rust). Label jars with contents and date. Store in cool, dark place.
Best Recipes for Beginners
Start with these foolproof options:
Strawberry jam:
Sweet, delicious, and hard to mess up. Uses pectin which helps it set.
Bread and butter pickles:
Classic sweet pickles. Great way to use excess cucumbers.
Salsa:
Follow a tested recipe exactly (don’t change proportions). Super satisfying to make.
Dill pickles:
Traditional and tasty. Cucumbers, dill, garlic, vinegar.
How to Test Jar Seals
After jars cool completely (12-24 hours), test each seal:
Method 1: Press the center of the lid with your finger. If it doesn’t move (flex up and down), it’s sealed.
Method 2: Tap the lid with a spoon. A sealed jar makes a high-pitched ringing sound. An unsealed jar makes a dull thud.
Method 3: Look at the lid. The center should be concave (pulled down slightly).
If any jar didn’t seal, refrigerate it and use within a week. Or reprocess with a new lid within 24 hours.
Storage and Shelf Life
Store sealed jars in a cool (50-70°F), dark, dry place. Basement shelves, pantry, or closet work well.
How long does canned food last?
Properly canned food is safe indefinitely, but quality decreases over time.
Best quality timeline:
- High-acid canned goods: 12-18 months
- Pickles: 12 months
- Jams and jellies: 12 months
After that, food is still safe but may lose color, texture, or flavor.
Common Problems and Solutions
Problem: Jar didn’t seal.
Cause: Food on rim, damaged jar/lid, insufficient processing time.
Solution: Refrigerate and use within a week, or reprocess with new lid within 24 hours.
Problem: Fruit floating in jars.
Cause: Fruit less dense than syrup, overripe fruit, air trapped in fruit.
Solution: Not a safety issue. Still safe to eat. Pack fruit firmly next time.
Problem: Liquid loss from jars.
Cause: Overfilling jars, fluctuating pressure during processing, food packed too tight.
Solution: As long as jar sealed, food is safe. Store in a place where sticky drips won’t matter.
Problem: Cloudy liquid.
Cause: Could be starch from food (harmless) or spoilage (dangerous).
Solution: If jar sealed properly and liquid was clear after processing, cloudiness indicates spoilage. Throw it out.
Cost: Moderate Upfront, Reusable Jars
Initial investment: $80-130 for equipment and first batch of jars.
Ongoing costs: Just replacement lids ($2-3 per dozen). Jars and rings are reused for years.
Cost per jar: After initial setup, about $0.50-0.75 per jar when you factor in food, lids, and energy costs.
That’s significantly cheaper than buying equivalent products at the store, especially for things like artisan jams or pickles.
Safety First: What You Must Know
Let’s get serious for a moment about safety. Food preservation is generally very safe when you follow guidelines. But there are real risks if you don’t.
Botulism: What It Is and How to Prevent It
Botulism is the scariest risk in home canning.
Clostridium botulinum bacteria are everywhere—in soil, on produce, in dust. The spores survive boiling. In low-acid, oxygen-free environments (like improperly canned food), they germinate and produce a deadly toxin.
Botulism symptoms: Blurred vision, drooping eyelids, slurred speech, difficulty swallowing, muscle weakness, paralysis. It can be fatal.
The good news: Botulism is completely preventable.
Prevention rules:
- Use the right method for the food. High-acid foods: water bath. Low-acid foods: pressure canning. No exceptions.
- Follow tested recipes. Don’t wing it.
- Process at the right temperature for the right time. Water bath: 212°F. Pressure canning: 240°F.
- Check seals. Don’t eat from unsealed jars.
- When opening jars, look for spoilage signs. Bulging lids, mold, off-smells, spurting liquid = throw it out immediately.
Safe pH Levels for Canning
The magic number is pH 4.6.
Foods with pH below 4.6 are considered high-acid and safe for water bath canning. Foods above pH 4.6 are low-acid and require pressure canning.
High-acid foods (pH below 4.6):
- Most fruits
- Pickled vegetables (vinegar lowers pH)
- Foods with added acid (tomatoes with lemon juice)
Low-acid foods (pH above 4.6):
- All vegetables (except tomatoes with added acid)
- Meat, poultry, seafood
- Dried beans
- Milk and dairy
Never water bath can low-acid foods. It’s not safe.
Importance of Tested Recipes
“Tested recipes” means recipes developed and scientifically verified by food safety experts.
Trusted sources:
- USDA Complete Guide to Home Canning
- National Center for Home Food Preservation (nchfp.uga.edu)
- University extension services
- Ball Blue Book of Preserving
These sources test recipes in laboratories. They verify pH levels, processing times, and safety.
What about recipes from:
- Pinterest? Maybe yes, maybe no. Check if they cite a tested source.
- Blogs? Same—look for citations to USDA or university sources.
- Old cookbooks? Often unsafe by modern standards.
- Family recipes? Sweet memories, but possibly dangerous.
Don’t Trust Grandma’s Old Recipes
I know, I know. Grandma canned for 50 years and never poisoned anyone.
But here’s the thing: food safety science has advanced. We understand pH levels now. We know exact temperatures needed to kill bacteria. We’ve documented cases of botulism from home-canned goods.
Grandma might have been lucky. Or maybe her recipes happened to be safe. But “it worked for grandma” isn’t evidence of safety.
Why old recipes can be unsafe:
- Didn’t account for pH levels
- Used methods no longer considered safe (open kettle, oven canning, etc.)
- Processing times were guesses
- Didn’t adjust for altitude
Stick with tested recipes. Your life literally depends on it.
Signs of Spoilage
Before eating any home-preserved food, inspect it carefully.
Don’t eat food from jars with:
- Bulging or swollen lids
- Broken seals
- Mold (even a tiny bit)
- Spurting liquid when opened
- Off-smell or unusual odor
- Cloudiness (in products that should be clear)
- Bubbles rising when jar is still
- Discoloration
When in doubt, throw it out. Don’t taste it. Don’t even open it near your face—botulism toxin can be absorbed through mucus membranes.
Throw suspicious jars away where animals and people can’t access them.
Altitude Considerations
Water boils at lower temperatures at high altitudes.
At sea level, water boils at 212°F. At 5,000 feet, it boils at 203°F. That lower temperature means longer processing times are needed to ensure safety.
Altitude adjustments:
- 1,001-3,000 feet: Add 5 minutes to processing time
- 3,001-6,000 feet: Add 10 minutes
- 6,001-8,000 feet: Add 15 minutes
- Above 8,000 feet: Add 20 minutes
For pressure canning, altitude affects pressure settings, not time. Check your canner’s instructions.
Conclusion: Your Preservation Journey Begins Now
You’ve learned the fundamentals of food preservation—from simple freezing to more advanced canning methods. You understand why food spoils and how different preservation techniques stop that process.
Start Small, Build Confidence
Don’t feel like you need to master everything at once.
Start with freezing. It’s easy, forgiving, and builds your confidence. Freeze a batch of berries or blanch some green beans. See how satisfying it feels to pull out food you preserved months later.
Then maybe try refrigerator pickles—quick, tasty, and almost impossible to mess up.
Once you’re comfortable, move on to water bath canning. Make a batch of jam. Experience the “ping” of jar lids sealing. Line up those beautiful jars on your shelf.
Each method you learn builds on the last. Each jar you preserve adds to your skills and your pantry.
Every Preserved Jar Is Money Saved and Waste Reduced
Think about the financial impact:
- A bushel of tomatoes costs $15-25 and yields 15-20 quarts of sauce worth $4-7 each at the store
- Buying berries on sale and freezing them saves $3-5 per pound year-round
- Making your own jam costs half what artisan jam costs at the market
But it’s not just about money. It’s about waste too.
Americans throw away 40% of the food we buy. That’s not just wasted food—it’s wasted money, wasted resources, and environmental damage.
Every cucumber you pickle instead of tossing is a small victory. Every jar of jam is produce saved from the compost bin.
The Satisfaction of Self-Sufficiency
There’s something deeply satisfying about opening your pantry and seeing shelves lined with food you preserved yourself.
It’s a connection to the past, to the skills our ancestors relied on. It’s independence from the grocery store, at least in small measure. It’s the knowledge that you can take raw ingredients and create something that nourishes your family months later.
In uncertain times, knowing you have preserved food tucked away brings peace of mind. You’ve built a small buffer against whatever life throws at you.
Your Preservation Journey Begins Now
You have the knowledge. You understand the methods. You know how to stay safe.
Now it’s time to actually do it.
Start this week. Pick up some freezer bags and freeze something. Buy a few cucumbers and make refrigerator pickles. Order a basic canning kit and put up a batch of jam.
Take that first step.
You’ll make mistakes—everyone does. A jar might not seal. Your first pickles might be too salty. Your frozen green beans might be a bit mushy.
That’s okay. You’re learning. With each batch, you’ll get better. Your techniques will improve. Your preserved foods will taste more delicious.
Before long, you’ll be the person your friends come to for preserving advice. You’ll be gifting jars of your homemade jam. You’ll be planning your garden around what you want to preserve.
Food preservation is a journey. Today, you take the first step.
Frequently Asked Questions
Q1: What’s the easiest food preservation method for beginners?
A: Freezing is the easiest method to start with. You already have a freezer, it requires minimal equipment (just bags and containers), and the learning curve is gentle. You can successfully freeze berries, vegetables, and cooked foods with just a few simple steps. It’s hard to make a serious mistake with freezing.
Q2: How much does it cost to start food preservation?
A: It depends on the method. Freezing costs almost nothing if you have a freezer—just $10-20 for bags and containers. Water bath canning requires $80-130 for equipment initially, but jars are reusable. Pressure canning is the most expensive at $150-300 for equipment. Dehydrating ranges from free (oven or sun) to $150 for an electric dehydrator. Start with low-cost methods and add equipment as you grow more confident.
Q3: Is home food preservation actually safe?
A: Yes, when you follow tested recipes and proper procedures. The key is using the right method for each food type: high-acid foods can be water bath canned, low-acid foods must be pressure canned, and everything can be frozen. Follow guidelines from trusted sources like the USDA, university extensions, or the National Center for Home Food Preservation. Never improvise with recipes—follow tested instructions exactly.
Q4: How long does preserved food last?
A: It varies by method. Frozen foods maintain best quality for 8-12 months (fruits/vegetables) or 3-4 months (cooked meals). Properly canned foods last 12-18 months at best quality. Dehydrated foods keep 6-12 months. Fermented foods vary widely. All preserved foods remain safe longer than these times, but quality (flavor, texture, nutrition) decreases over time.
Q5: Can I use my grandmother’s old canning recipes?
A: Generally, no. While grandma meant well, old recipes often don’t meet modern safety standards. They may have incorrect pH levels, inadequate processing times, or use methods now known to be unsafe (like open kettle canning or oven canning). Stick with tested recipes from the USDA, university extensions, or the Ball Blue Book. These have been scientifically verified as safe.
Q6: What foods can’t be safely preserved at home?
A: Some foods are difficult or unsafe to preserve at home: dairy products (except hard cheeses for freezing), most eggs, foods containing flour or cornstarch (they break down), cream-based sauces (separate when frozen), lettuce and salad greens (turn to mush), and anything with mayonnaise. Additionally, never can pumpkin or squash as chunks or puree using home methods—the density makes safe processing nearly impossible.
Q7: Do I need special equipment to start?
A: Not much! For freezing, you just need freezer bags and containers you probably already own. For basic pickling, regular jars work for refrigerator pickles. For water bath canning, you need canning jars, lids, and a large pot (or actual water bath canner). The nice thing is that canning equipment lasts decades—it’s a one-time investment that pays for itself quickly.
Q8: How much space do I need for food preservation?
A: Very little for most methods. Freezing uses your existing freezer. A small apartment kitchen works fine for canning—you just need counter space and a stove. Even root cellaring can work in a closet or basement corner. The biggest space need is storage for your preserved foods, but jars stack neatly on shelves, frozen foods fit in your freezer, and dehydrated foods take up minimal space.
Q9: What’s the difference between water bath and pressure canning?
A: Water bath canning uses boiling water (212°F) and works ONLY for high-acid foods like fruits, jams, pickles, and tomatoes with added acid. The acid prevents botulism bacteria growth. Pressure canning reaches 240°F using a special sealed pot, which is necessary for low-acid foods like vegetables, meats, and soups. Using the wrong method is dangerous—always match the method to the food’s acidity level.
Q10: Can I preserve food if I live in an apartment?
A: Absolutely! Freezing obviously works anywhere with a freezer. Canning needs only a stove and some counter space. Many apartment dwellers successfully can, ferment, and dehydrate foods. Some methods (like root cellaring) might be harder without a basement, but refrigerator pickles, freezing, and dehydrating work great in small spaces. You might just work in smaller batches than someone with a big farmhouse kitchen.
Q11: How do I know if preserved food has gone bad?
A: For canned goods, check before opening: bulging lids, rust, dents, or leaking indicate problems. When opening, look for spurting liquid, mold, cloudiness, off-smells, or discoloration. For frozen foods, severe freezer burn or off-odors indicate quality loss. When in doubt, throw it out—never taste suspicious preserved foods. Botulism toxin has no smell or taste, so visual and seal inspection is critical.
Q12: Is freezing as good as canning?
A: They’re different, each with advantages. Freezing better maintains fresh flavor and texture, requires less equipment, and is easier for beginners. Canning creates shelf-stable foods that don’t require electricity, often improves flavor (like jams), and frees up freezer space. Choose based on your needs: freezing is easier and faster, canning is better for long-term storage without power. Many people use both methods.
Q13: What should I preserve first as a beginner?
A: Start by freezing summer berries—wash, dry, and freeze them on a cookie sheet before bagging. It’s nearly foolproof and teaches basic techniques. Next, try refrigerator pickles using cucumber slices, vinegar, and spices—ready in 24 hours with no processing. Once comfortable, make strawberry or raspberry jam using a tested recipe. These three projects build confidence without overwhelming you, and they’re all delicious.
Q14: How do I prevent botulism?
A: Follow these rules strictly: (1) Only water bath can high-acid foods (fruits, pickles, tomatoes with added acid). (2) Pressure can all low-acid foods (vegetables, meat). (3) Use tested recipes from trusted sources only—never improvise. (4) Process foods at correct temperatures for full recommended times. (5) Check jar seals before storing. (6) Discard any jars showing signs of spoilage. Follow these guidelines and botulism risk is essentially zero.
Q15: Where can I find trusted recipes?
A: These sources provide scientifically tested, safe recipes: National Center for Home Food Preservation (nchfp.uga.edu), USDA Complete Guide to Home Canning, Ball Blue Book of Preserving, university extension services (search “[your state] extension food preservation”), and the Ball company website. Always verify that recipes cite these sources. Avoid relying solely on Pinterest, random blogs, or old family recipes without verification—safety standards have changed significantly.