- Introduction
- What Is Meat Curing?
- Safety First: Important Warnings
- Understanding Curing Ingredients
- Equipment You’ll Need
- The 5 Main Methods for Curing Meat
- METHOD #1: Dry Curing
- METHOD #2: Wet Curing / Brine Curing
- METHOD #3: Equilibrium Curing
- METHOD #4: Combination Curing
- METHOD #5: Sausage Curing
- Comparison: Which Method Should You Use?
- Best Meats to Cure
- Ideal Curing Environment
- Your First Curing Project: Wet-Cured Bacon
- Common Beginner Mistakes & How to Avoid Them
- Troubleshooting Guide
- After Curing: Storage & Shelf Life
- Smoking After Curing (Optional)
- Frequently Asked Questions
- Conclusion
Introduction
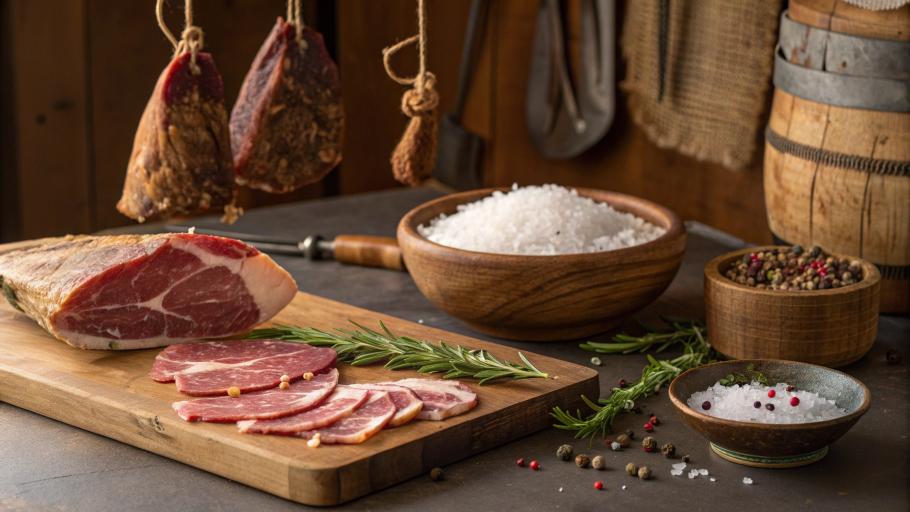
I’ll never forget the first time I tasted real homemade prosciutto. My friend’s grandfather, who had immigrated from Italy 50 years earlier, still cured meat in his basement using techniques passed down through generations. He sliced paper-thin pieces of the dark red ham, and when I took a bite, the rich, salty, complex flavor completely changed my understanding of what cured meat could be.
“This took me nine months to make,” he said with a proud smile. “But every slice was worth the wait.”
That moment sparked my curiosity. Could I learn to cure meat at home? Was it safe? What methods did people use? After years of research, practice, and yes—a few failures—I’ve learned that meat curing is an ancient skill anyone can master with proper knowledge and patience.
If you’ve ever wondered how bacon, salami, or ham are made, you’re in the right place. This guide will teach you the 5 main methods for curing meat at home. You’ll learn what curing really means, essential safety rules, equipment you need, and step-by-step instructions for your first curing project.
Why is this guide different? I won’t overwhelm you with complicated science or assume you already know what “equilibrium curing” means. I’ll explain everything in simple terms, share critical safety warnings, and give you a complete beginner project you can start this weekend.
Ready to discover the ancient art of preserving meat? Let’s begin.
What Is Meat Curing?
The Basics
Meat curing is the process of preserving meat by removing moisture and adding ingredients like salt, sugar, and spices. This keeps the meat from spoiling while creating bold, savory flavors that fresh meat doesn’t have.
Think of it like this: fresh meat goes bad in days because bacteria love moisture. When you cure meat, you remove that moisture, making the environment too salty and dry for harmful bacteria to survive.
A Brief History
People have been curing meat for over 5,000 years. The ancient Sumerians (around 3000 BC) used sesame oil and salt to preserve meat and fish. They had no refrigerators, so curing wasn’t just about flavor—it was about survival.
Fast forward to the Roman Empire, and a politician named Cato the Elder wrote the first known curing recipe around 300 BC. Soldiers carried cured meats on long marches. Sailors packed salted pork for months-long voyages. Families cured meat in fall so they’d have protein all winter.
Today, we don’t cure meat to survive winter—we do it because the results are absolutely delicious.
Why Cure Meat Today?
You might wonder: “Why bother curing meat when I have a refrigerator?” Great question! Here’s why people still cure meat:
1. Preservation: Cured meat lasts months or even years without refrigeration (when done properly)
2. Incredible Flavor: The curing process concentrates flavors and creates tastes you can’t get any other way—think of the difference between fresh pork and bacon
3. Texture Transformation: Curing firms up meat, making it sliceable and changing its bite completely
4. Food Independence: You control exactly what goes into your food—no mystery preservatives or chemicals you can’t pronounce
5. Connection to Tradition: You’re using techniques that have fed humans for thousands of years
The Science Behind Curing (Explained Simply)
Here’s what happens when you cure meat:
Salt draws out moisture. When you cover meat in salt, osmosis (a fancy word for liquid moving from one place to another) pulls water from inside the meat to the outside. Less moisture means bacteria can’t grow.
Salt changes the meat’s environment. Bacteria need water and the right pH level to multiply. Salt makes the meat too salty and too dry for harmful bacteria to survive.
Time allows good changes. As the meat cures over days or weeks, enzymes (natural chemicals in the meat) break down proteins, creating new complex flavors—similar to how cheese ages.
That’s it! No PhD in chemistry needed. Salt + Time + Temperature Control = Preserved, flavorful meat.
Safety First: Important Warnings
Before we talk about fun stuff like bacon and salami, we need to discuss safety. Improperly cured meat can make you seriously ill or even kill you. I’m not trying to scare you away—I just want you to respect the process.
Critical Safety Rules
⚠️ RULE #1: Beware of Botulism
Botulism is a deadly bacteria that grows in low-oxygen, moist environments—exactly the conditions inside improperly cured meat. This bacteria produces a toxin that can paralyze your muscles, including the ones you need to breathe.
The good news? Following proper curing techniques prevents botulism completely. That’s why you must:
- Use the correct amount of curing salt (pink salt with nitrites)
- Maintain proper temperature (36-40°F during initial cure)
- Follow tested recipes exactly
⚠️ RULE #2: Control Temperature
Keep meat between 36-40°F during the initial curing phase. Warmer temperatures let bad bacteria multiply. Colder temperatures stop the curing process.
Use a refrigerator thermometer—don’t guess!
⚠️ RULE #3: Keep Everything Clean
Wash your hands thoroughly. Sanitize all containers, cutting boards, and utensils. Clean surfaces prevent contamination.
⚠️ RULE #4: Follow Recipes Exactly
This isn’t like regular cooking where you can “eyeball it.” When a recipe calls for 1 teaspoon of pink curing salt, use exactly that amount—not more, not less. Too little won’t preserve properly. Too much can be harmful.
⚠️ RULE #5: When In Doubt, Throw It Out
If meat smells off, looks wrong, or just seems suspicious—discard it immediately. Your health is worth more than any piece of meat.
Signs of Spoilage
Learn to recognize these danger signs:
THROW OUT IMMEDIATELY if you see:
- Green, black, or brown mold (these are dangerous)
- Sour, rotten, or putrid smell
- Slimy or sticky texture
- Discoloration (beyond normal curing darkening)
Okay to see:
- White mold (this is good mold—just wipe with vinegar if desired)
- Meat darkening to deep red/brown color
- Firm, dry texture
- Pleasant, meaty, slightly funky smell (not rotten)
Understanding Nitrates and Nitrites
You’ll often see “pink curing salt” or “Prague Powder” in curing recipes. This is regular salt mixed with sodium nitrite (pink curing salt #1) or sodium nitrate (pink curing salt #2).
What do they do?
- Prevent botulism bacteria from growing
- Keep meat pink/red (without it, cured meat turns gray-brown)
- Add distinctive cured flavor
- Extend shelf life
Are they safe? When used in proper amounts, yes. The FDA regulates how much can be used. Pink curing salt is dyed pink so you won’t confuse it with regular salt.
Important: Pink curing salt is NOT the same as Himalayan pink salt! Curing salt contains nitrites; Himalayan salt is just regular salt with minerals that make it pink.
Measurement matters: Use a digital scale. Measure precisely. Too much nitrite can be harmful; too little won’t preserve properly.
Understanding Curing Ingredients
Let’s break down what goes into curing meat.
Essential Ingredients
1. Salt (The Most Important Ingredient)
You’ll use two types:
Kosher Salt or Sea Salt: Used for the bulk of curing. These don’t have iodine or anti-caking agents that can affect flavor. Use coarse salt for dry curing; it’s easier to control coverage.
Pink Curing Salt (Prague Powder #1): Used in small amounts for safety. It prevents botulism and keeps meat pink. You’ll typically use 1 teaspoon per 5 pounds of meat.
Never use iodized table salt! The iodine creates off-flavors.
2. Sugar
Sugar balances the harsh saltiness and feeds good bacteria (for fermented sausages). You can use:
- Brown sugar (adds molasses flavor)
- White sugar (neutral sweetness)
- Honey or maple syrup (unique flavors)
3. Spices and Herbs
This is where creativity comes in! Common choices:
- Black pepper (classic)
- Garlic (savory depth)
- Bay leaves (aromatic)
- Juniper berries (traditional for some European recipes)
- Thyme, rosemary, paprika, coriander
4. Water (For Brines)
Use clean, cold water for wet curing solutions.
Where to Buy Curing Ingredients
Local Grocery Store: Kosher salt, sugars, spices
Butcher Shops: May carry pink curing salt, or can order it
Online Retailers: Amazon, specialty curing supply websites—best place for pink curing salt and unique spices
Typical Cost: $15-30 for enough ingredients to cure several batches
Equipment You’ll Need
Good news: you don’t need expensive equipment to start curing meat at home.
Essential Equipment
1. Non-Reactive Containers
Use glass, plastic, or stainless steel. Never use aluminum—it reacts with salt and can give meat a metallic taste.
Options:
- Large glass bowls with lids
- Food-grade plastic containers
- Heavy-duty resealable plastic bags (gallon size or larger)
2. Accurate Digital Scale
This is critical. You need to measure both meat weight and curing salt precisely.
Buy a kitchen scale that measures in grams and ounces, with capacity of at least 10-15 pounds. Cost: $15-25.
3. Refrigerator Space
Most curing happens at 36-40°F—perfect refrigerator temperature. Clear a shelf in your fridge where meat can sit undisturbed for days or weeks.
4. Cheesecloth
Used for wrapping meat during the drying phase. Allows air circulation while keeping insects away.
Cost: $5-10 for a pack.
5. Thermometer and Hygrometer
A thermometer tells you temperature. A hygrometer measures humidity. For basic wet curing, a fridge thermometer ($5-10) is enough. For dry curing/aging, you’ll want a combined thermometer-hygrometer ($15-25).
Nice-to-Have Equipment
Meat Injector ($10-20): Looks like a large syringe. Used to inject brine directly into meat for faster, more even curing.
Vacuum Sealer ($40-100): Removes air from bags. Great for equilibrium curing and storing finished products.
Separate Curing Chamber: A dedicated mini fridge with temperature and humidity control. Only needed if you get serious about long-term curing. Cost: $200-500.
Budget Breakdown
Bare Minimum Starter: $50-75
- Digital scale ($20)
- Glass containers or bags ($10)
- Thermometer ($10)
- Cheesecloth ($5)
- Ingredients ($15-20)
Comfortable Start: $100-150
- Everything above plus:
- Meat injector ($15)
- Better containers ($20)
- Vacuum sealer (optional, $40-60)
The 5 Main Methods for Curing Meat
Now for the fun part! Let’s explore the different curing techniques.
METHOD #1: Dry Curing
What It Is
Dry curing is the oldest and most traditional method. You bury meat in a mixture of salt and spices, let it sit, then hang it to air-dry for weeks or months.
Best For
- Ham (whole legs)
- Bacon (pork belly)
- Pancetta (Italian cured pork belly, rolled)
- Prosciutto (Italian dry-cured ham)
- Bresaola (Italian cured beef)
- Coppa/Capicola (cured pork shoulder)
Time Required
Short answer: patience needed!
- Small cuts (bacon): 1-2 weeks
- Medium cuts (coppa): 2-4 weeks
- Large cuts (whole ham): 3-12 months
Step-by-Step Process
Step 1: Prepare the meat
- Trim excess fat if needed
- Pat completely dry with paper towels
Step 2: Make the cure mix
- Combine kosher salt, pink curing salt #1, sugar, and spices
- Typical ratio: 2 parts salt, 1 part sugar, plus spices to taste
Step 3: Bury the meat
- In a container or heavy plastic bag, pack cure mix all around the meat
- Every surface should be completely covered
- Seal container or bag
Step 4: Refrigerate and wait
- Place in refrigerator (36-40°F)
- Flip or massage the meat daily
- Liquid will pool at bottom—this is good! It’s moisture leaving the meat
Step 5: Rinse and add spices
- After initial cure (usually 7 days per inch of thickness), rinse off ALL the salt
- Pat completely dry
- Apply a spice rub if desired (pepper, herbs, etc.)
Step 6: Wrap and hang to dry
- Wrap loosely in cheesecloth
- Tie with kitchen twine
- Hang in a cool (50-60°F), humid (60-70%) environment
- Let air-dry until meat loses 35-40% of its original weight
How do you know it’s done? The meat should feel firm throughout, not soft or squishy in the center. It should have a pleasant, funky, meaty smell—not sour or rotten.
Pros of Dry Curing
✅ Incredible concentrated flavor
✅ Very long shelf life (months to years)
✅ Traditional, authentic method
✅ No cooking required if done properly
Cons of Dry Curing
❌ Takes weeks to months
❌ Requires specific temperature/humidity for drying phase
❌ Can become too salty if not rinsed properly
❌ Risk of uneven curing
METHOD #2: Wet Curing / Brine Curing
What It Is
Wet curing (also called brining) involves submerging meat in a saltwater solution with sugar and spices. The meat soaks up the brine flavors while the salt preserves it.
Best For
- Corned beef (brined beef brisket)
- Ham (whole or sliced)
- Turkey or chicken (before roasting)
- Pork chops or roasts
- Any larger cuts of meat
Time Required
Much faster than dry curing!
- Small cuts (chicken breasts): 2-4 hours
- Medium cuts (pork loin): 1-2 days
- Large cuts (whole turkey, beef brisket): 3-7 days
Step-by-Step Process
Step 1: Make the brine
- In a large pot, combine:
- 1 gallon cold water
- 1 cup kosher salt
- 1/2 cup sugar
- 1-2 teaspoons pink curing salt #1
- Spices (peppercorns, bay leaves, garlic, etc.)
- Bring to a boil to dissolve salt and sugar
- Let cool completely before using! Adding hot brine to meat will cook it
Step 2: Submerge the meat
- Place meat in a non-reactive container
- Pour cooled brine over meat until completely covered
- Meat will float—place a plate on top to keep it submerged
Step 3: Refrigerate
- Keep at 36-40°F
- Flip meat once a day for even brining
Step 4: Remove and rinse
- After prescribed time, remove meat from brine
- Rinse thoroughly under cold water
- Pat dry with paper towels
Step 5: Cook before eating
- Important: Wet-cured meat MUST be cooked before consumption
- Smoke, roast, grill, or boil depending on the recipe
Alternative Method: Injection
For faster, more even curing, use a meat injector to pump brine directly into the meat. This cuts curing time by 50-75%.
Pros of Wet Curing
✅ Much faster than dry curing
✅ Even flavor distribution throughout meat
✅ Results in moist, juicy meat
✅ Easier for beginners—hard to mess up
Cons of Wet Curing
❌ Takes up significant fridge space
❌ Shorter shelf life than dry-cured meat
❌ Must be cooked before eating
❌ Less intense flavor than dry-cured
METHOD #3: Equilibrium Curing
What It Is
This is a precise, modern take on dry curing. Instead of burying meat in pounds of salt, you calculate exactly 3% of the meat’s weight in salt, rub it on, then vacuum-seal the meat. The salt and meat reach “equilibrium”—the salt spreads evenly throughout without over-salting.
Best For
- Bacon (pork belly)
- Pork chops
- Small roasts
- Any cut where you want precise salt control
Time Required
1-2 weeks in the refrigerator
Step-by-Step Process
Step 1: Weigh the meat
- Use your digital scale
- Example: Pork belly weighs 2,000 grams
Step 2: Calculate 3% for salt
- Multiply meat weight by 0.03
- Example: 2,000 grams × 0.03 = 60 grams of salt needed
Step 3: Add sugar and spices
- Typical ratio: 50% salt, 50% sugar by weight
- Example: 30 grams salt + 30 grams sugar
- Add spices (not weighed—to taste)
Step 4: Rub and seal
- Coat meat evenly with cure mixture
- Place in vacuum-seal bag and seal (removes all air)
- If no vacuum sealer, use a regular bag and squeeze out as much air as possible
Step 5: Refrigerate and flip daily
- Keep at 36-40°F
- Flip bag each day so liquid redistributes
Step 6: Rinse, dry, cook or smoke
- After 10-14 days, remove from bag
- Rinse briefly (won’t need much—it’s precisely salted)
- Pat dry and proceed to smoking or cooking
Pros of Equilibrium Curing
✅ Precise results—never too salty
✅ Wastes no salt
✅ Easy to control and replicate
✅ Great for beginners who want consistent results
Cons of Equilibrium Curing
❌ Requires vacuum sealer (or good zip-lock technique)
❌ Not traditional—purists may scoff
❌ Still takes 1-2 weeks
METHOD #4: Combination Curing
What It Is
Why choose between dry and wet when you can have both? Combination curing involves injecting brine into the meat (wet cure) while also applying a dry rub on the outside. You get the speed and even distribution of wet curing plus the flavor intensity of dry curing.
Best For
- Large hams (especially bone-in)
- Thick pork shoulders
- Any large, dense cut of meat
Time Required
1-3 weeks (faster than dry cure alone, slower than wet cure)
Step-by-Step Process
Step 1: Prepare the injection brine
- Mix water, salt, pink curing salt, sugar, and liquid spices
- Strain to remove any particles that could clog the injector
Step 2: Inject the meat
- Fill meat injector with brine
- Insert needle deep into meat at multiple points
- Inject slowly, pulling needle out as you inject
- Aim for even distribution throughout the meat
Step 3: Apply dry cure to exterior
- Mix kosher salt, sugar, and spices
- Rub generously all over the outside of the meat
Step 4: Bag and refrigerate
- Place in a large plastic bag or container
- Refrigerate at 36-40°F
- Massage and flip every few days
Step 5: Check for doneness
- After 1-3 weeks (depending on size), meat should feel firm throughout
- Rinse exterior, pat dry
- Cook or smoke as desired
Pros of Combination Curing
✅ Faster than dry cure alone
✅ Reduces risk of uneven curing or spoilage
✅ Great for very large cuts
✅ Interior and exterior both get flavored
Cons of Combination Curing
❌ Requires meat injector ($10-20)
❌ More complex process
❌ Can be easy to over-inject (creating “pockets” of brine)
METHOD #5: Sausage Curing
What It Is
Sausage curing is different from the other methods because you’re working with ground meat, not whole cuts. You mix curing salts and spices directly into the ground meat, stuff it into casings, then hang it to cure and sometimes ferment.
Best For
- Salami (Italian dry-cured sausage)
- Pepperoni (spicy Italian-American sausage)
- Summer sausage (semi-dry American sausage)
- Chorizo (Spanish or Mexican spiced sausage)
- Soppressata (coarse-ground Italian salami)
Time Required
Few days to several weeks, depending on diameter and desired dryness
Step-by-Step Process
Step 1: Grind the meat
- Use a meat grinder or buy pre-ground meat
- Keep meat very cold (almost frozen) for best texture
Step 2: Mix with cure and spices
- Add pink curing salt #2 (for long-term curing)
- Add kosher salt, sugar, and spices
- Mix thoroughly—this is critical for even distribution
Step 3: Stuff into casings
- Use natural hog casings (most common) or synthetic casings
- Stuff firmly but not too tight (sausage will expand slightly)
- Tie off ends with twine
Step 4: Ferment (optional, for some sausages)
- Hang at warmer temp (70-85°F) for 24-48 hours
- This allows beneficial bacteria to grow, lowering pH for safety and flavor
Step 5: Cure and dry
- Hang in curing chamber (50-60°F, 70-80% humidity)
- Mold will form on outside (white is good—wipe any other colors)
- Let cure until sausage loses 30-40% of weight
Step 6: Enjoy!
- Properly cured salami doesn’t need cooking
- Slice thin and enjoy on charcuterie boards
Pros of Sausage Curing
✅ Incredible variety of flavors possible
✅ Impressive results—homemade salami is amazing
✅ Can be sliced thin and eaten without cooking
✅ Makes great gifts
Cons of Sausage Curing
❌ More advanced technique
❌ Requires casings, grinder (or butcher can grind)
❌ Fermentation step can be tricky
❌ Needs precise humidity control
Comparison: Which Method Should You Use?
Still not sure which curing method to try? Let me break it down.
Method Comparison Chart
| Method | Time | Difficulty | Best For | Shelf Life | Must Cook? |
|---|---|---|---|---|---|
| Dry Curing | Weeks to Months | Medium | Ham, bacon, prosciutto | Months to Years | No (if done properly) |
| Wet Curing | Hours to Days | Easy | Corned beef, turkey, chicken | 1-2 Weeks | Yes |
| Equilibrium | 1-2 Weeks | Easy-Medium | Bacon, small cuts | Months (if smoked) | Usually yes |
| Combination | 1-3 Weeks | Medium | Large hams, shoulders | Months | Yes |
| Sausage | Days to Weeks | Hard | Salami, pepperoni | Months | No (most types) |
My Beginner Recommendation
Start with wet curing (brine curing). Here’s why:
✅ Fastest results (days instead of weeks/months)
✅ Most forgiving (hard to over-salt)
✅ Familiar results (like deli ham, corned beef)
✅ Lower risk (shorter curing time = less chance for problems)
✅ No special equipment beyond basic containers
Once you’ve successfully wet-cured a few cuts of meat and understand the basics, graduate to equilibrium curing bacon. It’s still beginner-friendly but teaches you precision.
After that? Try your hand at dry curing something small like duck breast (duck prosciutto). Then, if you’re hooked, explore the wonderful world of salami!
Best Meats to Cure
Not all meat cures equally well. Here’s what works best.
Pork (Most Popular Choice)
Pork is the king of curing. The fat content keeps it moist, and the flavor pairs beautifully with salt and smoke.
Best cuts:
- Pork belly → Bacon, pancetta
- Pork leg (ham) → Prosciutto, ham
- Pork shoulder → Coppa, capicola, pulled pork after brining
- Pork loin → Canadian bacon
- Ground pork → Sausages, salami
Beef
Beef cures beautifully but tends to be leaner, so it dries out faster. Choose fattier cuts when possible.
Best cuts:
- Beef brisket → Corned beef, pastrami (cured then smoked)
- Beef round or leg → Bresaola (Italian cured beef)
- Beef plate or navel → Beef bacon
- Ground beef → Beef salami, summer sausage
Poultry
Chicken and turkey benefit tremendously from brining before roasting. They don’t dry-cure well (too lean, too bland).
Best use:
- Whole turkey → Brine before Thanksgiving roasting
- Whole chicken → Brine for juicy, flavorful roasting
- Duck legs → Cure and make duck confit (cooked slowly in fat)
Game Meat
Venison, elk, wild boar, and other game meats are naturally lean and can taste “gamey.” Curing helps tenderize and add flavor.
Best use:
- Venison or elk → Jerky, dried sausages, salami
- Wild boar → Any pork recipe (similar fat content)
Fish
Yes, you can cure fish! Salmon is the most popular, but trout, mackerel, and cod work too.
Best use:
- Salmon → Gravlax (Scandinavian cured salmon), smoked salmon
- Trout → Smoked trout
- Cod → Bacalao (salt cod, traditional in Portuguese/Spanish cooking)
Ideal Curing Environment
Temperature and humidity control can make or break your curing project.
Temperature Requirements
Initial Curing Phase (in salt/brine):
- Temperature: 36-40°F
- Location: Refrigerator works perfectly
- Why: Cold enough to prevent bad bacteria, warm enough for cure to work
Drying/Aging Phase (for dry-cured meats):
- Temperature: 50-60°F
- Humidity: 60-70%
- Why: Allows moisture to evaporate slowly without case-hardening (outside dries too fast, trapping moisture inside)
Humidity Control
Too Dry (<50% humidity):
- Meat surface dries too quickly
- Creates a hard shell that traps moisture inside
- Inside stays wet and can spoil
Too Humid (>80% humidity):
- Moisture doesn’t evaporate
- Encourages bad mold and bacteria growth
- Meat can rot before it cures
Just Right (60-70% humidity):
- Meat dries evenly from inside out
- Good white mold can develop (protective)
- Proper aging and flavor development
Setting Up a Curing Space
Option 1: Use Your Regular Refrigerator (Easiest)
Works for: Wet curing, equilibrium curing, short-term dry curing
Pros: You already have it, perfect temperature
Cons: Limited space, can’t control humidity, food smells can transfer
Option 2: Cool Basement or Cellar (Traditional)
Works for: Dry-curing aging phase (if climate is right)
Pros: Traditional method, free to use
Cons: Temperature fluctuates with seasons, may not work year-round
Option 3: DIY Curing Chamber (For Serious Hobbyists)
Convert a mini fridge or wine cooler:
- Add temperature controller ($30-50)
- Add humidifier/dehumidifier ($40-80)
- Install fan for air circulation ($10)
- Monitor with thermometer-hygrometer ($20)
Total investment: $200-300
Works for: Long-term dry curing, salami, prosciutto
Pros: Total control, year-round curing
Cons: Upfront cost, takes space
Monitoring
Buy a thermometer-hygrometer ($15-25 on Amazon). Place it in your curing space and check daily. Keep a log if you’re serious about tracking conditions.
Your First Curing Project: Wet-Cured Bacon
Ready to try curing? Let’s make bacon! This is the perfect first project because it’s easy, forgiving, and absolutely delicious.
Why This Project?
✅ Uses wet curing (easiest method)
✅ Familiar result (everyone loves bacon)
✅ Only takes 7 days
✅ Hard to mess up
✅ Teaches you fundamental curing skills
Ingredients
- 5 pounds pork belly (skin removed, if possible)
- 1/2 cup kosher salt
- 1/2 cup brown sugar (packed)
- 2 teaspoons pink curing salt #1 (Prague Powder)
- 1 tablespoon black pepper (coarsely ground)
- 4 cloves garlic (minced)
- Optional: maple syrup (2 tbsp), cayenne pepper (1 tsp for spicy)
Equipment Needed
- Digital scale
- Large resealable plastic bag (2-gallon) or glass container
- Refrigerator space
- Paper towels
Step-by-Step Instructions
Day 1: Mix and Apply Cure
- Rinse pork belly and pat completely dry
- In a bowl, mix together: kosher salt, brown sugar, pink curing salt, black pepper, and garlic
- Rub cure mixture all over pork belly—cover every surface generously
- Place pork belly in plastic bag or container
- Seal bag (squeeze out air) or cover container
- Place in refrigerator on a tray (in case it leaks)
Days 2-7: Flip Daily
- Once a day, flip the bag over
- You’ll see liquid pooling—this is good! Massage the bag to redistribute
- The pork belly will firm up and darken in color
Day 7: Rinse and Test
- Remove pork belly from bag
- Rinse thoroughly under cold water (get off all the cure)
- Pat dry with paper towels
- Test: Press the thickest part—it should feel firm like your flexed bicep muscle, not squishy
- If still soft, return to bag with a fresh sprinkle of kosher salt for 1-2 more days
Day 7+: Smoke or Cook
Option A: Smoke it (traditional bacon)
- Use your smoker at 200°F with apple or hickory wood
- Smoke until internal temperature reaches 150°F (2-3 hours)
- Let cool, then slice thin and fry as regular bacon
Option B: Roast it (no smoker needed)
- Place on wire rack over baking sheet
- Roast at 200°F until internal temp reaches 150°F (1-2 hours)
- Let cool, slice, fry
Storage:
- Refrigerate: Up to 2 weeks
- Freeze: Up to 3 months
Estimated Cost
- Pork belly (5 lbs at $4-6/lb): $20-30
- Ingredients (salt, sugar, spices): $8-12
- Total: $28-42 for 5 pounds of artisan bacon
Compare that to $8-12 per pound at the store!
Common Beginner Mistakes & How to Avoid Them
Learn from the mistakes I made so you don’t have to!
Mistake #1: Not Following Recipe Precisely
What happens: Too much or too little curing salt leads to unsafe or improperly preserved meat
Solution:
- Measure with a digital scale, not measuring cups/spoons
- Don’t substitute pink curing salt amounts
- Follow tested recipes from reliable sources
Mistake #2: Wrong Temperature
What happens: Too warm = bacteria growth and spoilage; too cold = curing stops working
Solution:
- Use a refrigerator thermometer ($5-10)
- Check temperature daily
- Keep between 36-40°F during curing
Mistake #3: Not Enough Salt Coverage (Dry Cure)
What happens: Exposed areas don’t cure properly and can spoil
Solution:
- Bury meat completely in salt—don’t be shy
- Check daily and reapply salt if any spots are exposed
- When in doubt, use more salt (you’ll rinse it off later)
Mistake #4: Skipping the Rinse Step
What happens: Meat is inedibly salty
Solution:
- Always rinse cured meat thoroughly
- Pat dry before proceeding to smoking or drying
- If still too salty after cooking, soak in water for 1-2 hours
Mistake #5: Eating Uncured Meat Thinking It’s Done
What happens: Food poisoning, potential serious illness
Solution:
- Wet-cured meat MUST be cooked before eating
- Dry-cured meat must lose 30-40% of weight before safe to eat raw
- When in doubt, cook it
Mistake #6: Using Iodized Table Salt
What happens: Off-flavors, bitter taste, potential health risks
Solution:
- Only use kosher salt, sea salt, or curing salt
- Check labels—avoid iodine and anti-caking agents
Troubleshooting Guide
Something went wrong? Here’s how to fix common problems.
Problem: Meat is too salty
✅ Solution:
- Soak cooked meat in water for 1-2 hours, changing water every 30 minutes
- Next time, cure for less time or rinse more thoroughly
- For dry cure, brush off more salt before the drying phase
Problem: Seeing green, black, or brown mold
✅ Solution:
- Throw out immediately—don’t take chances
- This indicates bad mold that can produce toxins
- Next time: ensure proper temperature, better airflow, cleaner environment
Problem: White mold appeared
✅ Solution:
- This is OK! White mold is protective and normal in dry curing
- If you don’t like the look, wipe it off with a cloth dipped in vinegar
- Don’t throw the meat away—white mold is good mold
Problem: Meat smells bad (sour, rotten, putrid)
✅ Solution:
- Trust your nose and discard it
- Bad smell = spoilage bacteria
- Next time: check temperature, ensure proper salt coverage, maintain cleanliness
Problem: Uneven curing (some parts soft, some firm)
✅ Solution:
- For dry cure: massage the meat more often, ensure even salt coverage
- For wet cure: turn meat more frequently, consider injection for even brine distribution
- Next time: use a more uniform cut of meat
Problem: Meat dried too fast on outside (case hardening)
✅ Solution:
- Too late to fix this batch—outside is sealed, inside won’t dry properly
- Next time: control humidity better (60-70% is ideal)
- Consider using a curing chamber for better environmental control
After Curing: Storage & Shelf Life
You’ve successfully cured meat—now what? Storage depends on the method used.
Wet-Cured Meat
Must be cooked before eating
Storage:
- Keep refrigerated at 36-40°F
- Use within 1-2 weeks
- Or freeze for up to 3 months
Examples: Corned beef, brined ham, bacon (before smoking)
Dry-Cured Meat (Properly Aged)
Can eat without cooking (if properly cured)
Storage:
- Wrap in cheesecloth or butcher paper
- Store in cool (50-60°F), dry place
- Or vacuum seal and refrigerate
- Shelf life: 3-12 months depending on dryness
Examples: Prosciutto, bresaola, coppa
Smoked Cured Meat
Usually ready to eat (depends on if you hot or cold smoked)
Storage:
- Refrigerate in airtight container
- Use within 2 weeks
- Or freeze for up to 6 months
Examples: Bacon, smoked ham, pastrami
Storage Best Practices
✅ Label everything with date cured and date to use by
✅ Check periodically for mold or off-smells
✅ When vacuum sealing, ensure meat is completely dry first
✅ Don’t store cured meat touching other foods (flavors transfer)
Smoking After Curing (Optional)
Many cured meats taste even better when smoked. Should you try it?
Why Smoke?
Flavor: Adds rich, smoky depth that complements cured meat beautifully
Additional Preservation: Smoke contains compounds that inhibit bacteria growth
Tradition: Many classic cured meats (bacon, ham, pastrami) are traditionally smoked
Hot Smoking vs. Cold Smoking
Hot Smoking (225-275°F):
- Cooks and smokes simultaneously
- Meat reaches safe internal temperature while absorbing smoke
- Takes 2-6 hours depending on size
- Examples: Bacon, ribs, ham
Cold Smoking (Below 90°F):
- Adds smoke flavor without cooking
- Meat stays raw but gets smoky taste
- Takes 12-24+ hours
- Requires special cold smoke generator
- Examples: Salmon, cheese, sausages
Beginner Recommendation: Start with hot smoking—it’s safer and easier.
Best Woods for Cured Meat
- Apple: Sweet, mild, perfect for pork and poultry
- Cherry: Fruity, slightly sweet, beautiful red color
- Hickory: Strong, bacon-like flavor, traditional for pork
- Maple: Sweet and mild, great for ham and bacon
Avoid: Softwoods like pine (toxic resins), treated lumber
Frequently Asked Questions
1. Is curing meat safe at home?
Yes, when done properly! Follow tested recipes exactly, maintain proper temperature, use curing salts as directed, and practice good hygiene. Thousands of people safely cure meat at home every day.
2. Do I need special equipment?
Minimal equipment needed: digital scale, non-reactive containers, refrigerator space, and thermometer. Total investment: $50-75. Advanced methods (dry-aging, salami) need more equipment.
3. How long does cured meat last?
Depends on method:
- Wet-cured (cooked): 1-2 weeks refrigerated
- Dry-cured (aged): 3-12 months
- Frozen: 3-6 months
4. Can I cure meat without nitrates/nitrites?
Technically yes, but… you’ll get shorter shelf life and higher risk of botulism. Some traditional recipes use only salt, but they require very specific conditions. For home curing, I recommend using pink curing salt for safety.
5. What’s the difference between pink salt and regular salt?
Pink curing salt (Prague Powder) contains sodium nitrite mixed with regular salt, dyed pink for safety. It prevents botulism and keeps meat pink. Himalayan pink salt is just mineral-rich regular salt—totally different!
6. Do I have to cook cured meat?
Depends:
- Wet-cured meat: YES, always cook
- Dry-cured meat (properly aged): No, safe to eat raw
- When in doubt: cook it for safety
7. Can I cure any cut of meat?
Most cuts work, but fattier is generally better. Fat keeps meat moist during curing and adds flavor. Lean cuts can become too dry and tough.
8. How much does it cost to cure meat at home?
First project: $50-75 for equipment and ingredients
Ongoing: Much cheaper than buying! Homemade bacon costs ~$5-6/lb vs. $8-12/lb for artisan bacon at stores
9. What if I see mold?
White mold: OK! Normal in dry curing, wipe with vinegar if desired
Green, black, or brown mold: Throw out immediately—dangerous
10. Can I cure meat in summer?
Yes, if you have climate control. Use refrigerator or air-conditioned space. Don’t try to cure at room temperature in summer—too warm for safety.
11. Is cured meat healthy?
In moderation, yes. Cured meat is high in sodium and contains nitrites (in small, regulated amounts). Enjoy as an occasional treat, not daily staple. Balance with fresh vegetables and whole foods.
12. Where do I find pink curing salt?
Online: Amazon, specialty curing supply websites
Local: Some butcher shops, specialty grocery stores
Search for: Prague Powder #1, Instacure #1, or pink curing salt
Conclusion
Five thousand years ago, someone figured out that covering meat in salt made it last through winter. That simple discovery has evolved into an incredible craft that produces some of the world’s most delicious foods.
Here’s what you need to remember:
✅ Start with wet curing (easiest, fastest, most forgiving)
✅ Safety is non-negotiable (proper temperature, follow recipes exactly)
✅ Measure precisely (especially curing salts—use a digital scale)
✅ When in doubt, throw it out (trust your nose and eyes)
✅ Be patient (good curing takes time—don’t rush)
The bacon project I shared will give you hands-on experience with the fundamentals. Once you’ve successfully made bacon, you’ll understand how curing works. From there, you can explore prosciutto, salami, bresaola, and dozens of other cured meats.
My final advice? Don’t be intimidated. Yes, there are safety rules to follow. Yes, it takes patience. But curing meat at home connects you to generations of people who practiced this ancient skill. There’s something deeply satisfying about slicing into a piece of meat you cured yourself.
So buy that pork belly. Mix up your cure. And in seven days, you’ll be eating the best bacon you’ve ever tasted—because you made it yourself.
Happy curing!