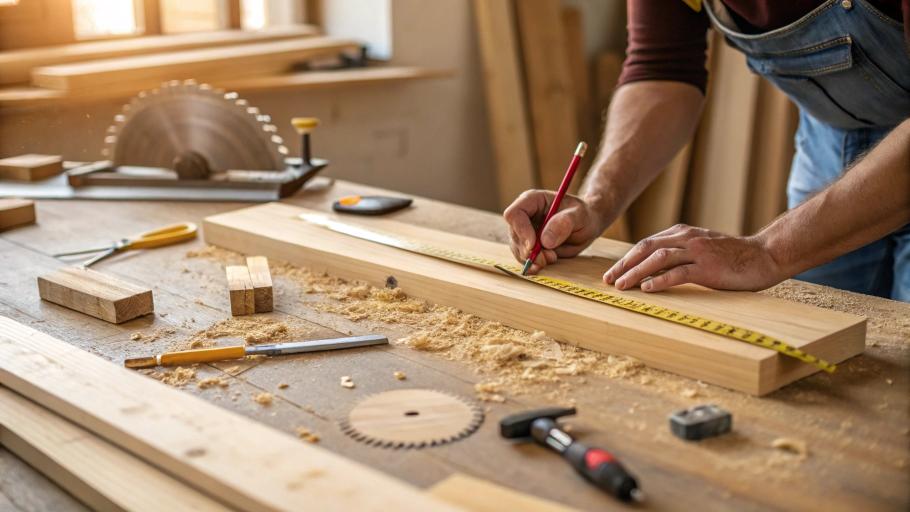
I’ll never forget my first woodworking project. I was 16 years old, and I wanted to build a simple bookshelf for my bedroom. Armed with nothing but excitement and a rusty hand saw from my dad’s garage, I dove right in. Three hours later, I had a wobbly, uneven disaster that looked more like modern art than furniture. The cuts were crooked, the boards didn’t line up, and one leg was an inch shorter than the others.
Was I discouraged? Maybe for a day. But you know what? That terrible bookshelf taught me more than any perfect project ever could. It showed me that woodworking isn’t about being perfect—it’s about learning, practicing, and getting a little better each time.
If you’ve ever wanted to build something with your own hands but felt intimidated by all the tools and techniques, you’re in the right place. This guide will teach you the 7 fundamental woodworking skills every beginner needs to know. You’ll learn what tools to buy (and what to skip), how to set up a simple workspace, and step-by-step instructions for basic techniques like cutting, drilling, and joining wood.
Why is this guide different? I’m not going to throw complicated jargon at you or assume you already know what a miter cut is. I’ll explain everything in plain English, share common mistakes to avoid, and give you three simple projects to practice your new skills.
Ready to build something amazing? Let’s get started.
- What Is Woodworking?
- Before You Start: Safety First
- Understanding Wood: Beginner’s Guide
- Setting Up Your Workspace
- Essential Woodworking Tools for Beginners
- Basic Woodworking Terminology
- The 7 Fundamental Skills Every Beginner Must Master
- SKILL #1: Measuring and Marking Accurately
- SKILL #2: Cutting Straight Lines
- SKILL #3: Making Angled Cuts (Miters)
- SKILL #4: Drilling Holes
- SKILL #5: Joining Wood
- SKILL #6: Sanding for Smooth Finish
- SKILL #7: Applying Finish
- Your First 3 Beginner Projects
- PROJECT #1: Simple Wooden Box
- PROJECT #2: Basic Shelf
- PROJECT #3: Simple Birdhouse
- Common Beginner Mistakes & How to Avoid Them
- Troubleshooting Guide
- Tool Care & Maintenance
- Next Steps: Growing Your Skills
- Frequently Asked Questions
- Conclusion
What Is Woodworking?
The Basics
Woodworking is simply the craft of making useful or beautiful things from wood. It can be as simple as building a birdhouse or as complex as crafting a handmade dining table. People have been working with wood for thousands of years—it’s one of the oldest human skills.
The best part? Anyone can learn woodworking. You don’t need to be super strong, have perfect eyesight, or own a huge workshop. You just need patience, willingness to learn, and a few basic tools.
Why Learn Woodworking?
Here’s why millions of people love woodworking:
1. Save Money: Why pay $200 for a shelf when you can build one for $30?
2. Create Custom Pieces: Build exactly what you want, in the exact size and style you need
3. Feel Proud: There’s something incredibly satisfying about building something with your own hands
4. Reduce Stress: Working with wood is calming and meditative
5. Learn a Valuable Skill: You’ll be able to fix and build things for the rest of your life
Woodworking vs. Carpentry: What’s the Difference?
People often confuse these two, but here’s the simple difference:
Woodworking focuses on creating furniture, boxes, cabinets, and decorative items. Think smaller projects with detailed craftsmanship.
Carpentry focuses on building structures like houses, decks, and framing. Think construction work and larger-scale projects.
This guide focuses on woodworking—building smaller projects at home.
Before You Start: Safety First
Let me be blunt: woodworking tools can hurt you if you don’t respect them. But with proper safety gear and smart habits, woodworking is actually quite safe. I’ve been woodworking for over 20 years and never had a serious injury—because I always follow these safety rules.
Essential Safety Gear
1. Safety Glasses (Non-Negotiable)
Every single time you work with wood, you must wear safety glasses. Wood chips and sawdust fly everywhere, and one piece in your eye can cause permanent damage. Buy impact-rated safety glasses, not just regular glasses. They cost $5-$15 and will last for years.
2. Ear Protection
Power tools are LOUD. Circular saws, routers, and sanders can reach 100+ decibels—loud enough to damage your hearing permanently. Wear foam earplugs (cheap) or earmuff-style hearing protection (more comfortable).
3. Dust Mask or Respirator
Wood dust isn’t just annoying—it’s harmful to your lungs. A simple dust mask ($1 each) is fine for quick projects. For regular woodworking, invest in a reusable respirator ($25-$40).
4. Work Gloves (Sometimes)
Wear gloves when handling rough lumber or moving large boards. NEVER wear gloves when using power saws—they can catch on the blade and pull your hand into danger.
Shop Safety Rules You Must Follow
✅ Keep your workspace clean. Sawdust and clutter cause accidents.
✅ Never remove safety guards from power tools. They’re there for a reason.
✅ Unplug tools before changing blades. This prevents accidental starts.
✅ No loose clothing or jewelry. Long sleeves, dangling necklaces, and rings can get caught in tools.
✅ Know where your fire extinguisher is. Wood dust is flammable.
✅ Don’t rush. Most accidents happen when people work too fast.
First Aid Basics
Keep a first aid kit in your workshop with:
- Bandages (various sizes)
- Antiseptic wipes
- Gauze pads
- Medical tape
- Tweezers (for splinters)
If you get seriously cut, apply pressure to stop bleeding and seek medical help immediately.
Understanding Wood: Beginner’s Guide
Not all wood is the same. Some types are easy to work with, while others are tough and expensive. Let’s break it down simply.
Types of Wood Explained Simply
SOFTWOODS (Pine, Cedar, Fir)
These come from evergreen trees (the ones with needles). Despite the name “softwood,” they’re not always soft—it’s just a botanical classification.
- Cost: $$ (Inexpensive)
- Easy to work with: YES—cuts easily, sands smoothly
- Best for: Practice projects, outdoor furniture, shelves, boxes
- Downsides: Dents and scratches easily, shows wear
Pine is the most common softwood for beginners. It’s cheap ($3-$6 per board at big box stores), readily available, and very forgiving.
HARDWOODS (Oak, Maple, Cherry, Walnut)
These come from deciduous trees (the ones that lose leaves in winter).
- Cost: (More expensive)
- Easy to work with: MEDIUM—denser, requires sharper tools
- Best for: Fine furniture, cutting boards, items that take abuse
- Downsides: Costs 3-5x more than pine, harder to cut
Save hardwoods for when you’ve mastered the basics. There’s no sense spending $50 on oak boards for your first project when you might mess it up.
Reading Wood Grain: Why It Matters
Wood grain shows the direction of the wood fibers. Always cut, sand, and plane WITH the grain (in the same direction as the lines), not against it. Going against the grain causes tear-out (splintering) and rough surfaces.
Think of it like petting a cat: stroke with the fur (smooth), not against it (scratchy).
Common Wood Dimensions
Here’s something confusing: a “2×4” board is NOT actually 2 inches by 4 inches.
When lumber is cut at the mill, it starts at those dimensions (called the nominal size). But after drying and planing, the actual size is smaller:
- 2×4 actual size: 1.5″ x 3.5″
- 2×6 actual size: 1.5″ x 5.5″
- 1×4 actual size: 0.75″ x 3.5″
This matters when you’re planning projects. If you need something exactly 4 inches wide, a 2×4 won’t work.
Where to Buy Wood
Big Box Stores (Home Depot, Lowe’s, Menards):
- Pros: Convenient, no minimum purchase, good for beginners
- Cons: Limited selection, lower quality (more warped boards)
- Best for: Pine, cedar, plywood, beginner projects
Lumberyard:
- Pros: Higher quality, more variety, better hardwoods
- Cons: Can be intimidating for beginners, may have minimum purchase
- Best for: Hardwoods, specialty projects
Salvaged Wood:
- Pros: Cheap or free, unique character
- Cons: May have nails, dirt, or damage
- Best for: Rustic projects, practice cutting
How Much Does Wood Cost?
Budget Guide (Prices as of 2025):
- Pine 2×4 (8 feet long): $4-$7
- Pine 1×6 (6 feet long): $8-$12
- Oak 1×6 (6 feet long): $25-$40
- Plywood sheet (4’x8′, 3/4″ thick): $40-$70
For your first few projects, budget $50-$100 for wood.
Setting Up Your Workspace
You don’t need a fancy workshop to start woodworking. Here’s the truth: I built my first 20 projects in a one-car garage with a folding table.
Space Requirements
Minimum space needed: 10′ x 10′ (a corner of your garage, basement, or shed)
What you need:
1. Good Lighting: Natural light is best, but bright LED shop lights ($30-$50) work great
2. Ventilation: Work near an open door or window. Wood dust needs to escape.
3. Sturdy Work Surface: Options include:
- Workbench ($100-$300 to buy, $50 to build yourself)
- Folding work table ($50-$80)
- Old solid door on sawhorses ($30 total)
4. Electrical Outlets: You’ll need power for drills, saws, and sanders. Use a heavy-duty extension cord if needed.
The Budget Workshop: What You Really Need
Don’t spend thousands of dollars before you know if you’ll love woodworking. Start with:
- Work surface: $30-$100
- Tool storage: Pegboard ($20) or old shelves
- Sawdust management: Shop vacuum ($40) or old broom
Total startup cost for workspace: $100-$200
Workshop Organization Tips
✅ Hang tools on pegboard so you can see what you have
✅ Label storage bins for screws, nails, and hardware
✅ Sweep after every project to prevent sawdust buildup
✅ Keep fire extinguisher visible and accessible
Essential Woodworking Tools for Beginners
This is where beginners get overwhelmed. Walk into any hardware store and you’ll see thousands of tools. Do you need them all? Absolutely not.
The Absolute Essentials (Start Here)
Here’s the honest truth: You can build amazing projects with just these tools.
MEASURING TOOLS
1. Tape Measure ($8-$15)
- Get a 25-foot tape measure
- Look for one with clear markings and a locking feature
- This will be your most-used tool
2. Speed Square or Combination Square ($10-$20)
- Makes marking straight, 90-degree cuts easy
- Also marks 45-degree angles
- A speed square is cheaper and more durable
3. Carpenter’s Pencil ($2 for a pack)
- Flat shape won’t roll away
- Makes visible marks on wood
- Always keep 2-3 sharp pencils handy
CUTTING TOOLS
Start with ONE of these:
Option A: Hand Saw ($12-$25)
- No electricity needed
- Quiet
- Great for small projects
- Downside: Slower, requires more effort
Option B: Circular Saw ($50-$100)
- Cuts quickly and efficiently
- Portable
- Can cut large boards
- Downside: Requires electricity, louder
My recommendation: Start with a circular saw if you can afford it. It’ll save you hours of time and frustration.
Optional (but very helpful): Miter Saw ($100-$250)
- Makes perfectly angled cuts
- Great for picture frames and trim
- Not essential for your first projects
FASTENING TOOLS
1. Hammer ($15-$25)
- Get a 16-ounce claw hammer
- Used for nails and light demolition
- The “claw” on the back pulls nails out
2. Cordless Drill/Driver ($50-$120)
- This is your most important power tool
- Drills holes AND drives screws
- Get one with at least 18-20 volt battery
- Buy a combo set with drill bits and driver bits
3. Screwdriver Set ($15-$30)
- Even with a drill, you’ll sometimes need a manual screwdriver
- Get both Phillips head and flathead
HOLDING TOOLS
4. Clamps ($30-$60 for 4-6 clamps)
- Hold wood pieces together while glue dries
- Keep boards steady while cutting
- You’ll need at least 4 clamps in various sizes
- Get bar clamps (6-12 inches) for small projects, plus 2 larger clamps (24+ inches)
SMOOTHING TOOLS
1. Sandpaper Assortment ($15-$25)
- Buy variety packs with different grits
- You’ll need: 80 grit (coarse), 120 grit (medium), 220 grit (fine)
- Also get a rubber sanding block ($5)
Budget Breakdown: Essential Tools Cost
| Tool Category | Cost |
|---|---|
| Measuring tools | $20-$35 |
| Hand saw OR circular saw | $12-$100 |
| Hammer | $15-$25 |
| Cordless drill/driver | $50-$120 |
| Screwdriver set | $15-$30 |
| Clamps (4-6) | $30-$60 |
| Sandpaper & block | $20 |
| Safety gear (glasses, mask, ear protection) | $20-$40 |
| TOTAL | $182-$430 |
Realistic beginner budget: $200-$350
Nice-to-Have Tools (Add Later)
Once you’ve mastered the basics and completed a few projects, consider adding:
- Power sander ($40-$80) — Makes sanding 10x faster
- Router ($80-$150) — Creates decorative edges and grooves
- Table saw ($200-$800) — Most versatile power tool for serious woodworkers
- Jigsaw ($50-$100) — Cuts curves and intricate shapes
Don’t buy these until you’re sure you’ll use them regularly.
Tool Buying Tips
✅ Buy used hand tools (hammers, clamps, squares) — they last forever
✅ Buy new power tools — you want the warranty and safety features
✅ Check Facebook Marketplace, Craigslist, garage sales for deals
✅ Wait for holiday sales (Black Friday, Father’s Day) for big discounts
Basic Woodworking Terminology
Before we jump into techniques, let’s learn the basic vocabulary. This will help you understand project plans and tutorials.
Terms You Need to Know
Parts of a Board:
- Face: The wide, flat surfaces (top and bottom)
- Edge: The narrow sides running the length
- End: The very ends of the board (where you see growth rings)
Cutting Terms:
- Crosscut: Cutting across the grain (makes boards shorter)
- Rip cut: Cutting along the grain (makes boards narrower)
- Miter: An angled cut (usually 45 degrees)
- Bevel: A cut at an angle through the thickness of the board
Other Important Terms:
- Grain: The direction wood fibers run
- Kerf: The width of the cut a saw blade makes
- Pilot hole: A small hole drilled before inserting a screw (prevents splitting)
- Countersink: Making a cone-shaped recess so screw heads sit flush
- Square: A perfect 90-degree angle
Don’t worry about memorizing these all at once. You’ll learn them naturally as you work.
The 7 Fundamental Skills Every Beginner Must Master
Here’s where the real learning begins. Master these 7 skills and you can build almost anything.
SKILL #1: Measuring and Marking Accurately
“Measure twice, cut once.” You’ve heard this saying, right? It exists because countless woodworkers have ruined projects by measuring carelessly.
Why Accuracy Matters
If your measurements are off by even 1/8 inch, your project won’t fit together properly. Gaps will show, corners won’t be square, and the whole thing will look amateur.
How to Use a Tape Measure
1. Understand the Markings:
- The longest lines are inches
- The second-longest lines are 1/2 inches
- Medium lines are 1/4 inches
- Smallest lines are 1/8 inches (some tape measures show 1/16″)
2. Use the Hook Correctly: The metal piece at the end of your tape measure is slightly loose—this is intentional! It compensates for whether you’re measuring from the inside or outside of an object.
3. Mark Consistently:
- Use a sharp pencil
- Make a small “V” mark pointing to the exact measurement
- Put an “X” on the waste side (the part you’ll cut off)
How to Use a Square
A square helps you mark perfect 90-degree cuts.
Technique:
- Place the square’s short edge against the board’s edge
- Hold it firmly in place
- Draw a line along the long edge
- This line will be perfectly perpendicular to the edge
Pro tip: Always check that your cuts are square by holding the square against the finished edge.
SKILL #2: Cutting Straight Lines
Crooked cuts ruin projects. But with proper technique, anyone can cut straight.
Hand Saw Technique
1. Starting the Cut:
- Place the saw blade on the waste side of your line
- Use your thumb to guide the blade
- Make a few gentle backward strokes to create a small groove
2. Making the Cut:
- Use long, smooth strokes
- Let the saw’s weight do the work—don’t push down hard
- Keep your eye on the line, not the blade
- Slow down as you near the end
3. Finishing Without Splintering:
- Support the waste piece with your free hand as you finish
- This prevents the wood from breaking off roughly
Circular Saw Basics
Circular saws cut much faster but require respect and practice.
Safety First:
- Always wear safety glasses and ear protection
- Keep both hands on the saw
- Never reach under the board while the blade is spinning
Setting Up the Cut:
- Clamp a straight piece of wood to act as a cutting guide
- Set blade depth so it extends about 1/4″ below the board
- Line up the blade with your cut line
Making the Cut:
- Start the saw BEFORE it touches the wood
- Let the blade reach full speed
- Push steadily forward, following your guide
- Don’t force it—let the saw do the work
SKILL #3: Making Angled Cuts (Miters)
Miter cuts create attractive corner joints for picture frames, trim, and boxes.
What Are Miter Cuts?
A miter cut is simply a cut at an angle across the board’s width. The most common angle is 45 degrees—two 45-degree cuts fit together to make a perfect 90-degree corner.
Using a Miter Saw
1. Setting the Angle:
- Loosen the angle lock
- Swing the saw head to 45 degrees
- Tighten the lock
2. Making the Cut:
- Place the board flat against the fence
- Mark where you want to cut
- Hold the board firmly (or clamp it)
- Pull the saw down smoothly
- Let the blade stop completely before lifting
Hand Miter Box Alternative
Don’t have a miter saw? A miter box ($15-$25) holds a hand saw at preset angles. It’s slower but works perfectly for small projects.
SKILL #4: Drilling Holes
Seems simple, right? But there’s a right way and a wrong way to drill.
Choosing the Right Drill Bit
- Twist bits: General purpose, for holes up to 1/2″
- Spade bits: Larger holes (5/8″ to 1.5″), less precise
- Forstner bits: Flat-bottom holes, very precise (expensive)
For beginners, a set of twist bits ($10-$20) handles 90% of projects.
Drilling Technique
1. Mark the Spot:
- Use a sharp pencil to mark the center
- Make a small indentation with a nail or center punch (keeps the bit from wandering)
2. Drill Straight:
- Hold the drill at a 90-degree angle to the surface
- Start slowly to ensure the bit goes where you want
- Apply steady pressure—don’t force it
3. Prevent Blowout: When drilling all the way through, the exit side often splinters (called “blowout”). Solutions:
- Place scrap wood underneath
- OR drill until the bit just starts to poke through, then flip the board and finish from the other side
The Pilot Hole Rule
Always drill pilot holes before driving screws near the edge of a board. The pilot hole should be slightly smaller than the screw’s shaft (not including threads). This prevents splitting.
SKILL #5: Joining Wood
Connecting two pieces of wood is the essence of woodworking. Here are the easiest joints for beginners.
Basic Wood Joints for Beginners
1. Butt Joint (Easiest)
Two pieces of wood simply meet at a 90-degree angle. Connect with screws, nails, or glue.
- Strength: Weak (needs reinforcement)
- Difficulty: Very easy
- Best for: Quick projects, areas that won’t bear weight
2. Pocket Hole Joint (Best for Beginners)
You drill a hole at an angle through one board, then drive a special screw into the second board.
- Strength: Strong
- Difficulty: Easy (with a pocket hole jig, $40-$80)
- Best for: Furniture, cabinets, face frames
3. Miter Joint (Most Attractive)
Two pieces cut at 45-degree angles fit together to create a corner with no end grain showing.
- Strength: Weak (needs reinforcement)
- Difficulty: Medium (requires precise cuts)
- Best for: Picture frames, decorative boxes
Gluing Basics
Wood glue creates incredibly strong bonds—stronger than the wood itself when done right.
How to Glue Properly:
- Apply glue to both surfaces in a thin, even layer
- Press pieces together firmly
- Use clamps to hold them in place
- Wipe away squeeze-out with a damp cloth before it dries
- Wait 30 minutes minimum before removing clamps (24 hours for full strength)
Pro tip: Wood glue only works on bare wood. It won’t stick to paint, stain, or finish.
SKILL #6: Sanding for Smooth Finish
Sanding is tedious but absolutely necessary. Skipping this step is like cooking a gourmet meal and serving it on a dirty plate.
Grit Progression Explained
Sandpaper grit numbers tell you how coarse or fine the paper is:
- Lower numbers (40-80 grit): Coarse—removes material quickly, leaves scratches
- Medium numbers (100-150 grit): Medium—smooths surface, removes coarse scratches
- Higher numbers (180-320 grit): Fine—prepares for finish, creates smooth surface
The Rule: Always progress through grits. Don’t jump from 80 to 220.
Typical progression: 80 → 120 → 220
Hand Sanding Technique
1. Always Sand WITH the Grain Sanding across the grain creates scratches that show through finish.
2. Use a Sanding Block Wrap sandpaper around a block (or buy a rubber sanding block). This creates a flat surface and prevents uneven sanding.
3. Check Your Progress Run your hand across the wood—your fingers will detect bumps your eyes miss.
4. Remove Dust Between Grits Use a brush or vacuum to remove sanding dust before switching to finer grit.
SKILL #7: Applying Finish
A finish protects your wood and makes it beautiful. There are dozens of finishing products, but beginners should start with these three.
Types of Finish for Beginners
1. Wood Stain
- What it does: Adds color while letting wood grain show through
- Best for: Projects where you want to darken or change wood color
- Application: Brush or wipe on, let soak 5-15 minutes, wipe off excess
- Downside: Won’t protect wood by itself (needs clear coat on top)
2. Polyurethane (Clear Coat)
- What it does: Creates a protective, waterproof layer
- Best for: Tabletops, cutting boards, anything that gets used
- Application: Brush on thin coats, sand lightly between coats
- Types: Water-based (easy cleanup, less durable) or oil-based (stronger, takes longer to dry)
3. Paste Wax or Oil Finish
- What it does: Enhances natural wood beauty, easy to apply
- Best for: Decorative pieces, butcher blocks, wood that won’t get heavy use
- Application: Rub on with cloth, let sit, buff with clean cloth
- Downside: Not as protective as polyurethane
Application Tips
✅ Always test on scrap wood first — See how the finish looks before committing
✅ Apply thin coats — Multiple thin coats are better than one thick coat
✅ Sand between coats — Use 320-grit sandpaper for a glass-smooth finish
✅ Work in a well-ventilated area — Finish fumes can be strong
✅ Be patient — Let each coat dry fully before applying the next
Your First 3 Beginner Projects
You’ve learned the skills—now let’s put them to use! These projects build on each other, teaching new skills with each one.
PROJECT #1: Simple Wooden Box
Skills Practiced: Measuring, cutting, gluing, clamping, sanding, finishing
Tools Needed:
- Saw
- Square
- Clamps
- Wood glue
- Sandpaper
Materials:
- 1×6 pine board (6 feet long) — about $10
Estimated Time: 2-3 hours (plus glue drying time)
What You’ll Build: A 6″ x 8″ x 4″ box perfect for storing small items
This project teaches you how to measure accurately, cut square corners, and glue pieces together. Don’t worry about making it perfect—just focus on getting the techniques right.
PROJECT #2: Basic Shelf
Skills Practiced: Measuring, drilling, using screws, leveling
Tools Needed:
- Saw
- Drill with bits
- Level
- Screwdriver
Materials:
- 1×8 pine board (cut to desired length)
- 2 shelf brackets — $5-$10
- Wood screws
Estimated Time: 2-4 hours
What You’ll Build: A wall-mounted shelf for books, plants, or décor
This project introduces you to working with hardware (brackets) and teaches you how to drill pilot holes properly.
PROJECT #3: Simple Birdhouse
Skills Practiced: All 7 fundamental skills combined
Tools Needed: All essential tools listed earlier
Materials:
- 1×6 cedar board (6 feet long) — about $15
- 1.5″ exterior screws
- Small hinge for cleaning door (optional)
Estimated Time: 4-6 hours
What You’ll Build: A functional birdhouse that will attract birds to your yard
This project combines everything you’ve learned. You’ll make straight cuts, angled cuts (for the roof), drill an entrance hole, assemble with screws, and apply outdoor finish.
Common Beginner Mistakes & How to Avoid Them
Learn from others’ mistakes so you don’t have to make them yourself!
Mistake #1: Not Measuring Accurately
What happens: Pieces don’t fit together, gaps everywhere, crooked corners
Solution:
- Use a sharp pencil
- Mark with a “V” pointing to the exact measurement
- Double-check before cutting
- Measure twice, cut once!
Mistake #2: Cutting Too Fast
What happens: Crooked cuts, rough edges, dangerous situations
Solution:
- Slow down—you’re not in a race
- Let the saw do the work, don’t force it
- Focus on accuracy, not speed
Mistake #3: Not Using Pilot Holes
What happens: Wood splits when you drive screws, especially near edges
Solution:
- Always drill pilot holes before screwing near edges
- Pilot hole should be slightly smaller than screw shaft
- Takes an extra 30 seconds, saves the whole project
Mistake #4: Skipping Grits When Sanding
What happens: Surface feels rough, finish looks blotchy
Solution:
- Don’t jump from 80 grit to 220 grit
- Use progression: 80 → 120 → 220
- Yes, it takes longer, but the result is worth it
Mistake #5: Using Dull Tools
What happens: Cuts are rough, you have to force the tool, dangerous situations
Solution:
- Keep saw blades sharp
- Replace circular saw blades when they get dull ($10-$20)
- Sharpen or replace hand saw when it stops cutting smoothly
Mistake #6: Not Using Enough Clamps
What happens: Wood pieces slip while gluing, joints aren’t tight
Solution:
- Use at least 2 clamps per joint
- “You can never have too many clamps” — every woodworker ever
- Check that pieces are square before glue dries
Troubleshooting Guide
Something went wrong? Here’s how to fix common problems.
Problem: Wood splits when I drive screws
✅ Solution: Drill pilot holes first, use smaller screws, or move screw further from edge
Problem: My cuts aren’t straight
✅ Solution: Use a cutting guide (clamp a straight board to follow), go slower, check blade alignment
Problem: Glue joints are weak or pieces come apart
✅ Solution: Use more glue, clamp for at least 30 minutes, make sure surfaces are clean and bare wood
Problem: Finish looks blotchy or uneven
✅ Solution: Sand more thoroughly, use pre-stain wood conditioner (for pine), apply thinner coats
Problem: Board is warped or bowed
✅ Solution: Choose straighter boards at the store (sight down the edge), store wood flat
Tool Care & Maintenance
Good tools last decades if you care for them properly.
Keeping Tools Sharp
Saw Blades:
- Circular saw blades: Replace when cuts become rough (every 1-2 years for hobbyists)
- Hand saws: Replace hardpoint saws, or learn to sharpen traditional saws
Chisels and Plane Blades:
- Learn basic sharpening on a whetstone or sandpaper
- Many hardware stores offer sharpening services
Cleaning Tools
- Remove sawdust and wood resin after each use
- Wipe metal surfaces with a cloth to prevent rust
- Clean circular saw blades with oven cleaner (removes pitch buildup)
Proper Storage
- Keep tools in a dry area (moisture causes rust)
- Hang tools on pegboard or store in toolbox
- Apply a light coat of oil to metal surfaces if storing long-term
- Keep sharp tools covered or in protective cases
Next Steps: Growing Your Skills
Skill Development Roadmap
BEGINNER (0-6 months):
- Master the 7 fundamental skills
- Complete 3-5 simple projects
- Learn to use essential tools safely
- Build confidence
INTERMEDIATE (6-18 months):
- Learn advanced joinery (dowels, biscuits, dado joints)
- Add power tools (router, table saw, power sander)
- Build furniture (bookshelf, table, chairs)
- Experiment with different wood species
ADVANCED (18+ months):
- Fine furniture making
- Hand-cut dovetails
- Wood carving or turning
- Custom cabinetry
- Design your own projects from scratch
Learning Resources
YouTube Channels (Free!):
- Steve Ramsey (Woodworking for Mere Mortals) — Best beginner channel
- The Wood Whisperer — Excellent tutorials
- April Wilkerson — Great for tool reviews and projects
Local Options:
- Community colleges often offer woodworking classes
- Woodworking clubs (search “[your city] woodworking club”)
- Maker spaces with shared workshops
Books:
- “The Complete Manual of Woodworking” by Albert Jackson
- “The Essential Woodworker” by Robert Wearing
Expanding Your Tool Collection
After mastering basics, consider adding (in this order):
- Random orbit sander ($50-$80) — Saves hours of hand sanding
- Kreg pocket hole jig ($40-$80) — Makes strong joints easy
- Router ($80-$150) — Creates decorative edges and joinery
- Table saw ($200-$800) — Most versatile power tool
- Miter saw ($100-$250) — Perfect angled cuts
Don’t rush to buy tools. Add them as projects demand them.
Frequently Asked Questions
1. How much does it cost to start woodworking?
Budget Option: $150-$250 (essential hand tools, basic safety gear, wood for 2-3 projects)
Recommended Start: $300-$500 (includes cordless drill, circular saw, quality hand tools, safety gear)
Comfortable Start: $600-$800 (adds miter saw, better clamps, wider tool selection)
2. Can I teach myself woodworking?
Yes! Millions of people have learned through YouTube, books, and trial-and-error. However, taking even one beginner class will accelerate your learning and help you avoid bad habits.
3. What’s the easiest wood for beginners?
Pine is perfect for beginners. It’s inexpensive ($3-$7 per board), cuts easily, and is widely available. Poplar is also good—slightly harder than pine, takes paint beautifully.
4. Do I need a big workshop?
No! A 10’x10′ space (corner of garage, basement, or shed) is plenty. Some people work on apartment balconies or with a folding workbench.
5. What’s the first tool I should buy?
Tape measure and pencil (for planning), followed by either a cordless drill (most versatile) or hand saw (if working without power). Safety glasses are mandatory from day one.
6. How long does it take to learn basic skills?
With regular practice (2-4 hours per week), most people feel comfortable with fundamental skills in 3-6 months. You’ll keep improving for years, but you can build useful projects within your first month.
7. Is woodworking dangerous?
It can be, but proper safety practices make it quite safe. Always wear safety gear, respect power tools, and never rush. Most injuries happen from carelessness, not from the activity itself.
8. What’s the best first project?
A simple box or shelf. These teach fundamental skills without being overwhelming. Avoid complicated furniture or projects with intricate joinery for your first few attempts.
9. Should I buy new or used tools?
Hand tools (hammers, squares, clamps): Used is fine—they last forever
Power tools: New is safer—you get warranty and modern safety features
Compromise: Buy refurbished power tools from reputable retailers
10. How do I know if wood is good quality?
Look for:
- Straight boards (sight down the edge)
- Few knots (especially not near where you’ll cut)
- No cracks or splits
- Consistent color
- Not warped, twisted, or cupped
11. Do I need expensive wood to make nice projects?
No! Pine furniture can be beautiful with proper craftsmanship and finishing. Master techniques with cheap wood first, then upgrade to hardwoods for special projects.
12. Can kids do woodworking?
Yes, with proper supervision! Kids as young as 8-10 can learn basic skills using hand tools. Wait until teenage years for power tools, and always supervise.
Conclusion
Remember that wobbly bookshelf I built when I was 16? I still have it. Not because it’s beautiful (it’s not), but because it reminds me that everyone starts somewhere.
Here’s what you need to remember:
✅ Master the 7 fundamental skills: Measuring, cutting straight, cutting angles, drilling, joining, sanding, and finishing
✅ Start with essential tools ($200-$350 budget)
✅ Practice on simple projects first (box, shelf, birdhouse)
✅ Safety always comes first (glasses, hearing protection, dust mask)
✅ Be patient with yourself — Every mistake is a lesson
The secret to woodworking success? It’s not talent, expensive tools, or a big workshop. It’s simply taking the time to learn proper techniques and practicing them over and over.
Your first project might be imperfect. That’s okay! Your tenth project will be better. Your hundredth project might be something you’re truly proud of.
Start small. Start today. Just start.
Pick one project from this guide. Buy the materials this weekend. Set aside a few hours next week. Build something with your own two hands.
You’ll be amazed at what you’re capable of.