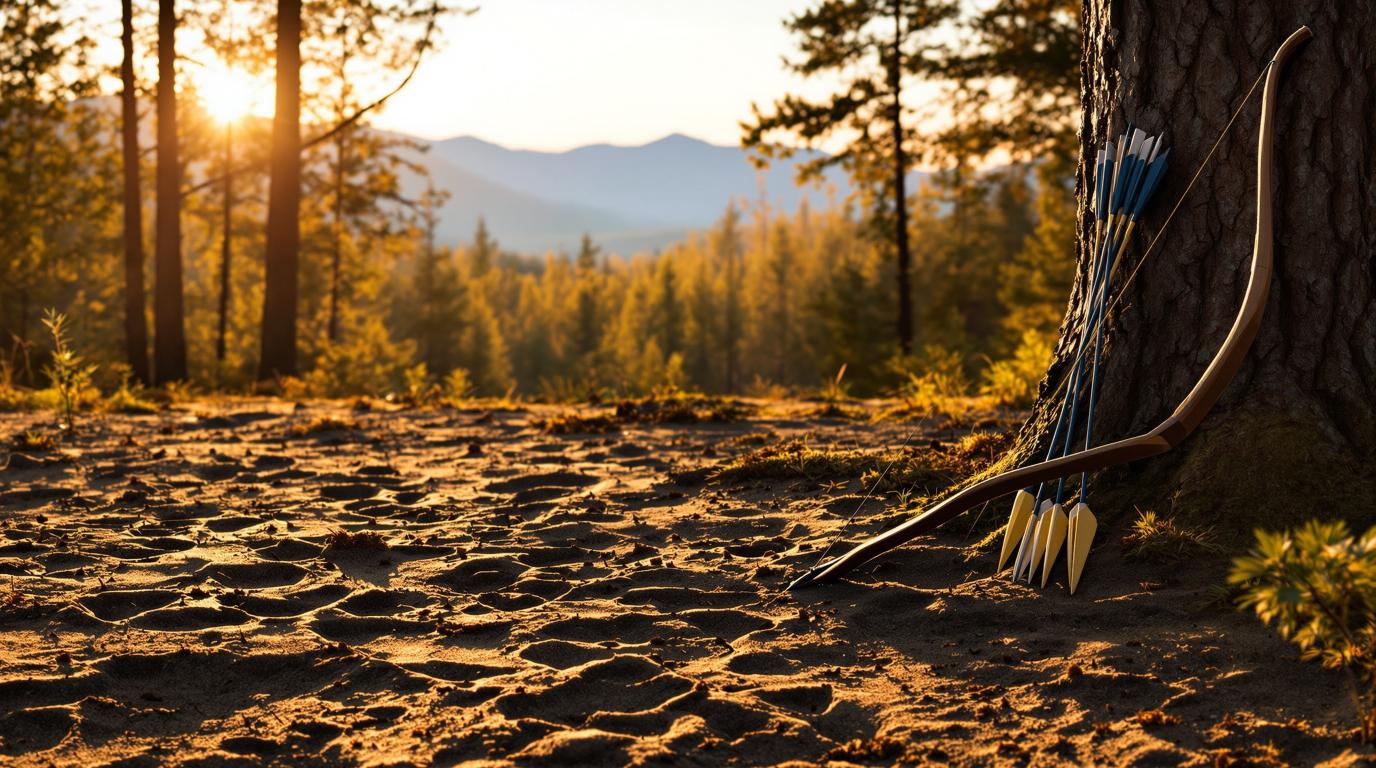
Picture this: Your great-great-grandfather steps into the forest at dawn. No rifle over his shoulder. No scope or rangefinder. Just a handmade bow, a quiver of arrows he carved himself, and knowledge passed down through generations. He reads the land like you read a book. Every broken twig, every track in the mud, every shift in the wind tells him a story.
That hunter fed his family not because he had better technology, but because he had better skills. He knew how to move without sound, how to think like his prey, how to become part of the forest instead of an intruder. Those skills didn’t disappear when modern hunting gear arrived. They just got forgotten by most of us.
But here’s the thing: learning traditional hunting techniques makes you a better hunter today, even if you own the fanciest rifle in the gun safe. Why? Because traditional methods teach you patience, observation, and a deeper connection to what hunting really is. They’re backup skills if your equipment fails. They’re a challenge that tests you in ways no modern hunt can. And they’re a way to honor the hunters who came before us.
In this guide, we’re going to explore the traditional hunting techniques that worked for thousands of years. You’ll learn how to make your own hunting tools, how to track animals like your ancestors did, and how different cultures around the world solved the challenge of bringing home meat. We’ll cover what’s legal today, how to actually practice these skills, and how to show proper respect for the indigenous knowledge we’re learning from.
Whether you want to try a primitive bow season, challenge yourself with ancient skills, or just understand how your ancestors hunted, this guide will show you the way. Let’s step back in time and discover what real hunting looks like.
- Understanding Traditional Hunting
- Traditional Hunting Tools
- Tracking and Reading Sign
- Individual Hunting Techniques
- Communal Hunting Strategies
- Regional Technique Variations
- After the Kill: Processing and Preservation
- Cultural and Spiritual Dimensions
- Modern Application and Legality
- Learning Path: Your Journey to Traditional Hunting Skills
- Common Mistakes and Troubleshooting
- Honor the Knowledge, Respect the Animals
- Frequently Asked Questions
Understanding Traditional Hunting
Before we dive into specific techniques, let’s talk about what makes hunting “traditional” and why these old methods still matter today.
What Makes Hunting “Traditional”?
Traditional hunting means using time-tested methods that existed before modern firearms and technology took over. We’re talking about techniques that were refined over thousands of years—methods that worked so well they kept entire communities fed.
Traditional hunting includes:
- Hand-crafted weapons and tools (bows, spears, stone knives)
- Silent movement and stalking skills
- Deep knowledge of animal behavior and patterns
- Understanding seasonal changes and migration routes
- Reading tracks, scat, and other signs
- Respecting the animal and using every part of the kill
Traditional hunting isn’t about struggling with inferior tools. It’s about mastering skills that make the tools almost secondary. A skilled traditional hunter with a simple bow is more effective than an unskilled hunter with the latest compound bow and all the gadgets.
Why Should You Learn Traditional Techniques Today?
You might be wondering: “Why bother learning old methods when I have modern gear?” Great question. Here are the real reasons:
You become a more complete hunter. Modern gear can make you lazy. You rely on scent blockers instead of learning wind patterns. You use rangefinders instead of judging distance by eye. Traditional techniques force you to develop real skills that make you better at everything.
You gain backup knowledge. What happens if your rifle scope breaks in the field? What if you run out of ammunition in a survival situation? Traditional skills are insurance—knowledge that never runs out of batteries or breaks down.
You connect more deeply to hunting. There’s something profound about killing game the same way your ancestors did 500 years ago. The meat tastes different when you’ve earned it through pure skill instead of technology.
You honor cultural heritage. These techniques represent thousands of years of human knowledge. Learning them preserves something valuable that’s disappearing from our culture.
You challenge yourself in new ways. If modern hunting is getting too easy or predictable, traditional methods will humble you fast. They’re hard. That’s what makes success so satisfying.
The Philosophy Behind Traditional Hunting
Traditional hunting isn’t just about different tools. It’s about a different mindset entirely.
Patience over speed. Modern hunters want quick kills. Traditional hunters understand that hunting is 90% waiting and 10% action. You might shadow a deer for days before getting your shot. That’s normal.
Observation over technology. Instead of checking your phone’s weather app, you watch how trees bend in the wind. Instead of using trail cameras, you study tracks and scat to know what’s moving through. Your senses replace your gadgets.
Respect for the animal. Traditional hunters knew that animals weren’t just targets—they were giving their lives to feed you. That demanded respect. You thanked the animal. You used every part. You never wasted.
Connection to place. You can’t traditional hunt effectively in strange territory. You need to know your hunting ground intimately—every ridge, every spring, every trail. This takes years.
Community and sharing. Big game hunts were often group efforts. The harvest was shared. Teaching young hunters was essential. Traditional hunting was never just about one person.
Traditional Hunting Tools
Let’s talk about the weapons your ancestors used. These aren’t museum pieces—people still hunt successfully with these tools today. Even better, you can make most of them yourself with basic materials and patience.
The Bow and Arrow
The bow and arrow might be humanity’s most important hunting invention. It’s been around for at least 10,000 years, and it’s still one of the most effective hunting tools ever created.
Why bows worked so well:
- Silent (doesn’t spook nearby game)
- Can be carried with multiple arrows ready
- Accurate at 20-50 yards in skilled hands
- Can be crafted from materials found in nature
- Repairable in the field
Making a Traditional Bow
You can make a hunting bow from a single piece of wood. Here’s how:
Step 1: Choose Your Wood
The best bow woods are:
- Osage orange (the absolute best—tough, flexible, powerful)
- Yew (traditional European choice)
- Hickory (strong and available)
- Ash (good for beginners)
- Elm (flexible and forgiving)
Find a straight piece about 6 feet long and 2 inches in diameter. Look for wood with straight grain—no twists, knots, or branches. Cut it in winter when the sap is down.
Step 2: Season the Wood
Let your wood dry for 3-6 months in a cool, dry place. Don’t rush this. Wet wood makes weak bows that break.
Step 3: Shape the Bow
Mark the center of your stave—this is your handle. Leave this section thick and round. Using a drawknife or hatchet, taper both limbs gradually from the handle toward the tips. The goal is to create a bow that bends evenly on both sides.
Step 4: Tillering
This is the critical part. Tillering means testing the bend and removing wood from stiff spots. Hang your bow horizontally with a string loosely attached. Pull the string and watch how the limbs bend. Remove wood from areas that aren’t bending enough. Do this slowly—you can always remove more wood, but you can’t add it back.
Keep tillering until both limbs bend in smooth, even curves. Test by pulling the string to your draw length. If it holds without breaking, you’ve got a bow.
Step 5: String It
Make a string from strong cord, braided plant fiber, or sinew. Attach loops at both ends using timber hitches. Your bow should have a gentle curve when strung—don’t force it into a tight bend or it will break.
Pro tip: Rub your finished bow with animal fat or beeswax. This protects the wood and makes it last longer.
Making Arrows
Arrows are just as important as the bow. Here’s how to make ones that fly straight:
Step 1: Find Straight Shafts
Look for:
- Straight cedar shoots
- River cane (in southern regions)
- Young pine shoots
- Store-bought dowels (if you’re starting out)
You need shafts about 28-32 inches long and 3/8 inch diameter. Cut them in fall or winter.
Step 2: Straighten the Shafts
No natural wood is perfectly straight. Heat the shaft over coals (not flame) until warm. Gently bend the crooked parts straight. Hold until cool. Repeat until the shaft is straight when you roll it on a flat surface.
Step 3: Add the Nock
Cut a notch in the back end of the arrow for the bowstring. Make it just deep enough to hold the string firmly without splitting the shaft. Some traditional archers burn this notch in with a hot wire—it’s smoother and less likely to crack.
Step 4: Fletch the Arrow
Fletching is the feathers that make arrows fly straight. You need three feathers per arrow. Turkey, goose, or hawk feathers work best.
Split each feather down the center. Trim to about 4-5 inches long. Attach three feathers evenly spaced around the shaft, about 2 inches from the nock. Bind them with thin cord or sinew, then seal with pine pitch or glue.
Step 5: Add the Point
Traditional options:
- Stone points: Flaked from flint, obsidian, or chert (we’ll cover this later)
- Bone points: Carved from leg bones of large animals
- Fire-hardened wood: The simplest option—just sharpen the tip and harden it in fire
- Metal points: Trade items or salvaged metal (historically used once available)
Attach points by splitting the shaft slightly, inserting the point, and binding tightly with wet sinew. As the sinew dries, it shrinks and holds like iron.
Test your arrows: They should fly straight when shot. If they wobble in flight, check the fletching and straightness.
The Spear and Atlatl
The spear is older than the bow—probably the first hunting weapon humans ever made beyond thrown rocks.
Hand Spears
Making a hunting spear:
Find a straight sapling about 6-8 feet long and 1.5 inches thick. Popular woods include ash, hickory, or oak. Remove all branches and bark. Let it dry for a few weeks.
Sharpen one end to a point. Fire-harden this point by slowly rotating it over coals until darkened and hard. This makes the tip incredibly tough.
For larger game, attach a stone or metal point. Split the shaft end slightly, insert the point, and bind tightly with sinew or strong cord.
Using a spear effectively:
Spears work best on:
- Wild boar (where legal—some states allow spear hunting for hogs)
- Large fish (spearfishing is widely legal)
- Self-defense against dangerous game
You need to get close—within 10-15 feet for an effective throw, or right up to the animal if you’re using it like a pike. This takes courage and skill.
The Atlatl
An atlatl is a throwing stick that acts like an extension of your arm. It gives you incredible power and range with a spear.
How it works: The atlatl is a stick about 2 feet long with a hook or socket at one end. You place the butt of your spear against this hook. When you throw, the atlatl adds leverage, essentially giving you a longer arm. This lets you throw spears farther and harder than humanly possible otherwise.
Making an atlatl:
Find a flat piece of wood about 2 feet long, 2 inches wide, and 1/2 inch thick. Carve a hook at one end that will catch the spear butt. Add a finger loop or handle grip for control.
Make atlatl darts (shorter, lighter spears) about 5-6 feet long. These need to be flexible and perfectly balanced.
Practice is essential. Throwing an atlatl accurately takes hundreds of practice throws. Start at close targets and work your way back.
Snares and Traps
Snares and traps let you hunt even when you’re not there. Your ancestors used these constantly for small game.
Legal warning: Many states heavily restrict or completely ban snares and traps. Always check your local regulations before using these. Some states only allow them during licensed trapping seasons.
Deadfall Traps
A deadfall uses a heavy object (log or rock) to crush the animal when it takes the bait.
The Figure-4 Trigger:
This is the classic trigger mechanism. You need three sticks:
- Vertical post with a notch near the top
- Horizontal stick (the “bait stick”) with notches on both ends
- Diagonal brace with a notch
Carve these notches carefully so they lock together. When an animal disturbs the bait stick, the whole thing collapses and drops your deadfall weight.
Size your deadfall appropriately—a 10-pound rock for squirrels, a 50-pound log for raccoons or groundhogs.
Placement: Set deadfalls along game trails, near burrows, or at locations where you see frequent small game activity.
Snares
A snare is a loop that tightens around the animal, holding it in place.
Simple snare setup:
Use strong wire or braided cord. Make a loop using a slip knot. Anchor one end firmly to a tree or stake. Set the loop across a game trail at head height for your target animal.
Sizing guidelines:
- Rabbits: 4-inch diameter loop
- Squirrels: 3-inch loop
- Raccoons: 6-inch loop
Spring pole snare: Attach your snare to a bent sapling. When the animal triggers the snare, the sapling springs up, lifting the animal off the ground. This prevents escape and protects your catch from predators.
Ethical note: Check snares at least twice daily. Animals caught in snares can suffer if left too long. This is why many hunters prefer other methods.
Stone Tools
Before metal, stone was the only material hard enough to make effective cutting tools and weapon points.
Flint Knapping Basics
Flint knapping is the art of chipping stone into sharp-edged tools. It’s harder than it looks but incredibly satisfying when you succeed.
Finding the right stone:
- Flint (found in limestone areas)
- Obsidian (volcanic glass—the sharpest)
- Chert (similar to flint)
- Jasper (harder to work but makes beautiful points)
Look for fine-grained stone without cracks or inclusions. Test by tapping with another rock—it should sound solid, not hollow.
Safety first: Stone flakes are sharper than surgical scalpels. Wear safety glasses. Work sitting down with your knees protected. Keep bystanders away.
The basic technique:
Hold the stone in your protected hand. Strike it with a harder rock (quartzite works well) along the edge at a 45-degree angle. Flakes will pop off. Control the angle and force to shape your point.
Start with thick flakes and practice before trying to make arrowheads. It takes most people 20-30 attempts before they make a usable point.
Pressure flaking: Once you have the rough shape, use an antler tine to press off small flakes along the edges. This gives you the sharp, finished edge.
Tracking and Reading Sign
Your ancestors could look at the ground and see a complete story. A single track told them what animal passed by, how long ago, where it was going, and whether it was relaxed or spooked. Let’s learn this almost-lost skill.
Understanding Animal Tracks
Tracks are your most valuable information source. They tell you what’s in your area and where it’s moving.
Basic Track Identification
Deer family tracks (whitetail, mule deer, elk, moose):
- Two teardrop-shaped prints (hooves)
- Pointed end faces forward
- Dewclaws sometimes show behind main hooves (in deep snow or soft ground)
- Size varies: whitetail 2-3 inches, elk 4-5 inches, moose 5-7 inches
Bear tracks:
- Five toes on each foot
- Large pad behind toes
- Claws usually show
- Hind foot looks almost human
- Front foot 4-6 inches, hind 7-10 inches (black bear)
Wild hog tracks:
- Similar to deer but rounder
- Dewclaws almost always show
- Points outward more than deer
- Often in muddy areas
Coyote/wolf tracks:
- Four toes in diamond shape
- Claws always show
- More oval than dog tracks
- Coyote 2-3 inches, wolf 4-5 inches
Reading Track Age
Fresh tracks have:
- Sharp, crisp edges
- Moisture (in snow or mud)
- No debris blown into them
- Correct color (not faded)
Old tracks show:
- Rounded, eroded edges
- Dry, cracked appearance
- Leaves or debris inside
- Rain damage or frost crystallization
Practice this: Make your own track in soft ground. Check it every few hours. You’ll learn how quickly tracks age in your local conditions.
Following a Trail
Tracking isn’t just about finding prints. Animals leave sign everywhere:
Broken vegetation: Fresh breaks show green inside. Old breaks are brown and dry.
Disturbed leaves: The underside of leaves is a different color. Kicked-up leaves stand out.
Displaced rocks: If a rock looks freshly turned, something stepped on it.
Mud transfers: Animals walking through mud leave traces on grass and rocks.
Marking the trail: As you follow tracks, mark the last clear print you found. If you lose the trail, return to your mark and search in circles until you find the next sign.
Scat and Droppings
Animal droppings tell you what’s in the area and what they’re eating.
Deer pellets:
- Small oval pellets
- Usually in clusters
- Spring/summer: soft, clumped (eating green plants)
- Fall/winter: hard, individual (eating twigs and dry food)
Bear scat:
- Varies greatly by diet
- Often contains berries, seeds, or fur
- Tubular, 1-2 inches diameter
- Location tells you travel routes
Rabbit pellets:
- Small, round, fibrous
- Usually near burrows or feeding areas
Fresh vs. old:
- Fresh: still moist, strong odor, flies present
- Old: dry, broken apart, no odor, gray or white
Rubs, Scrapes, and Markings
Animals mark their territory and communicate through these signs.
Buck rubs: Male deer rub their antlers on trees to mark territory and remove velvet. Fresh rubs show white wood underneath. Rub height indicates deer size. Multiple rubs in an area indicate a travel corridor.
Scrapes: Bucks paw at the ground and urinate in the scrape to mark territory. Active scrapes are torn up with fresh dirt. Often under overhanging branches that the buck also marks with scent.
Bear claw marks: Bears mark trees by clawing them. Height indicates bear size. Fresh marks show white wood.
Wallows: Wet depressions where animals roll. Pigs, elk, and deer all make wallows. Fresh wallows have water and recent tracks.
Bedding Areas
Animals bed down during the day. Finding these spots gives you hunting opportunities.
What bedding areas look like:
- Matted vegetation in oval shape
- Protected location (under low branches, in thick brush, on hillsides with view)
- Often near food sources
- Multiple beds indicate repeated use
Approaching bedding areas: Come in from downwind. Move incredibly slowly and quietly. Glass ahead constantly. Animals in beds are hard to see but will explode out if they detect you.
Best times: Mid-morning to mid-afternoon when animals are likely bedded.
Travel Routes and Corridors
Animals are creatures of habit. They use the same paths repeatedly.
Game trails: Look for worn paths through vegetation. These are highways for deer and other game. The best trails show:
- Compacted soil from many hooves
- Clear path through brush
- Fresh tracks of multiple animals
- Droppings along the route
Natural funnels: Animals naturally flow through easy terrain:
- Saddles between hills (they avoid climbing over peaks)
- Creek crossings at shallow spots
- Ridge lines that offer easy walking
- Edge habitat where forest meets field
Seasonal patterns: Learn where animals move in different seasons:
- Spring: Moving to fresh green growth
- Summer: Near water sources
- Fall: Feeding heavily, rutting activity
- Winter: Migrating to better food and shelter
Reading the Wind
Wind carries your scent. If animals smell you, game over. Traditional hunters were wind experts.
Why scent matters: A deer’s nose is thousands of times more sensitive than yours. They can smell you from a quarter mile away if the wind is wrong.
Using wind to your advantage:
- Always approach from downwind (wind blowing from animal to you)
- Wet your finger and hold it up—the cool side shows wind direction
- Watch grass, leaves, and spider webs to see subtle wind shifts
- Scent rises in warming morning air, sinks in cooling evening air (thermal currents)
Morning strategy: Morning air warms and rises. Hunt high on hillsides where your scent rises away from valleys below.
Evening strategy: Cooling air sinks. Hunt low where sinking air carries scent down and away from ridges above.
Individual Hunting Techniques
Now let’s get into the actual hunting methods—the techniques that put meat on the table.
Still-Hunting and Stalking
Still-hunting means moving slowly through the woods, pausing frequently to look and listen. Stalking means approaching a specific animal you’ve spotted.
The Art of Moving Silently
Most people crash through the woods like elephants. Traditional hunters move like ghosts. Here’s how:
The fox walk:
- Stand on one foot with weight balanced
- Extend other foot forward
- Touch down gently with outside edge of foot
- Roll weight across foot toward inside
- Finally place heel down
- Test the ground before full weight
- If you feel anything that will make noise, lift foot and try new spot
This feels awkward at first. It’s slow—sometimes 2-3 steps per minute. But it’s silent.
Body position: Crouch slightly to lower your profile. Keep weight centered over hips. Freeze instantly if you hear or see anything.
One step, many looks: Take one step, then scan for 30 seconds. Look high, low, and at mid-level. Most animals are spotted by movement or the horizontal line of their back.
Practice at home: Walk silently across a floor covered in dry leaves. When you can cross without crunching, try it in the woods.
Camouflage and Concealment
Traditional hunters didn’t have camo clothes. They used nature itself.
Breaking up your outline:
- Stick small branches in your hat and clothing
- Smear mud on exposed skin
- Wear earth-toned clothes (brown, tan, gray, green)
- Add charcoal to face and hands
Movement camouflage: More important than pattern is moving only when the animal isn’t looking. Watch their head. When they drop it to feed or look away, move. When their head comes up, freeze completely.
Using terrain: Stay in shadows. Move behind trees and rocks. Use terrain features to hide your approach. Skyline yourself (appear on a ridgeline silhouette) and the game will see you instantly.
The Stalk
You’ve spotted your game. Now you need to get within bow or spear range (20-40 yards).
Planning your approach:
- Check the wind first—if it’s wrong, wait or come from different direction
- Identify covered routes (ditches, tree lines, brush)
- Pick your final shooting position before you start
- Mark landmarks so you don’t get lost in thick cover
Making the stalk:
- Move only when animal feeds or looks away
- Take your time—rushing ruins stalks
- Stop frequently to reassess
- Be ready to freeze for 5+ minutes without moving
- Get on hands and knees or belly-crawl for final approach
Common stalk mistakes: Moving too fast, forgetting about wind shifts, making one last adjustment that alerts game, rushing the shot.
Calling and Decoying
Animals respond to sounds from their own species. Traditional hunters mastered animal calls.
Making calls from natural materials:
- Deer grunt: Blow through a hollowed section of elderberry stem
- Elk bugle: Use a diaphragm from a cow’s stomach or birch bark tube
- Turkey calls: Striker rubbed across slate or wood
- Predator calls: Blow through grass blade between thumbs (makes rabbit distress sound)
Decoy techniques: Native American hunters sometimes wore deer heads and hides to approach game. They’d mimic deer behavior—walking, stopping to feed, browsing. This is risky today (other hunters might mistake you) but the principle works: look like what the animal expects to see.
Ambush and Stand Hunting
Sometimes the smart play is staying put and letting animals come to you.
Lie-in-Wait Tactics
Traditional ambush hunting means picking a spot where game will pass, then waiting silently for hours or even days.
Choosing ambush locations:
- Game trails with fresh sign
- Water sources during dry periods
- Food sources (oak trees with acorns, berry patches)
- Natural funnels between terrain features
- Scrape sites during rut
Natural blinds: Find or create cover that:
- Breaks up your outline
- Allows movement without being seen
- Provides shooting lanes
- Hides your scent path (behind, not in front)
Building a blind: Pile brush, use fallen logs, stack rocks—whatever matches the natural surroundings. Build it several days before hunting so animals get used to it.
The waiting game: Bring nothing that makes noise. Don’t fidget. Watch constantly. Some traditional hunters waited 12+ hours without moving. That level of patience is rare today but incredibly effective.
Persistence Hunting
This is the most primal hunting technique: running animals to exhaustion. Humans are terrible sprinters but incredible endurance runners.
How It Works
Most animals overheat quickly because they can’t sweat like humans. When you chase them, they sprint away. They stop to cool down. You keep jogging toward them. They sprint again. After several cycles, they overheat and can’t run anymore.
Requirements:
- Open terrain where you can track the animal
- Hot climate (human cooling advantage increases with temperature)
- Exceptional cardiovascular fitness
- Expert tracking skills
- Hours of time (hunts last 2-8 hours)
The process:
- Find and spook the animal
- Track at steady jog
- Animal sprints away, stops to cool
- You catch up, it sprints again
- Repeat until animal is too exhausted to flee
- Close for the kill
Where it works: San people of Kalahari Desert still use this technique on springbok and kudu. Tarahumara people of Mexico chase deer through canyons.
Modern application: Extremely limited. Few hunters have the fitness or the legal ability to pursue this method. But it teaches you about animal physiology and human endurance capabilities.
Communal Hunting Strategies
Big game hunting was often a team effort. Coordinated groups could take down animals that single hunters couldn’t.
Buffalo Jumps and Cliff Drives
One of the most dramatic traditional techniques: stampeding buffalo herds off cliffs.
How it worked:
Phase 1 – Preparation:
- Scout for cliff with suitable drop-off (30+ feet)
- Build rock cairns or walls leading to cliff (forms funnel)
- Select “buffalo runner” (fastest, bravest hunter)
Phase 2 – The Drive:
- Runner dresses in buffalo hide
- Approaches herd from downwind
- Mimics buffalo behavior to infiltrate herd
- Other hunters position behind herd
- At signal, hunters shout and wave robes
- Spooked buffalo run toward perceived safety
- Buffalo runner leads them into funnel
- Runner escapes at last second
- Herd stampedes over cliff
Phase 3 – Harvest:
- Entire community processes buffalo
- Meat is dried and stored
- Hides tanned
- Bones used for tools
- Nothing wasted
Famous buffalo jump sites: Head-Smashed-In Buffalo Jump (Alberta, Canada) was used for 5,500 years.
Deer Drives
Smaller scale than buffalo jumps but similar principle: drivers push deer toward waiting shooters.
Setup:
- Hunters position at likely escape routes (saddles, creek crossings, thick cover edges)
- Drivers spread out upwind of bedded deer
- Drivers move slowly through cover, making occasional noise
- Deer sneak away from drivers toward shooters
Communication: Traditional hunters used bird calls or specific whistles to coordinate without alerting game.
Safety is critical: Everyone must know positions. Shooters only shoot quarry, never toward sounds in brush.
Fire Drives
Australian Aboriginal people mastered using fire to hunt.
The technique:
- Small controlled burns in grasslands
- Fire pushes game toward hunters
- Smoke disorients animals
- Fresh green shoots after burn attract game for future hunts
Legal and ethical note: Fire drives are illegal almost everywhere today due to fire danger. This is historical knowledge, not something to attempt.
Surrounds and Encirclement
Large groups form a circle around animals, gradually tightening it.
Requirements:
- Many hunters (20+)
- Open terrain where circle can form
- Coordination and discipline
- Noise or movement to keep animals from breaking through
Modern application: Some communal hunts for invasive species (wild hogs) use similar principles where legal.
Regional Technique Variations
Different environments demanded different solutions. Let’s see how hunters adapted worldwide.
Plains Hunting (North American)
The Great Plains presented unique challenges: flat terrain, few trees, and massive herds.
Buffalo hunting tactics:
- Disguise approaches: Wearing wolf or buffalo hides
- Horse hunting: After horses arrived, mounted hunters could keep pace with herds
- Communal drives: Buffalo jumps and surrounds
- Solo bow hunting: Approaching herds on foot using terrain folds
Antelope tactics: Pronghorn are incredibly fast. Plains hunters used:
- Curiosity flags: Waving cloth to attract curious antelope
- Water ambush: Waiting at scarce water sources
- Long stalks: Using minimal terrain features
Woodland Hunting (Eastern North America)
Thick forests required different approaches.
Whitetail deer methods:
- Still-hunting: Moving silently through woods
- Calling: Using rattling antlers and grunts during rut
- Trail ambush: Waiting along active trails
- Drive hunts: Small groups pushing deer to standers
Turkey hunting: Eastern tribes called turkeys with:
- Wing bone calls: Carved from turkey wing bones
- Box calls: Scraping wood against wood
- Mouth calls: Clicking sounds with tongue and mouth
Arctic Hunting
Extreme cold demanded specialized techniques.
Seal hunting:
- Breathing hole waiting: Seals must surface at air holes in ice. Inuit hunters waited motionless for hours with harpoons ready
- Patience essential: Might wait all day for one shot
Caribou tactics:
- Migration interception: Waiting at traditional crossing points
- Kayak ambush: Attacking swimming caribou during river crossings
Cold adaptations:
- Clothing from animal hides
- High-fat diet for calories
- Using every part of animal (waste means death in Arctic)
Desert Hunting (Southwest)
Limited water shaped desert hunting.
Bighorn sheep: Climbing steep rocky terrain to reach high-dwelling sheep. Desert hunters were expert climbers.
Water source ambush: In desert, animals must drink. Hunters waited at springs and seeps.
Heat strategy: Hunting early morning and evening. Resting during scorching midday.
African Bushmen Techniques
San people of Kalahari are master hunters.
Persistence hunting: Running antelope to exhaustion (covered earlier)
Poison arrows: Using plant and insect toxins on small arrows. Not instantly lethal, so hunter tracks wounded animal for hours until poison takes effect.
Cooperative hunting: Sharing knowledge, planning, and harvest among group.
Asian Mountain Hunting
Steep terrain and thin air demanded adaptation.
Mongolian eagle hunting: Training golden eagles to hunt foxes and rabbits. Hunter and eagle form lifelong bond.
Mountain goat tactics: Climbing to altitudes above timberline. Using rocks for cover. Incredible patience in harsh conditions.
Australian Aboriginal Methods
Diverse techniques for unique animals.
Fire hunting: Controlled burns to drive game (especially lizards and small mammals)
Kangaroo tactics:
- Tracking: Following fresh prints
- Ambush: Waiting at water sources
- Dogs: Using dingoes to corner kangaroos
Boomerang use: Thrown into flocks of birds. Doesn’t need to return—just needs to hit target or scare birds into nets.
After the Kill: Processing and Preservation
Killing the animal is just the beginning. Traditional hunters mastered using every part.
Field Dressing Traditional Style
Without modern knives and tools, field dressing required stone or bone blades.
The essential cuts:
- Open the abdomen from sternum to pelvis
- Remove internal organs carefully (save heart, liver, kidneys)
- Drain blood completely
- Cool the carcass quickly
Using stone knives: Obsidian or flint blades are sharper than steel but more fragile. Make short, controlled cuts. Apply steady pressure rather than sawing.
Transporting the meat: Without vehicles, traditional methods included:
- Travois: A-frame drag sledge pulled behind hunter
- Pack frames: Sticks lashed together to carry meat on back
- Tumpline: Strap across forehead supporting load
- Quartering: Cutting animal into manageable pieces
Meat Preservation
Fresh meat spoils quickly. Traditional preservation made it last months.
Smoking
Smoke dries meat and adds preservative compounds.
Building a smokehouse:
- Small structure with racks for hanging meat
- Fire pit below (not directly under meat)
- Vents for controlling smoke flow
- Can be as simple as branches and bark
Woods for smoking:
- Hickory: Strong, traditional flavor
- Oak: Mild, reliable
- Apple or cherry: Sweet smoke for game birds
- Never use pine or softwoods: Creates bitter taste and harmful resins
Hot vs. cold smoking:
- Hot smoking (150-200°F): Cooks and preserves. Ready in hours.
- Cold smoking (below 100°F): Only dries and flavors. Takes days. Meat must be cured with salt first.
Drying (Jerky)
The simplest preservation: remove water so bacteria can’t grow.
Making jerky:
- Slice meat very thin (1/4 inch or less)
- Cut across grain for tender jerky, with grain for chewy
- Season with salt (essential for preservation)
- Hang strips in sun or over low fire
- Protect from flies with cheesecloth
- Dry until brittle (breaks when bent)
- Store in dry container
Without salt: Meat must be dried faster in sun or hot smoke before spoilage starts.
Pemmican: The Ultimate Survival Food
Pemmican is concentrated nutrition that lasts years.
Traditional recipe:
- Dry meat completely until brittle
- Pound dried meat into powder
- Render fat from animal into liquid tallow
- Mix equal parts meat powder and melted fat
- Add dried berries (optional but adds vitamins)
- Pack into containers
- Seals as fat cools
Why it works: Fat protects meat from air and moisture. High calorie density. Complete nutrition. Can last 5+ years if kept dry.
Hide Tanning
Animal hides provided clothing, shelter, and cordage.
Brain Tanning Method
Every animal has enough brains to tan its own hide. This traditional method creates soft, flexible leather.
The process:
Step 1 – Fleshing: Remove all meat and fat from hide. Scrape with sharp stone or bone tool. This takes hours.
Step 2 – Brain mixture: Mash animal’s brain with water into paste. Every cell wall in brain contains lecithin oils that break down skin proteins.
Step 3 – Soaking: Work brain mixture into hide thoroughly. Let soak several hours or overnight.
Step 4 – Stretching: Stretch hide repeatedly as it dries. This breaks down fibers and makes leather soft. Stretch in all directions. This is exhausting work.
Step 5 – Smoking: Hang hide over smoky fire (no flames). Smoke makes leather water-resistant and preserves it.
Result: Soft, flexible buckskin perfect for clothing.
Using Every Part
Traditional hunters wasted nothing.
Organs:
- Heart, liver, kidneys: Eaten fresh (highly nutritious)
- Stomach/intestines: Cleaned and used as containers or cooking vessels
- Bladder: Water container
Bones:
- Leg bones: Cracked for marrow (high fat content)
- Small bones: Needles and awls
- Larger bones: Tool handles, hide scrapers
- Antlers: Tool handles, pressure flakers for stone work
Sinew:
- Back sinew: Strongest cordage for bowstrings
- Leg sinew: Thread for sewing
- Practice: Dry it, pound it into threads
Hooves:
- Boiled down into glue
- Mixed with pine pitch for waterproof adhesive
Brain:
- Tanning hides (as described above)
Blood:
- Food (blood sausage)
- Binder for various mixtures
Cultural and Spiritual Dimensions
Traditional hunting was never just about killing. It had deep spiritual meaning.
Respect and Gratitude
Your ancestors understood something modern hunters often forget: the animal is giving its life to feed you. That deserves respect.
Pre-hunt practices:
- Fasting: Cleansing body and mind
- Prayer: Asking permission to hunt
- Offerings: Leaving tobacco, corn, or other sacred items
- Mental preparation: Entering right state of mind
At the moment of kill:
- Speaking to the animal
- Thanking it for sacrifice
- Quick, clean death (suffering is disrespectful)
- Silence and reverence
After the harvest:
- Using every part possible
- Sharing meat with community
- Proper disposal of remains
- Gratitude ceremony
Native American Spiritual Practices
Different tribes had different ceremonies, but common themes appeared.
Vision quests: Young hunters sought spiritual guidance through fasting and isolation. They might receive a vision of their hunting spirit guide.
Hunting medicine bundles: Pouches containing sacred items:
- Animal fetishes (carved figures)
- Special stones or shells
- Herbs and medicines
- Items from successful hunts
Bear ceremonialism: Bears were especially sacred. When killed:
- Body treated with great honor
- Dressed in finest clothing
- Feast held in bear’s honor
- Bones carefully gathered and honored
- Speaker apologized to bear nation
Taboos: Many tribes had restrictions:
- Women might not eat certain parts
- Some animals never hunted during certain seasons
- Wasting meat was serious offense
- Bragging about kills was forbidden
Universal Themes Across Cultures
Hunting spirituality appears in every culture:
Gratitude: Whether Christian prayer, Native ceremony, or Buddhist mindfulness, hunters thanked the animal and the land.
Using everything: Waste was disrespectful everywhere. Using all parts honored the sacrifice.
Sharing: Successful hunters shared meat with community, especially elders and those who couldn’t hunt.
Teaching: Passing knowledge to young hunters was sacred duty.
Adapting Spiritual Practices Today
You don’t need to appropriate Native ceremonies to hunt spiritually.
Personal gratitude practices:
- Moment of silence before hunting
- Thank you spoken to animal after kill
- Conscious intention to use meat fully
- Sharing harvest with others
Mindful hunting:
- Present in moment
- Aware of interconnection
- Grateful for opportunity
- Respectful of animal’s death
Avoiding waste:
- Use as much meat as possible
- Don’t take shots you’re not confident in
- Process carefully
- Don’t hunt for trophy only
Cultural Sensitivity
What to avoid:
- Don’t claim Native American spirituality if you’re not Native
- Don’t perform ceremonies from cultures not your own
- Don’t use sacred items (medicine bundles, pipes) without proper teaching
- Don’t appropriate regalia or dress
What’s respectful:
- Learn from indigenous knowledge
- Credit source cultures
- Practice gratitude in your own way
- Support indigenous hunting rights
- Learn with humility
Modern Application and Legality
Want to try traditional techniques today? Here’s what you need to know about laws and ethics.
What’s Legal Today?
Hunting regulations vary by state, but here are general rules:
Bow Hunting Regulations
Legal in most places:
- Traditional recurve or longbow
- Wooden arrows
- Modern compound bows (not traditional but effective)
Requirements:
- Minimum draw weight (usually 35-40 pounds)
- Specific arrow types (broadheads required for big game)
- Hunter education certification
- Proper tags and licenses
Special primitive bow seasons: Many states offer early archery seasons specifically for bow hunters. Some states have extra-primitive seasons for traditional bows only (no compounds).
Trapping Regulations
Generally requires:
- Separate trapping license
- Specific season dates
- Species limits
- Trap type restrictions (many traditional traps illegal)
- Daily trap checks
Often illegal:
- Snares (banned in many states)
- Body-gripping traps in some areas
- Certain trap sizes
Check your state wildlife agency: Trapping laws vary dramatically state by state.
Spear Hunting
Extremely limited legality:
- Some states allow spearfishing for rough fish
- A few states permit hog hunting with spears
- Almost nowhere allows spear hunting of deer or other big game
Historical reasons for prohibition: Concerns about clean kills and wounding rates.
What’s Definitely Illegal
- Fire drives: Extreme fire danger
- Poison: Banned everywhere for obvious reasons
- Snares in most jurisdictions (trapping license might allow in specific seasons)
- Hunting from vehicles: Must be on foot in almost all states
- Communal drives in some states: Check local regulations
- Night hunting: Generally prohibited except specific predator hunting
Primitive Weapon Seasons
Many states offer special seasons for primitive weapons:
Advantages:
- Extended season dates
- Lower hunter pressure
- More intimate hunting experience
- Personal challenge and satisfaction
Common primitive seasons:
- Archery-only: Usually earliest season
- Muzzleloader: Often between archery and rifle seasons
- Traditional bow: Some states have extra-traditional seasons
Requirements vary: Check your state’s definition of “primitive.” Some allow modern compounds; others require traditional recurves only.
Ethical Considerations
Just because something is legal doesn’t make it ethical.
Fair chase principles:
- Animal has reasonable chance to escape
- No guaranteed kills
- Hunter skills matter more than technology
- Respect for animal’s wild nature
Clean kills are paramount:
- Only take shots you’re confident in
- Practice extensively before hunting season
- Know your effective range (usually 20-30 yards with traditional bow)
- Track wounded game persistently
Respect game laws:
- They exist for conservation
- Poaching destroys wildlife populations
- Illegal hunting harms all hunters’ reputation
Sustainable harvest:
- Don’t kill more than you’ll use
- Target appropriate age/sex animals
- Consider population health
- Think generations ahead
Learning Path: Your Journey to Traditional Hunting Skills
Ready to start learning? Here’s a realistic progression from beginner to competent traditional hunter.
Phase 1: Knowledge Building (Months 1-3)
What to do:
- Read extensively (books on traditional archery, tracking, indigenous hunting)
- Watch educational videos (primitive skills YouTube channels)
- Visit natural history museums and cultural centers
- Study local wildlife behavior
Key skills:
- Learn to identify animal tracks in your area
- Understand basic bow mechanics
- Study local hunting regulations
- Connect with experienced hunters
Recommended books:
- “The Traditional Bowyer’s Bible” series
- “Tom Brown’s Field Guide to Nature Observation and Tracking”
- “The Complete Book of Hunting” by Robert Elman
- “Bows & Arrows of the Native Americans” by Jim Hamm
Phase 2: Tool Making (Months 3-6)
Start simple:
- Make a basic bow (follow instructions earlier in this article)
- Craft several dozen arrows
- Practice stone tool basics
- Make cordage from plant fibers
Practice, practice, practice:
- Shoot your bow daily
- Start at 10 yards, gradually increase distance
- Focus on instinctive shooting (no sights)
- Track your arrow hits
Build supporting skills:
- Learn to sharpen tools properly
- Practice knot-tying
- Make fire without matches
- Basic bushcraft skills
Phase 3: Tracking Practice (Ongoing)
Start observing now:
- Walk wild areas daily
- Identify every track you see
- Photograph tracks for later study
- Follow trails without hunting
Level up:
- Join tracking clubs or workshops
- Practice with experienced trackers
- Study animal behavior in field
- Learn scat identification
Keep a journal:
- Document tracks found
- Note behavior patterns
- Record seasonal movements
- Build local knowledge
Phase 4: Skills Application (Months 6-12)
Apply what you’ve learned:
- Practice stalking non-game (deer, turkey, squirrels)
- Join traditional archery clubs
- Attend primitive skills gatherings
- Apply for primitive weapon hunting seasons
First hunts:
- Start with small game (where legal with bow)
- Practice on targets before hunting
- Go with experienced traditional hunters
- Accept that early hunts might not be successful
Practice Without Hunting
You can develop skills year-round without hunting:
3D archery courses: Shoot at life-size foam animal targets in realistic woodland settings. This builds instinctive shooting skills.
Tracking challenges: Many areas host tracking workshops and competitions. Learn from experts.
Primitive skills gatherings: Annual events where you can learn from masters:
- Rabbitstick Rendezvous (Utah)
- Falling Leaves Gathering (North Carolina)
- Northeast Primitive Skills Gathering (New York)
- Many others nationwide
Bushcraft camping: Practice living with primitive gear:
- Sleep in natural shelters
- Cook on open fires
- Navigate without GPS
- Process natural materials
Finding Mentors
Learning from experienced practitioners accelerates your progress dramatically.
Where to find mentors:
- Traditional archery clubs (nearly every state has them)
- Tribal cultural programs (many tribes offer classes to public)
- Primitive skills schools
- Museum volunteers and staff
- Hunting clubs with traditional members
How to approach:
- Be respectful and humble
- Offer to help (don’t just ask for information)
- Practice recommended skills before next meeting
- Show genuine commitment
- Pass knowledge forward later
Common Mistakes and Troubleshooting
Learning traditional hunting means making mistakes. Here’s how to fix common problems.
Tool-Making Mistakes
Problem: Bow breaks during tillering or shooting
- Cause: Wood too dry, wrong grain orientation, forcing an uneven bend
- Prevention: Season wood properly (3-6 months), follow grain carefully, tiller slowly
- Solution: Start over with new wood. Save broken bow pieces for learning
Problem: Arrows fly erratically
- Cause: Bent shaft, uneven fletching, spine too weak or stiff for bow
- Solution: Roll shaft on flat surface to check straightness. Replace if bent. Check that all three feathers are evenly spaced and same size. Match arrow spine to bow weight.
Problem: Stone tools shatter when flaking
- Cause: Wrong striking angle, hidden internal flaws in stone, too much force
- Solution: Strike at 45-degree angle. Test stone first by tapping for hollow sound. Use controlled strikes, not heavy blows.
Problem: Bowstring breaks
- Cause: Too thin, damaged by moisture, sharp edges on bow tips
- Solution: Make string thicker (more strands). Protect from moisture. Sand bow tips smooth. Always have backup string.
Stalking Errors
Problem: Game spots you repeatedly
- Cause: Skylining yourself, moving too fast, forgetting to check wind
- Solution: Stay in shadows and below ridgelines. Move one step per 30 seconds. Check wind constantly.
Problem: You’re too loud while walking
- Cause: Stiff boots, stepping on sticks, heel-striking
- Solution: Practice fox walk. Wear softer footwear or remove boots. Test ground before full weight. Move slower.
Problem: Getting winded by game
- Cause: Wind shift, forgetting thermal currents, poor planning
- Solution: Always approach from downwind. Remember air rises in morning (hunt high), sinks in evening (hunt low). Be willing to abandon stalk if wind goes bad.
Tracking Mistakes
Problem: Losing the trail
- Cause: Moving too fast, not marking last sign, getting distracted
- Solution: Mark last definite track with stick or rock. Search in expanding circles from last mark. Slow down.
Problem: Misidentifying tracks
- Cause: Partial print, unusual substrate, multiple species in area
- Solution: Look for multiple tracks. Check stride and gait. Note all sign (not just prints). Take photos for later study.
Problem: Can’t determine track direction
- Cause: Shallow print, confusing substrate
- Solution: Look at stride pattern (animals walk forward). Check for toe drag marks. Dirt is often kicked backward from print.
Shot Placement Errors
Problem: Wounding animals without recovering them
- Cause: Shots beyond effective range, poor practice, impatience
- Solution: Know your range (probably 20-30 yards max with traditional bow). Practice extensively. Wait for perfect shot. Pass on marginal opportunities.
Problem: Missing clean broadside shots
- Cause: Target panic, rushing, poor form
- Solution: Practice blank bale shooting (close range, eyes closed). Focus on form, not results. Shoot daily. Use instinctive aiming (muscle memory, not conscious aiming).
General Pitfalls
Romanticizing the difficulty: Traditional hunting is genuinely hard. Don’t expect quick success.
Inadequate practice: You need hundreds of arrows shot before hunting. You need dozens of stalks practiced. This takes months.
Ignoring safety: Stone flakes are razor sharp. Bow limbs store tremendous energy. Respect your tools.
Legal violations: Ignorance isn’t an excuse. Know your local regulations completely.
Giving up too soon: Most traditional hunters hunt several seasons before success. Persistence matters more than natural talent.
Honor the Knowledge, Respect the Animals
We’ve covered a lot of ground—from making your own hunting tools to tracking game to ancient techniques used for thousands of years. But before we finish, let’s remember what this is really about.
Traditional hunting techniques aren’t just interesting historical trivia. They represent humanity’s longest relationship with the natural world. For 99% of human history, these skills meant survival. They meant your family ate or starved. They meant you understood the land in ways we’ve almost completely lost.
When you learn to track an animal, you’re seeing the world the way your ancestors saw it. When you make a bow with your own hands, you’re connecting to craftspeople stretching back ten thousand years. When you stalk within bow range of a deer, you’re testing yourself against the same challenge that made humans human.
But here’s what matters most: these skills teach humility and respect. You can’t charge through the woods with a traditional bow and expect success. You have to slow down. You have to observe. You have to admit that the deer is better at being a deer than you are at being a hunter. That’s a good lesson.
You learn that meat doesn’t come from plastic-wrapped packages. It comes from a living animal that sees, smells, and fears. It comes at the cost of that animal’s life. When you work that hard for your food—when you craft the weapon, practice for months, stalk for hours, and finally make a clean kill—you appreciate that sacrifice in a way that’s almost impossible otherwise.
Start Where You Are
You don’t need to master everything in this guide. Pick one technique that interests you. Maybe you want to make a bow. Maybe tracking sounds fascinating. Maybe you just want to try still-hunting silently. Start there.
Give yourself permission to be a beginner. Your first bow might break. Your first arrows might fly crooked. Your first stalk might send game running at 100 yards. That’s fine. That’s learning.
Find people who know more than you and learn from them. Read. Practice. Spend time in nature. Be patient with yourself.
Pass It Forward
As you learn these skills, share them. These techniques disappear one generation at a time. Every traditional hunter who doesn’t teach someone means that knowledge dies.
When you become competent, help beginners. Show kids how to track. Teach someone to make arrows. Share your harvests. Keep these ancient skills alive.
Respect the Source
Remember where this knowledge comes from. Much of what we know about traditional hunting comes from indigenous peoples who perfected these techniques over millennia. They’re not props for your outdoor adventure—they’re sophisticated survival technologies developed by skilled people.
Learn with humility. Give credit. Support indigenous hunting rights. Don’t appropriate sacred practices. Approach this knowledge with respect for the cultures that created and preserved it.
The Choice Is Yours
You can keep hunting with modern equipment and that’s perfectly fine. There’s nothing wrong with scoped rifles and compound bows. They work.
But if you want to challenge yourself in a new way, if you want to connect more deeply with hunting’s roots, if you want skills that will last your lifetime and beyond, traditional techniques are waiting for you.
The forest is still there. The tracks are still being made. The animals are still moving through. Your ancestors did this successfully for thousands of generations.
You can too.
Now go make that bow. Study those tracks. Practice that stalk. The ancient skills are calling you.
Your journey starts today.
Frequently Asked Questions
1. Are traditional hunting methods legal today?
It depends on the method and your location. Bow hunting with traditional bows is legal almost everywhere during archery seasons. Trapping requires special licenses and follows strict regulations about trap types and seasons. Spear hunting is extremely limited—usually only for fish or hogs where permitted. Methods like fire drives, poison, and many communal drives are illegal due to safety and conservation concerns. Always check your specific state’s hunting regulations before attempting any traditional method.
2. What’s the easiest traditional hunting technique to learn first?
Start with bow and arrow hunting during established archery seasons. You can buy or make a simple recurve bow, practice in your backyard or at archery ranges, and apply these skills during legal hunting seasons. Tracking and still-hunting are also beginner-friendly—you can practice these year-round without hunting by simply observing wildlife. Avoid starting with trapping (complex regulations) or techniques requiring group coordination.
3. How long does it take to make a traditional bow?
The actual construction takes 8-12 hours spread over several days. However, the wood must season for 3-6 months before you start, and you’ll need time to learn the process. Many beginners take 2-3 attempts before creating a reliable hunting bow. Plan on 6-9 months from cutting the wood to hunting with your finished bow. You can speed this up by buying pre-cut bow staves or attending bow-making workshops.
4. Can you really hunt effectively without modern weapons?
Absolutely. Indigenous peoples fed themselves exclusively with traditional methods for thousands of years. The key is skill development and realistic expectations. A practiced traditional archer can reliably take deer at 20-30 yards. That requires more skill and patience than shooting a rifle at 200 yards, but it’s completely achievable. Success rates are lower than modern hunting, but the satisfaction is much higher.
5. What animals are best for traditional hunting methods?
Start with whitetail deer—they’re abundant in most states and have long archery seasons. Turkey, small game (rabbits, squirrels), and wild hogs (where present) are also good choices. Avoid dangerous game (bear, mountain lion) until you’re very experienced. For absolute beginners, practice tracking and stalking any animals (even non-game like deer during off-season) to build skills before hunting.
6. Is traditional hunting more ethical than modern hunting?
Not necessarily. Ethics depend on the hunter, not the tools. Traditional hunting requires getting closer and often results in quicker kills, which some consider more respectful. However, traditional weapons have higher wounding rates in unskilled hands. The most ethical approach is choosing whatever method you can execute most competently to ensure clean, quick kills. What matters is practicing extensively, respecting the animal, and using the meat.
7. How do I find places to practice traditional hunting skills?
Join traditional archery clubs (most states have them). Attend primitive skills gatherings like Rabbitstick Rendezvous. Visit 3D archery ranges for realistic practice. Many state parks allow tracking and nature observation year-round. Connect with local hunting clubs—many have members who practice traditional methods. Some tribal cultural centers offer classes open to the public. Online forums can connect you with local practitioners.
8. What are the most important tracking skills to master?
Start with basic track identification—learn every animal’s footprint in your area. Then master aging tracks (fresh vs. old). Progress to following a trail while looking for non-track sign (broken vegetation, scat, beds). Learn to read stride and gait to determine speed and direction. Understanding wind and how it affects animal behavior is critical. Finally, develop patience—tracking often means moving one step per minute while constantly observing.
9. Can I use traditional techniques during modern gun season?
Yes, you can usually use traditional weapons during any season, including gun seasons. However, this comes with challenges: other hunters make noise and pressure game differently, hunter density is higher (less room to stalk quietly), and you must wear bright orange in most states (harder to conceal from game). Many traditional hunters prefer archery-only seasons for lower pressure and more primitive experience.
10. How did Native Americans make their arrows fly straight?
Arrow straightening required patience and understanding wood properties. They heated green shoots or shafts over coals (not flames) until warm and pliable, then gently bent crooked sections straight while warm. They held the shaft straight until it cooled, repeating as needed. Some tribes used special straightening tools with grooves to apply even pressure. The process could take hours per arrow. Proper fletching (three evenly-spaced feathers) and correct spine matching to bow weight were equally important.
11. What’s the difference between still-hunting and stalking?
Still-hunting means moving slowly through the woods without a specific target, constantly looking for game. You might take hundreds of steps between one area and another, pausing frequently. Stalking is approaching a specific animal you’ve already spotted. You plan a route to get close using cover and wind. Still-hunting is exploration and observation; stalking is tactical execution on a known target.
12. Are there modern tools that combine with traditional methods?
Yes. Many traditional hunters use modern items that don’t change the core challenge: GPS for safety, modern fabrics for comfort, store-bought string for reliability, modern arrows with traditional-style bows. The key is maintaining the skill challenge while accepting practical conveniences. Most traditional hunters draw the line at items that replace skill—like modern sights, rangefinders, or trail cameras.
13. How do I learn to read animal sign effectively?
Start by walking the same area repeatedly and documenting every track, scat, rub, scrape, and trail you find. Over time, patterns emerge. Take photos and compare them to field guides. Follow individual trails until you understand where they lead. Study one species intensely rather than trying to learn everything at once. Find a mentor who can point out sign you’re missing. Remember: reading sign takes years to master, not weeks.
14. What’s the most challenging traditional hunting technique?
Persistence hunting is arguably the hardest—it requires exceptional cardiovascular fitness, expert tracking at speed, suitable terrain, and 4-8 hours of sustained effort for one animal. Spear hunting large game (where legal) is extremely dangerous. Making and successfully hunting with your own hand-crafted stone-tipped arrows represents perhaps the most complete skill test, combining craftsmanship, woodsmanship, and hunting ability.
15. How can I honor indigenous hunting traditions respectfully?
Learn the history and give credit to source cultures. Support indigenous hunting rights and sovereignty. Don’t appropriate sacred ceremonies, regalia, or spiritual practices not shared willingly. Approach this knowledge with humility—recognize you’re learning what others perfected over millennia. When teaching others, acknowledge the source. Consider supporting indigenous cultural preservation organizations financially. Most importantly, use what you learn with respect for both the knowledge and the animals.