- The Ancient Art That Still Lives Today
- What Are Traditional Pottery Techniques?
- A Brief History: From Ancient Times to Today
- The Five Essential Traditional Techniques
- Technique #1: The Pinch Pot Method
- Technique #2: Coil Building
- Technique #3: Slab Building
- Technique #4: Wheel Throwing
- Technique #5: Paddle and Anvil
- Choosing Your Clay: Wild vs. Store-Bought
- Essential Tools for Traditional Pottery
- Decorating Traditional Pottery
- Drying Your Pottery Safely
- Traditional Firing Methods
- Common Beginner Mistakes and How to Fix Them
- Your First Project: Which Technique Should You Try?
- FAQs: Your Pottery Questions Answered
- Conclusion: Connecting to Thousands of Years of Tradition
The Ancient Art That Still Lives Today
Have you ever held a handmade clay bowl and wondered how it was made? Maybe you felt the bumps and curves that show it wasn’t made by a machine. Those little imperfections tell a story—a story that goes back 29,000 years.
That’s right. Humans have been making pottery for almost 30,000 years. From the frozen lands of ancient Japan to the deserts of the American Southwest, people have been shaping wet clay with their hands and turning it into beautiful, useful objects.
What’s amazing is that the techniques used by ancient potters are still used today. You don’t need expensive equipment or a fancy studio. Many traditional pottery methods require nothing more than your hands, some clay, and a bit of patience.
This guide will teach you the five main traditional pottery techniques that have been passed down through generations. Whether you want to make your first pinch pot or understand how ancient Greek vases were created, you’re in the right place.
By the end of this article, you’ll know which technique is best for beginners, what tools you actually need, and how to avoid the most common mistakes. Let’s get our hands dirty!
What Are Traditional Pottery Techniques?
Before we dive into the methods, let’s get clear on what we mean by “traditional pottery techniques.”
Traditional pottery techniques are the hand-based methods that people used for thousands of years before machines and modern technology took over. These techniques don’t rely on electric kilns, factory molds, or computer-controlled pottery wheels.
Instead, traditional techniques use:
- Your hands as the main tool
- Simple tools you can make yourself or find easily
- Natural materials like wild clay and mineral paints
- Ancient firing methods like pit fires and bonfires
Think of it this way: If a potter from 2,000 years ago could walk into your workspace and recognize what you’re doing, you’re using a traditional technique.
Why Learn Traditional Methods?
You might be thinking, “Why should I learn old-fashioned techniques when modern tools exist?”
Great question! Here are three reasons:
1. You don’t need expensive equipment. Many traditional techniques require nothing but clay and your hands. No pottery wheel. No electric kiln. Just you and the earth.
2. You connect with history. When you shape clay the same way ancient potters did, you’re part of a story that spans thousands of years. It’s pretty cool to think about.
3. You learn the fundamentals. Understanding traditional methods helps you master the basics. Even modern potters benefit from knowing how to hand-build pottery.
The Three Main Categories
Traditional pottery techniques fall into three groups:
- Hand-building: Making pots with just your hands and simple tools
- Wheel throwing: Using a spinning wheel to shape clay
- Firing: Heating clay in a fire or kiln to make it hard and permanent
We’ll explore all of these—but we’ll focus mainly on the techniques you can start learning today.
A Brief History: From Ancient Times to Today
Let’s take a quick trip through time.
29,000 BC: The earliest known ceramic object was made—a small figurine of a woman, found in what is now the Czech Republic.
14,000 BC: In Japan, people started making some of the world’s first pottery vessels during the Jōmon period. They used the coil method, rolling out long “snakes” of clay and stacking them to build pots.
3,500 BC: Someone in Mesopotamia (modern-day Iraq) invented the potter’s wheel. This changed everything. Suddenly, potters could make thin, symmetrical vessels much faster than before.
Ancient Greece (800-300 BC): Greek potters perfected wheel throwing and created the famous black and red figure vases we see in museums today.
Ancient China (2000 BC onward): Chinese potters developed porcelain and advanced wheel-throwing techniques that influenced pottery around the world.
Native American Traditions: For thousands of years, Indigenous peoples across the Americas created stunning pottery using coil, pinch, and paddle methods—all without the potter’s wheel.
Today: Many modern potters are returning to traditional techniques. Why? Because there’s something special about making pottery the way our ancestors did—with our hands, our creativity, and our connection to the earth.
The Five Essential Traditional Techniques
Let’s break down the five main techniques you need to know:
| Technique | Difficulty | Tools Needed | Best For | Origins |
|---|---|---|---|---|
| Pinch Pot | Easy | Just hands | Small bowls, cups | Prehistoric (worldwide) |
| Coil Building | Medium | Hands, optional rib | Larger vessels, vases | Japan, Native American, Greek |
| Slab Building | Medium | Rolling pin, knife | Tiles, boxes, plates | Ancient Middle East |
| Wheel Throwing | Hard | Potter’s wheel | Symmetrical bowls, vases | Mesopotamia (3,500 BC) |
| Paddle & Anvil | Medium | Wooden paddle, stone | Thin-walled pots | Southwest Native American |
Now let’s explore each one in detail.
Technique #1: The Pinch Pot Method
The pinch pot is the oldest and simplest pottery technique. If you’ve ever played with Play-Doh as a kid, you already know the basics.
How It Works
- Take a ball of clay about the size of a tennis ball
- Push your thumb into the center (not all the way through!)
- Pinch the walls between your thumb and fingers
- Rotate the ball as you pinch to keep walls even
- Keep pinching and rotating until you have a small bowl
That’s it. No wheel. No special tools. Just your hands.
What You Can Make
- Small bowls
- Tea cups
- Little decorative pots
- Spoon holders
Tips for Beginners
Keep your clay moist. Dry clay cracks easily. Keep a damp sponge nearby and wet your hands when needed.
Go slow. Don’t try to make the walls thin all at once. Pinch little by little, rotating the pot as you go.
Aim for even thickness. Try to keep the walls about as thick as your pinky finger (about 1/4 inch).
Common Mistakes
Pinching too thin: If you pinch the walls too thin in one spot, the clay will tear. If this happens, don’t panic—just wet the torn area and press it back together gently.
Uneven walls: One side thick, the other side thin? This happens when you forget to rotate the pot as you work. Keep turning!
Bottom cracks: These happen when clay dries too fast. Cover your pot with plastic wrap and let it dry slowly.
Technique #2: Coil Building
If you want to make something bigger than a pinch pot, coil building is your answer.
Ancient Japanese potters used this technique 14,000 years ago. Native American potters still use it today. Why? Because it works beautifully for large vessels.
How It Works
- Roll out clay into long “snakes” or coils (like rolling Play-Doh snakes)
- Make a flat base for your pot
- Coil the clay snake around the edge of the base
- Add coil on top of coil, building upward
- Smooth the coils together using your fingers or a rib tool
The Three Types of Pinches
To join coils properly, you need to master three pinches:
Bonding Pinch: Press your finger down and into the coil below. This attaches the new coil securely. If you skip this step, your coils might separate later.
Flat Pinch: Pinch the walls to make them thinner and smoother. This is how you shape your pot.
Compression Pinch: Squeeze the pot from both sides to make the opening smaller. This creates jars with narrow necks.
What You Can Make
- Large vases
- Planters
- Decorative sculptures
- Storage jars
Tips for Beginners
Roll coils evenly. If your coils are lumpy, your pot will be lumpy. Practice rolling smooth, even coils before you start building.
Score and slip. Before adding a new coil, scratch (score) the top of the coil below, add a bit of watery clay (slip), and then attach. This creates a strong bond.
Support your walls. As your pot gets taller, the walls might sag. Support them from the inside with your free hand as you work.
Common Mistakes
Coils separating: This happens when you don’t score and slip properly. Always take time to join coils well.
Leaning walls: If your walls lean in or out when you don’t want them to, use gentle compression pinches to straighten them.
Technique #3: Slab Building
Slab building is like making pottery with pancakes. You roll out flat sheets of clay and cut them into shapes.
This technique has been around for at least 14,000 years. Ancient people used it to make tiles, and Mayan potters used it to create boxes and vessels.
How It Works
- Roll out clay into flat slabs (like rolling pie dough)
- Cut the slabs into shapes with a knife
- Join the pieces together using score and slip
- Smooth the joints
Soft Slab vs. Hard Slab
Soft slab: The clay is still moist and flexible. You can bend and drape it. Good for curved forms.
Hard slab: The clay has dried to “leather-hard” (firm but not bone-dry). You can cut clean edges. Good for boxes and geometric shapes.
What You Can Make
- Tiles
- Square or rectangular boxes
- Plates
- Architectural pieces
Tips for Beginners
Roll evenly. Use two wooden sticks of equal thickness on either side of your clay as guides. This ensures even thickness.
Let slabs rest. After rolling, let your slabs rest for 10-15 minutes. This prevents warping.
Use a template. If you’re making a box, draw your shapes on paper first and use them as templates.
Common Mistakes
Warping: Slabs warp when they dry unevenly. Cover them with plastic and dry slowly.
Cracking at joints: Happens when joints aren’t scored and slipped well. Take your time joining pieces.
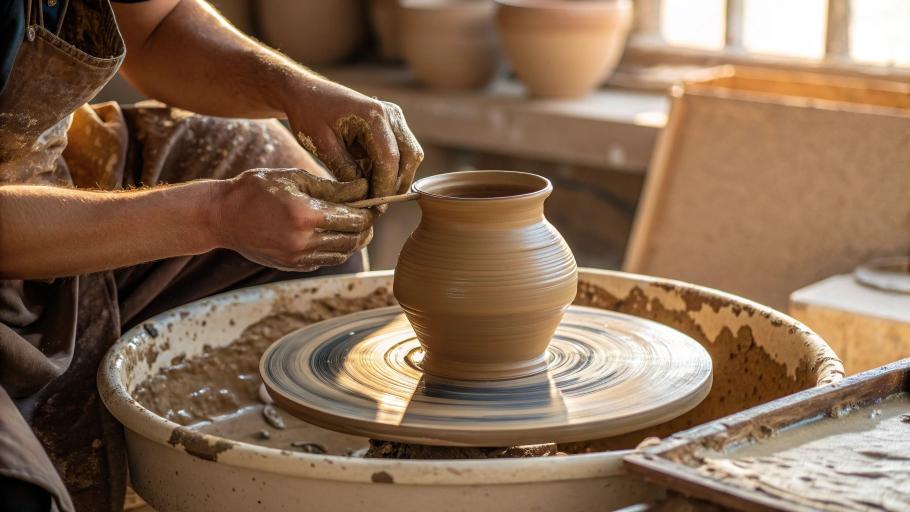
Technique #4: Wheel Throwing
The potter’s wheel was a game-changer when it was invented 5,500 years ago. Suddenly, potters could make perfectly round, symmetrical vessels quickly.
But here’s the truth: Wheel throwing is the hardest traditional technique to learn. It takes practice. Lots of practice.
How It Works
- Centering: Slam a ball of clay onto the spinning wheel and press it into perfect center
- Opening: Push your fingers into the center to create a hole
- Pulling: Pull the walls up, making them taller and thinner
- Shaping: Form the clay into bowls, vases, or cylinders
- Finishing: Smooth the rim and cut the pot off the wheel
What You Can Make
- Perfectly round bowls
- Vases
- Cups and mugs
- Plates
Tips for Beginners
Keep your hands wet. Friction between dry hands and spinning clay creates drag and ruins your pot. Keep a bowl of water nearby.
Use your whole body. Don’t just use your arm strength. Lean into the clay. Use your core and legs for stability.
Be patient with centering. This is the hardest part. It might take weeks of practice to consistently center clay. Don’t give up!
Common Mistakes
Off-center clay: If your clay wobbles, stop and re-center it. You can’t make a good pot from off-center clay.
Collapsing walls: Pulling walls too thin, too fast causes them to collapse. Go slow. Be gentle.
Uneven thickness: Happens when one hand presses harder than the other. Use equal pressure from both hands.
Technique #5: Paddle and Anvil
This technique is less known but super cool. Native American potters of the American Southwest—like the O’odham and Maricopa people—are masters of this method.
How It Works
- Form a basic pot shape (often using coils)
- Hold a smooth stone or ceramic piece inside the pot (the anvil)
- Gently paddle the outside with a flat wooden tool
- The paddling thins and shapes the pot
What You Can Make
- Thin-walled bowls
- Large pots with refined surfaces
- Traditional Native American vessels
Tips for Beginners
Control your force. Don’t whack the pot. Tap gently and consistently.
Rotate frequently. Keep turning the pot to shape it evenly all around.
Choosing Your Clay: Wild vs. Store-Bought
Now that you know the techniques, let’s talk about clay.
Store-Bought Clay (Recommended for Beginners)
Most beginners should start with store-bought clay. Here’s why:
It’s consistent. Every batch works the same way.
It’s ready to use. No digging or processing needed.
It’s affordable. About $15-$30 for 25 pounds.
Types of store-bought clay:
Earthenware: Low-fire clay. Easy to work with. Great for beginners. Usually reddish-brown.
Stoneware: Mid to high-fire clay. Stronger when fired. Gray or buff-colored. Also good for beginners.
Porcelain: High-fire clay. Very smooth but tricky to work with. Not recommended for beginners.
Wild Clay (The Traditional Way)
Finding and digging your own clay connects you to pottery’s ancient roots. But it takes work.
Where to find it:
- River and stream banks
- Road cuts and ditches
- Anywhere you see exposed earth
How to test it: Get a small amount wet and try to roll it into a coil. Can you wrap it around your finger without it cracking? That’s clay!
Processing wild clay:
- Dry it completely
- Grind it into powder
- Mix with 20% temper (sand or volcanic ash)
- Add water and knead
My advice? Start with store-bought clay. Once you’ve made a few successful pots, try wild clay for the experience.
Essential Tools for Traditional Pottery
Good news: You don’t need much!
Basic Tools (Total cost: $20-$50)
Your hands: The most important tool. Free!
Sponge: For keeping clay moist and smoothing surfaces. $2
Wire cutter: For cutting clay and removing pots from the wheel. $5
Rib tool: For smoothing and shaping. You can make one from a gourd or buy one for $8.
Knife or needle tool: For cutting and trimming. $5-$10
Optional Tools
Polishing stone: For burnishing pottery (creating a shiny surface). $10-$15
Rolling pin: For slab building. (You can use a regular kitchen rolling pin!)
Paint brushes: For decorating. $5-$15
DIY Alternatives
You can make many tools yourself:
- Rib tool: Cut a piece from a dried gourd
- Polishing stone: Find a smooth river rock
- Paddle: Carve from a piece of wood
Decorating Traditional Pottery
Once you’ve formed your pot, you might want to decorate it. Here are traditional techniques:
Polishing (Burnishing)
Rub the surface with a smooth stone when the clay is leather-hard. This creates a shiny, smooth surface—no glaze needed!
Slipping
Paint the pot with a thin layer of different colored clay. This is called slip.
Carving
Use a sharp tool to carve designs into leather-hard clay.
Stamping
Press objects into soft clay to create patterns. Ancient potters used shells, rope, and carved wood.
Painting
Paint designs using mineral pigments mixed with a little clay and water.
Tip: Practice on test pieces first before decorating your best pot!
Drying Your Pottery Safely
This step is critical. Most pottery problems happen during drying, not making.
Why Drying Matters
Clay shrinks as it dries. If it dries unevenly, it cracks. If it’s not fully dry before firing, it can explode in the kiln.
How to Dry Pots Properly
Go slow. Cover your pot loosely with plastic to slow drying. Let it dry over several days.
Dry evenly. Rotate the pot so all sides dry at the same rate.
Avoid drafts and sunlight. These cause one side to dry faster than the other.
Know the stages:
- Leather-hard: Firm but still damp. You can carve and polish at this stage.
- Bone-dry: Completely dry. Lighter in color and weight. Ready for firing.
Common Drying Problems
Cracking: Usually caused by uneven drying or walls that are too thick in some places and thin in others.
Warping: Happens when one side dries faster. Cover with plastic and rotate your pot.
How long does it take? Small pieces: 1-3 days. Large pieces: 5-7 days or more.
Traditional Firing Methods
Firing transforms soft clay into hard, permanent pottery. Without firing, clay will dissolve in water.
Primitive Outdoor Firing
This is how pottery was fired for thousands of years:
Pit firing: Dig a hole, build a fire at the bottom, place pots inside, cover with more wood, and let it burn for hours.
Bonfire firing: Stack wood around your pots above ground and light it.
Pros: No equipment needed. Very traditional.
Cons: Unpredictable results. Pots can crack or break. Requires outdoor space and fire safety knowledge.
Modern Alternatives for Beginners
Electric kiln: Most consistent and reliable. Many community studios have kilns you can use for a fee.
Community studios: Pay to use shared equipment. Great for beginners.
Safety Note
Outdoor firing involves real fire. Check local regulations. Have water nearby. Never leave fires unattended.
Common Beginner Mistakes and How to Fix Them
Let’s talk about what goes wrong—and how to fix it.
Problem: Clay is too dry and cracking.
Fix: Add small amounts of water. Knead thoroughly. Seal clay in plastic when not using it.
Problem: Pot cracks while drying.
Fix: Dry more slowly. Check for uneven thickness. Cover with plastic.
Problem: Coils separate after drying.
Fix: Score and slip more carefully. Press coils together firmly.
Problem: Pot explodes in the kiln.
Fix: Make sure it’s completely bone-dry. Check for air pockets.
Problem: Can’t center clay on the wheel.
Fix: Practice. Use more water. Press down and in firmly. Be patient—this skill takes time.
Your First Project: Which Technique Should You Try?
Ready to make your first pot? Here’s my advice:
For absolute beginners: Start with a pinch pot. Make a small bowl. It’ll take 30 minutes and teach you how clay feels.
If you like building: Try coil building. Make a simple vase or planter.
If you enjoy precision: Try slab building. Make a decorative tile or small box.
If you have access to a wheel: Sign up for a wheel-throwing class. Don’t try to teach yourself—it’s much easier with an instructor.
Simple First Projects
- Pinch pot: Small bowl for holding keys or jewelry
- Coil pot: Medium-sized planter for a small houseplant
- Slab project: Square tile with a stamped design
- Wheel-thrown: Simple bowl or cup (with instructor guidance)
Time investment: Plan for 1-3 hours of active work, plus several days of drying, plus firing time.
FAQs: Your Pottery Questions Answered
1. Can I make pottery without a kiln?
Yes! You can make air-dry sculptures or use primitive outdoor firing methods. However, pots fired in a kiln are stronger and more water-resistant.
2. What’s the easiest pottery technique for beginners?
Pinch pots. All you need is clay and your hands.
3. How much does it cost to start making pottery?
You can start for $20-$50 (clay + basic tools). Access to a kiln costs more, but many community studios charge $10-$30 per firing.
4. Can I use regular dirt as clay?
Maybe! Not all dirt is clay. Test it by adding water and trying to mold it. If it holds shape, it might be clay. But store-bought clay is more reliable.
5. How long does it take to learn pottery?
Pinch pots: 1 hour. Coil and slab building: A few weeks of practice. Wheel throwing: 6-12 months to get comfortable.
6. Do I need a pottery wheel to make pots?
No! Most traditional techniques don’t use wheels. Hand-building is a perfectly valid way to make beautiful pottery.
7. What’s the difference between pottery and ceramics?
Pottery specifically refers to clay vessels. Ceramics is a broader term that includes pottery, tiles, sculptures, and any object made from fired clay.
8. Can I make pottery at home?
Yes! Many potters work from home studios. You’ll need space, clay, basic tools, and access to a kiln (either your own or at a community studio).
9. Why did my pot crack during drying?
Usually from uneven drying or uneven thickness. Dry slowly, cover with plastic, and check that walls are consistent thickness.
10. How do I know if my clay is dry enough to fire?
It should be bone-dry—lighter in color and weight. Hold it to your cheek; it shouldn’t feel cool or damp.
11. Can I skip the firing process?
You can make decorative pieces without firing, but they’ll be fragile and dissolve in water.
12. What should I make for my first pottery project?
A small pinch pot bowl. It’s simple, quick, and teaches you the basics of working with clay.
Conclusion: Connecting to Thousands of Years of Tradition
You’ve just learned the five main traditional pottery techniques: pinch, coil, slab, wheel throwing, and paddle/anvil.
These aren’t just techniques—they’re bridges to our past. When you pinch a pot with your hands, you’re doing what humans have done for 29,000 years. When you roll out a coil, you’re using the same method that Japanese potters perfected 14,000 years ago.
The beauty of traditional pottery is its simplicity. You don’t need a factory or expensive equipment. Just clay, your hands, and patience.
So here’s my challenge to you: Pick one technique and try it this week.
Start small. Make a simple pinch pot. Roll out some coils. Cut a clay slab and see how it feels.
You might make something wonky. That’s okay! Every master potter started with wobbly bowls and uneven walls. What matters is that you start.
Because when you work with clay, you’re not just making a pot. You’re continuing a tradition that connects you to every potter who came before you—from ancient Greece to medieval China to your own ancestors.
Now go make something beautiful.