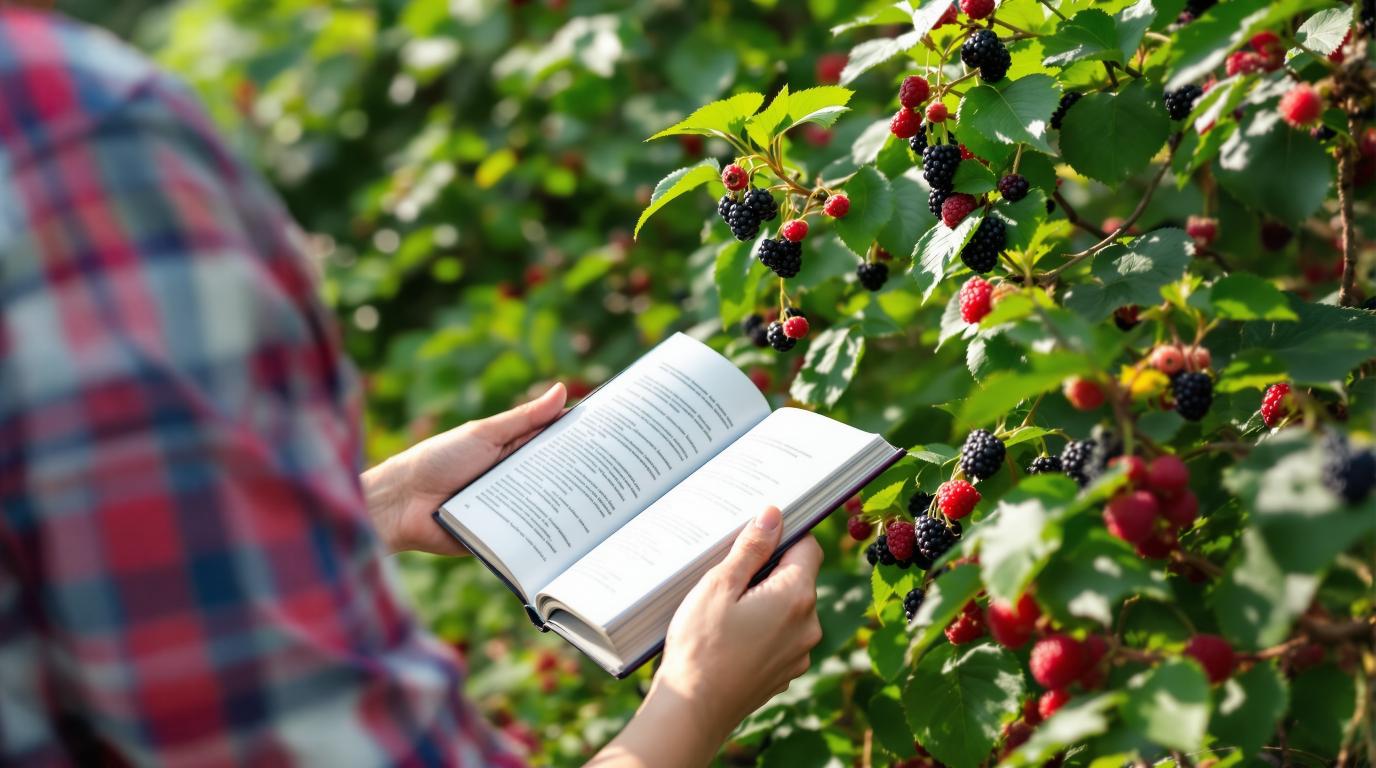
Picture this: you’re hiking through the woods on a beautiful summer day when you spot a bush loaded with plump, juicy berries. They look delicious, and you’re getting a bit hungry. But then a question stops you cold—are these safe to eat? Could they be poisonous?
You’re not alone in this uncertainty. Every year, thousands of people wonder about the berries growing wild around them. Some are incredibly nutritious and delicious, while others can make you seriously ill or even prove fatal. The difference between a tasty snack and a trip to the emergency room often comes down to knowledge.
Here’s the good news: identifying edible wild berries isn’t as mysterious or difficult as it might seem. With the right information and a safety-first approach, you can learn to confidently recognize common edible berries and avoid the dangerous ones. This guide will teach you a simple color-based identification system, show you the most common edible berries, warn you about poisonous lookalikes, and give you the skills to forage safely.
Whether you’re interested in wilderness survival, want to supplement your diet with free natural foods, or simply enjoy connecting with nature, learning to identify wild berries is a rewarding skill. But before we dive into the delicious details, let’s talk about the most important thing: keeping yourself and your loved ones safe.
- Before You Start Foraging
- The Berry Identification System
- Common Edible Wild Berries
- Dangerous Poisonous Berries to Avoid
- The Safe Foraging Process
- Tools and Resources for Berry Identification
- What to Do With Your Harvest
- Emergency Response: If Poisoning Occurs
- Building Your Foraging Skills Over Time
- The Joy and Responsibility of Foraging
Before You Start Foraging
The Golden Rule: When in Doubt, Don’t Eat
Let’s start with the most important rule in berry foraging: if you can’t identify a berry with absolute certainty, don’t put it in your mouth. This might sound overly cautious, but it’s the difference between a pleasant outdoor experience and a medical emergency.
Every year, poison control centers receive thousands of calls about people who ate wild berries they couldn’t identify. Children are especially vulnerable because they’re naturally curious and attracted to colorful berries. Even adults who think they “kind of know” what they’re looking at can make dangerous mistakes.
The consequences of eating the wrong berry range from mild stomach upset to severe organ damage and death. Some poisonous berries work quickly, while others cause problems that develop over hours. Why take that risk when you can learn to identify berries properly?
Remember: there’s no prize for eating unidentified berries. Take your time, learn carefully, and only eat what you can positively identify. Your health and safety are worth more than any wild snack.
Essential Foraging Principles
Before you head out to look for berries, understand these fundamental principles that every successful forager follows:
Always use multiple identification methods. Don’t rely on just one characteristic like color. Look at the entire plant—the leaves, stems, flowers, growth pattern, and habitat. The more features you can confirm, the more confident you can be in your identification.
Start with the easiest berries. Some berries are nearly foolproof to identify, while others require more experience. Begin your foraging journey with berries like blackberries and raspberries that have very few dangerous lookalikes. As your skills and confidence grow, you can tackle more challenging identifications.
Forage with experienced partners when possible. There’s no substitute for learning from someone who has successfully identified and harvested wild berries for years. Many communities have foraging groups or classes where you can learn alongside others. Consider reaching out to your local extension office or nature center for guided foraging walks.
Keep field guides handy. Invest in a quality field guide specific to your region. Apps can be helpful, but books don’t need batteries or cell service. Bring your guide into the field and use it actively—don’t try to memorize everything before you start.
Understanding the Risk Levels
Not all mistakes are equally dangerous. Understanding the different risk levels can help you prioritize what to learn first:
Deadly poisonous berries like water hemlock, nightshade, and baneberries can cause severe symptoms or death even in small quantities. These are your absolute must-know berries—you need to recognize them so you can stay far away.
Mildly toxic berries might cause nausea, vomiting, or diarrhea but typically won’t kill a healthy adult. Examples include holly berries and certain unripe berries. Still unpleasant, but usually not life-threatening.
Edible but unpalatable berries won’t hurt you, but they taste terrible—bitter, sour, or just plain bad. Some berries need cooking to become palatable, like elderberries, which are fine when properly prepared but can cause stomach upset when raw.
Delicious edible berries are what we’re after! These are safe, tasty, and often highly nutritious. Wild blackberries, raspberries, blueberries, and strawberries fall into this category and are perfect for beginners.
The Berry Identification System
Now let’s learn a practical system for evaluating berries you find in the wild. This color-based approach gives you a quick first assessment, but remember—it’s just the starting point, not the final answer.
The Color Safety Guide
Blue, Black, and Purple: Your Safest Bet (90% Edible)
If you find berries with dark blue, black, or deep purple skin, you’re looking at the safest color category. About 90% of berries in these colors are edible, making them the best choice for beginners.
Why are dark berries usually safe? Throughout evolution, plants that produced dark edible berries were more successful because birds and animals spread their seeds. Many toxic plants, on the other hand, developed other warning colors.
Common safe dark berries include blackberries, blueberries, black raspberries, elderberries (when cooked), and huckleberries. These berries often have pleasant, sweet-to-tart flavors and are packed with antioxidants.
However—and this is important—there are exceptions. The deadly nightshade berry looks similar to a blueberry but contains dangerous alkaloids. This is why you can never rely on color alone. Nightshade has a distinctive lack of a crown (the little star-shaped indent on top of blueberries), and it grows on plants with purple flowers and pointed leaves.
When you find dark berries, examine the whole plant carefully. Check the leaves, stems, and growth pattern. Use your field guide to confirm the identification before tasting anything.
Red and Orange: Proceed with Caution (50/50 Chance)
Red and orange berries are trickier—about half are edible, and half are toxic. This makes them a much riskier choice, especially for beginners.
The edible red berries you’ll commonly encounter include red raspberries, wild strawberries, salmonberries, and ripe red huckleberries. These are wonderful finds when properly identified. Red raspberries, with their hollow centers and aggregate structure, are generally safe. Wild strawberries look just like tiny versions of store-bought strawberries.
But here’s where it gets dangerous: many of the most toxic berries are also red. Baneberries, which can cause immediate cardiac problems, are bright red or white. Holly berries, used in Christmas decorations, are shiny red and quite poisonous. Pokeweed berries start out red and turn purple as they mature, becoming more toxic along the way.
The key with red berries is careful, detailed identification. Never assume a red berry is safe just because some red berries are edible. Look at every other characteristic—leaf shape, stem structure, growth habit, and season. When in doubt, skip it.
White, Yellow, and Green: Just Say No (90% Poisonous)
This is the easiest guideline to remember: avoid white, yellow, and green berries. About 90% of berries in these colors are poisonous, and the few exceptions aren’t worth the risk for beginners.
Poison ivy produces small white or cream-colored berries that cause severe reactions. Mistletoe berries are white or pale yellow and contain toxins that can damage your organs. Many white berries contain compounds that irritate the digestive system or worse.
There are very rare exceptions—some white and yellow varieties of wild currants and gooseberries exist—but unless you’re an experienced forager with expert guidance, treat all light-colored berries as off-limits. The risk-to-reward ratio just isn’t there.
This color rule alone can keep you safe from many dangerous berries. Teach it to your children: “Blue and black, good for a snack. Red, maybe instead. White and yellow, not for this fellow!”
Berry Shape and Texture Matters
Color isn’t the only clue. The shape and texture of berries tell you a lot about what you’re looking at.
Aggregate berries are made up of many tiny bumps clustered together, like raspberries, blackberries, and salmonberries. Here’s great news: berries with this raspberry-like structure are almost 99% safe to eat worldwide. If you see something that looks like a raspberry—with that distinctive bumpy, clustered appearance—it’s very likely edible.
Single round berries require more caution. Blueberries, huckleberries, and many other berries grow as individual spheres. While plenty of these are safe (like blueberries), many dangerous berries also fit this description. You’ll need to look at other features more carefully.
Shiny versus dull can provide hints too. Blackberries have a slight shine when ripe, while blueberries have a dusty, dull coating called “bloom.” Holly berries are extremely shiny and waxy-looking. While not a definitive test, shininess combined with other warning signs might indicate danger.
Smooth versus bumpy texture matters. Aggregate berries are naturally bumpy. Smooth, round berries could be many things—some safe, some dangerous. Use this as one piece of the puzzle, not the answer itself.
Plant Structure Identification
Berries don’t float in mid-air—they grow on plants. Looking at the entire plant gives you crucial identification information.
Canes versus bushes versus vines versus trees: Raspberries and blackberries grow on canes—long, often arching stems that can be woody or herbaceous. Blueberries grow on woody bushes that can range from knee-high to taller than a person. Some berries, like dewberries, grow on trailing vines along the ground. Mulberries and elderberries can grow on large bushes or small trees.
Thorns tell a story. Blackberries and most raspberries have thorns or prickles, while thimbleberries (a raspberry relative) are thornless. If you’re looking at a raspberry-like berry on a thornless plant, you might have thimbleberries—which are edible but less flavorful than true raspberries.
Leaf arrangement and shape are critical for identification. Raspberry and blackberry leaves are compound, with three to five leaflets arranged along a central stem. The leaflets have toothed edges. Blueberry leaves are simple, oval, and smooth-edged. Elderberry leaves are also compound but larger, with 5-11 leaflets.
Stem color and texture can reveal important differences. Elderberry stems are woody with rough bark. Water hemlock, a deadly poisonous plant, has smooth green or purple-streaked stems without bark. This single difference can save your life when you’re trying to identify elderberries.
Growth height and habitat provide context. Blueberries love acidic soil and often grow in sandy or rocky areas. Blackberries prefer forest edges and disturbed areas with good sunlight. Understanding where plants grow helps you narrow down possibilities.
Smell and Taste Clues
Your nose can be a useful tool, but your tongue should be used with extreme caution.
Safe berries smell pleasant or neutral. Ripe blackberries smell sweet and fruity. Strawberries have their distinctive aroma. If a berry smells harsh, chemical-like, or unpleasant, that’s nature’s warning system telling you to back away.
Bitter or chemical smells equal danger. If crushing a leaf or berry releases an acrid, bitter, or chemical odor, don’t eat it. Many toxic plants produce unpleasant smells as a defense mechanism.
The tiny taste test is for advanced foragers only. Some experienced foragers will touch a tiny piece of berry to their lips or tongue tip, wait a few minutes, and check for burning or unpleasant sensations. However, this technique can be dangerous with certain berries and should never be attempted by beginners.
When NOT to taste: Never taste anything with a milky sap, plants with a chemical smell, or any berry you cannot positively identify. The universal edibility test (which we’ll cover later) is time-consuming but much safer than random tasting.
Common Edible Wild Berries
Now for the fun part—let’s explore the most common edible wild berries you’re likely to encounter. We’ll start with the safest, easiest berries for beginners and progress to those requiring more knowledge.
The “Absolutely Safe” Starter Berries
Berry #1: Blackberries
Blackberries are perfect for beginning foragers. They’re easy to identify, delicious, common across most of the United States, and have no truly dangerous lookalikes.
How to identify blackberries: Look for large, shiny, deep purple-to-black berries made up of many tiny clustered drupelets (that bumpy texture). Each berry has a small white or greenish core inside. When you pick a ripe blackberry, it comes off the plant with this core attached—that’s a key difference from black raspberries.
The plants grow on thorny canes that can arch upward or trail along the ground. The canes are woody and covered in sharp prickles that will definitely scratch you if you’re not careful. The leaves are compound with three to five leaflets that have sharply toothed edges.
Best time and places: Blackberries ripen in mid to late summer, typically July through August, though timing varies by region. Look for them along forest edges, in clearings, near trails, along fence lines, and in sunny spots where the forest meets open land. They love disturbed areas and will often colonize abandoned lots or roadsides (though avoid foraging near busy roads due to pollution).
Ripeness indicators: Blackberries go through several color stages. They start green, turn red, and finally ripen to deep purple-black. Here’s the trick: just because a berry is black doesn’t mean it’s ripe. Taste a few from each patch—truly ripe blackberries are sweet and juicy, while underripe ones (even if black) are sour and hard. Pick only the softest, darkest berries that come off easily with a gentle tug.
Lookalikes and relatives: Dewberries look similar but grow on low, trailing vines instead of upright canes. Good news—dewberries are also edible and tasty! Other blackberry relatives include marionberries, boysenberries, and loganberries, all edible. There are no poisonous berries that truly resemble blackberries.
Harvesting tips: Wear long sleeves and sturdy gloves to protect yourself from thorns. Pick berries into a shallow container so the ones on the bottom don’t get crushed. Leave some berries for wildlife and for the plant to reseed itself. Blackberries are best eaten fresh within a day or two, or frozen immediately for longer storage.
Berry #2: Raspberries (Red and Black)
Raspberries are another excellent beginner berry with distinctive features that make them easy to identify.
Red raspberry identification: Red raspberries have that classic raspberry shape—small, round, and made up of many tiny bumpy drupelets. The magic identification trick is the hollow center. When you pick a ripe raspberry, it slides off a small white core, leaving a hollow cup shape. This hollow center is your confirmation that you have a true raspberry.
The plants grow on canes with small thorns (though some cultivated varieties are thornless). The canes can be green or have a whitish coating. Leaves are compound with three to five leaflets that are lighter green underneath.
Black raspberry identification: Black raspberries (sometimes called blackcaps) look like blackberries but have that telltale hollow center. They’re smaller than blackberries, have a dustier appearance without the shine, and ripen earlier in the summer. The canes often have a whitish coating and arch downward, sometimes rooting where they touch the ground.
The key difference between black raspberries and blackberries: Hold the berry up and look at the bottom. If you can see through it (hollow center), it’s a raspberry. If it has a solid white or green core, it’s a blackberry. Both are safe and delicious, but this difference helps you know exactly what you’re eating.
Where to find them: Raspberries love edges—forest edges, field edges, stream edges. They grow in partial shade to full sun. Red raspberries ripen in early to mid-summer (June-July in most areas), while black raspberries ripen a bit earlier. Look for them in areas with rich, moist soil.
Thimbleberry lookalikes: In western and Great Lakes regions, you might encounter thimbleberries. They look similar to raspberries but are flatter and wider, like a thimble. The plants are completely thornless. Thimbleberries are edible but delicate and somewhat bland—better eaten fresh on the trail than taken home. The thornless canes are the giveaway.
Harvesting and using: Ripe raspberries are soft and come off easily. They’re extremely delicate and don’t travel well, so either eat them fresh or freeze them immediately. They’re perfect for jams, pies, smoothies, or just popping in your mouth as you walk through the woods.
Berry #3: Blueberries and Huckleberries
Wild blueberries and their close relatives, huckleberries, are nutritional powerhouses and relatively easy to identify once you know what to look for.
Wild blueberry identification: Wild blueberries are smaller than store-bought varieties and grow on low bushes, typically under two feet tall (though highbush blueberries can grow much taller). The berries are round, blue-to-blue-black, and have a distinctive “belly button”—a five-pointed crown at the blossom end that looks like a tiny star.
The berries often have a dusty, whitish coating called bloom. The bushes have small, oval leaves with smooth edges. When you bite into a wild blueberry, the inside flesh is typically greenish or pale, not dark purple throughout.
Huckleberry identification: Huckleberries look very similar to blueberries but often grow on taller bushes in mountainous or higher-elevation areas. The berries are usually darker and have tiny, hard seeds you can feel when you eat them (blueberry seeds are so tiny they’re barely noticeable). Some huckleberries are reddish instead of blue-black.
Finding them in the wild: Wild blueberries love acidic soil and often grow in areas with pine trees, in rocky or sandy soils, or in areas that have been burned in the past. Huckleberries are more common in mountain regions, particularly in the Rocky Mountains and Pacific Northwest. Both berries ripen in mid to late summer.
Dangerous lookalike warning—Nightshade: Here’s where you need to be careful. Deadly nightshade produces berries that can look similar to blueberries at first glance—they’re round and dark. However, nightshade berries lack the characteristic crown or belly button. They grow on plants with purple, bell-shaped flowers and pointed leaves. The entire nightshade plant is toxic. Always check for that crown before you eat any small, round, dark berry.
Harvesting regulations: In some areas, especially national forests with heavy huckleberry populations, there are harvest limits and permits required. Check local regulations before you pick. This is particularly important in the Pacific Northwest, where huckleberries are both culturally significant and heavily harvested.
Nutritional benefits: Wild blueberries and huckleberries are loaded with antioxidants, vitamin C, and fiber. They’re often higher in nutrients than cultivated varieties because they’ve had to survive harsher conditions. They freeze beautifully and make excellent jams, pies, pancakes, or trail snacks.
The “Proceed with Knowledge” Berries
Berry #4: Elderberries
Elderberries are incredibly valuable for making immune-boosting syrups and delicious jams, but they require careful identification and proper preparation.
Black/blue elderberry identification: Elderberries grow in large, flat-topped clusters called umbels. When ripe, the tiny berries are dark purple to black and droop downward. Each individual berry is small—about the size of a BB pellet or peppercorn. The clusters can contain dozens of berries.
The most important identification feature is the stems. Elderberry plants have woody stems covered in bark. They grow as large shrubs or small trees, often 10-15 feet tall. The bark is grayish and rough. The leaves are compound, with 5-11 leaflets arranged in pairs along the stem, with one leaflet at the tip.
MUST COOK WARNING: This is critical—do not eat raw elderberries. Raw berries, bark, leaves, and roots contain cyanogenic glycosides that can cause nausea, vomiting, and diarrhea. Cooking breaks down these compounds and makes the berries safe. The flowers, however, can be eaten raw and are delicious fried into fritters.
Deadly lookalike #1—Pokeweed: Pokeweed berries are perhaps the most dangerous elderberry lookalike. They also grow in clusters and are dark purple when ripe. However, pokeweed berries hang in long, drooping strands (like grapes), not flat-topped clusters. The absolute telltale sign is the stem—pokeweed has bright pink to magenta stems that are unmistakable. Pokeweed is highly toxic and becomes more poisonous as it matures. If you see those pink stems, walk away!
Deadly lookalike #2—Water Hemlock: Water hemlock is one of North America’s most poisonous plants. While its flower clusters look somewhat similar to elderflower clusters, the key difference is the stem. Water hemlock has smooth, green or purple-streaked herbaceous stems without any bark. Elderberry stems are woody with rough bark. Never harvest elderberries without carefully checking that the stems are woody and covered in bark.
How to prepare safely: Harvest entire clusters when berries are dark and soft. At home, remove berries from stems (the stems contain more of the toxic compounds). Cook berries into syrup, jam, or pie filling. The heat breaks down the harmful compounds, making them safe and delicious.
Health benefits: Properly prepared elderberry syrup is famous for its immune-boosting properties. It’s rich in vitamin C, vitamin A, and antioxidants. Many people take elderberry syrup during cold and flu season.
Berry #5: Wild Strawberries
Wild strawberries are like discovering treasure—they’re tiny, but the flavor is incredibly intense compared to grocery store strawberries.
Identification: Wild strawberries look just like miniature versions of cultivated strawberries. They’re red, with tiny seeds dotting the outside, and have the characteristic conical shape. They’re usually about the size of your pinky fingernail or smaller.
The plants grow low to the ground with three-part leaves that have toothed edges—similar to cultivated strawberry plants but smaller. White, five-petaled flowers bloom in spring before the berries appear. The plants often grow in patches connected by runners.
Where to find them: Look for wild strawberries in sunny areas with well-drained soil—meadows, forest edges, fields, and even grassy areas in parks. They often grow along trails and in clearings. Peak season is late spring to early summer, though you might find a few throughout the summer.
The mock strawberry confusion: There’s a plant called mock strawberry (or Indian strawberry) that produces red, bumpy berries that look similar. Mock strawberries have yellow flowers instead of white, and the berries are harder and much less flavorful. They’re not poisonous, just disappointing. Look for white flowers to confirm you have true wild strawberries.
Why they’re special: Wild strawberries pack an incredibly sweet, intense flavor into a tiny package. Many foragers consider them far superior to commercial strawberries. They’re worth the effort to gather, even though you’ll need quite a few to make a meaningful amount.
Best uses: Eat wild strawberries fresh as you find them, or save enough to top yogurt, cereal, or desserts. They also make an intensely flavorful jam, though you’ll need a good-sized harvest. Some people freeze them to add to smoothies.
Dangerous Poisonous Berries to Avoid
Now let’s discuss the dark side of berry foraging—the poisonous berries you must learn to recognize and avoid. Knowing what not to eat is just as important as knowing what’s safe.
Deadly Poisonous Berries
Poison #1: Nightshade Berries
Several nightshade species produce poisonous berries, and they’re genuinely dangerous. Deadly nightshade (belladonna) and bittersweet nightshade both produce toxic berries.
What they look like: The berries are small, round, and shiny—either deep purple-black (looking deceptively like blueberries) or bright red. The key identification feature is the flowers: nightshade plants have distinctive purple or violet flowers with five petals and bright yellow centers that form a cone shape.
The deadly difference: Nightshade berries lack the crown or belly button that blueberries have. The leaves are pointed and oval, not the small, smooth oval of blueberry bushes. The plants often grow along fences, in disturbed areas, or in woodlands.
What makes them dangerous: Nightshades contain alkaloids like atropine and solanine that affect the nervous system. Symptoms include dilated pupils, confusion, hallucinations, rapid heartbeat, and in severe cases, respiratory failure. Even a few berries can cause serious problems, especially in children.
How to stay safe: Learn to recognize those distinctive purple flowers with yellow centers. If you see them, mark the area mentally and avoid all berries in that location. Teach children never to eat any purple berries that grow on plants with purple flowers.
Poison #2: Pokeweed Berries
Pokeweed (sometimes called pokeberry) is common across the eastern United States and is responsible for many accidental poisonings, often because people confuse it with elderberries.
Identification: Pokeweed produces clusters of dark purple, almost black berries that hang in long strands similar to grapes. Each berry is round and about the size of a pea. The plant grows as a large, bushy herb that can reach 6-10 feet tall.
The telltale sign—Pink stems! This is your warning beacon: pokeweed has bright pink to magenta or reddish-purple stems. These colored stems are completely distinctive and unlike any edible plant. If you see those pink stems, you’re looking at pokeweed, and you should not harvest the berries.
Increasing toxicity: Here’s something scary—pokeweed becomes more poisonous as it matures. The berries start out red and turn purple-black as they ripen, and the toxicity increases throughout this process. The roots are the most toxic part of the plant, but all parts contain harmful compounds.
Symptoms: Eating pokeweed berries causes burning in the mouth, stomach cramps, nausea, vomiting, diarrhea (sometimes bloody), and weakness. Large amounts can cause more severe problems including difficulty breathing and seizures.
Why people make mistakes: The berry clusters do look somewhat similar to elderberries if you’re not paying attention. However, elderberries grow in flat-topped clusters on woody stems, while pokeweed berries hang in drooping strands on those distinctive pink stems. Always check the stems!
Poison #3: Water Hemlock Berries
Water hemlock is considered one of the most poisonous plants in North America. It’s part of the carrot family, which also includes elderflower—leading to dangerous confusion.
What it looks like: Water hemlock produces umbrella-shaped clusters of small white flowers that later become clusters of tiny, ribbed seeds (not true berries, but often mistaken for them). The plant grows near water—streams, ditches, wetlands—and can reach 3-8 feet tall.
The critical difference: Water hemlock has smooth, hollow, green or purple-streaked stems without any bark. The stems are herbaceous (non-woody). In contrast, elderberry has woody stems covered in rough, gray bark. If you’re ever confused between elderberry and water hemlock, the stem test is the deciding factor.
Extreme toxicity: Water hemlock contains cicutoxin, which affects the nervous system. Even a small amount can cause violent seizures, vomiting, and death within hours. There is no antidote. This is not a plant to take chances with.
How to avoid it: Only harvest elderberries from plants with clearly woody, bark-covered stems. If the stems are smooth, green, or purple-streaked without bark, walk away immediately. When foraging near water, be extra cautious and triple-check your identification.
Poison #4: Holly Berries
You’ve probably seen holly plants in Christmas decorations, but those pretty red berries are definitely not for eating.
Identification: Holly berries are bright red, shiny, and round—about the size of a pea. They grow in small clusters close to the stems. The plant’s most recognizable feature is its dark green, glossy leaves with sharp, spiny edges (though some holly varieties have smooth leaves).
Where you’ll find them: Holly plants are extremely common in landscaping, parks, and yards, especially in the southern and eastern United States. Some wild varieties also exist in forests.
Why they’re dangerous: Holly berries contain saponins that cause severe stomach upset. While rarely fatal to adults, they can be quite dangerous for children. Symptoms include nausea, vomiting, diarrhea, and drowsiness.
Staying safe: Holly plants are so common in landscaping that children need to learn early never to eat these berries, even though they look appealing. If you’re foraging in areas near homes or parks, be aware that holly berries might be present.
Poison #5: Baneberries (White and Red)
Baneberries have an ominous name for good reason—they’re highly toxic and can cause immediate cardiac effects.
White baneberry (Doll’s Eyes): These bizarre berries are white with a dark spot, making them look like eyeballs on a stem—hence the creepy “doll’s eyes” nickname. They grow on bright red or pink, thick stems. The entire appearance is unusual enough that most people wouldn’t be tempted to eat them, but children might find them intriguing.
Red baneberry: These are shiny red berries on more slender green stems. They look somewhat similar to other red berries, making them more potentially dangerous.
Why they’re dangerous: Baneberries contain cardiogenic toxins that can cause immediate effects on the heart, including increased heart rate and cardiac arrest. They also cause burning in the mouth, stomach cramps, headache, dizziness, and hallucinations.
Habitat: Baneberries grow in woodland areas, often in moist, shady spots. The plants have large, compound leaves with many leaflets.
The bottom line: If you see white berries with dark spots on red stems, or unfamiliar red berries in the woods, leave them alone. The unusual appearance of doll’s eyes should be enough warning.
Other Dangerous Berries to Know
Virginia Creeper: Produces clusters of small, dark blue berries that look somewhat grape-like. The plant climbs on trees and fences with distinctive five-part leaves. The berries contain oxalic acid and are toxic, causing kidney damage.
Yew Berries: Red, cup-shaped berries with a hollow center containing a single seed. The fleshy part is edible, but the seed is deadly poisonous. The risk of accidentally biting the seed makes yew berries extremely dangerous. Yew plants have needle-like evergreen leaves.
Mistletoe Berries: White, pink, or red berries growing on parasitic plants in tree branches. They contain phoratoxin, which damages organs. Despite mistletoe’s romantic associations, the berries are definitely toxic.
Ivy Berries: Small, white to greenish berries growing on English ivy or poison ivy. Both are toxic and should be avoided entirely.
The Safe Foraging Process
Now that you know what to look for and what to avoid, let’s walk through a safe, systematic approach to foraging wild berries.
Pre-Foraging Preparation
Before you head out into the field, do your homework. Research which berries grow in your specific region and when they’re in season. Buy or borrow a quality field guide specific to your area—the Peterson Field Guide series, local Audubon guides, or your state’s native plant guide are all excellent choices.
Choose safe foraging locations away from roadsides (exhaust pollution), agricultural fields (pesticide drift), railroad tracks (herbicide treatment), and lawns or parks that might be sprayed with chemicals. State parks, nature preserves, and wild areas are ideal. Always check whether foraging is permitted in your chosen location.
Gather your equipment: a field guide, smartphone or camera for photos, small containers or baskets, gloves if you’ll be dealing with thorny plants, and water. Some foragers also bring a small notebook to record locations of good berry patches for future reference.
In-the-Field Identification Steps
When you find a berry that interests you, don’t immediately pop it in your mouth. Follow this systematic process:
Step 1: Photograph everything. Take pictures of the berries themselves, the leaves, the stems, the overall plant structure, and the surrounding habitat. These photos help you confirm identification at home and build your visual library for the future.
Step 2: Examine the entire plant. Look at the leaves—are they simple or compound? What shape and size? Check the stems—woody or herbaceous? Bark or smooth? Thorny or thornless? Look at how the berries are arranged—single, in clusters, in flat tops, in hanging strands?
Step 3: Note the location and habitat. Is this a sunny area or shady? Near water or on dry land? Forest edge or deep woods? Different berries prefer different environments, and this context aids identification.
Step 4: Check berry characteristics. What color is the berry? What size and shape? Does it have a crown or belly button? Is it shiny or dull? Smooth or bumpy? Does it have a hollow center? How does it smell?
Step 5: Consult your field guide right there in the field. Don’t rely on memory. Read the descriptions, look at the pictures, and carefully compare what you’re seeing with what the guide shows. Pay special attention to warnings about poisonous lookalikes.
Step 6: When uncertain, don’t harvest. If anything doesn’t match perfectly, if you have any doubts, or if you can’t find the berry in your guide, leave it alone. Take your photos home, do more research, and come back another day when you’re certain.
Step 7: For your first harvest of a new berry species, take only a small amount. Even when you’re confident in your identification, start small. Bring your sample home, do additional research, maybe post photos to a foraging group for confirmation, and only consume after you’re absolutely sure.
The Universal Edibility Test (When Necessary)
This test is time-consuming and should only be used in genuine survival situations or when you have absolutely no other way to identify a plant. For regular foraging, proper identification is always better.
If you must use this test, here’s how it works:
Preparation: Test only one plant part at a time. Fast for eight hours before testing. Have water available.
Skin contact test (15 minutes): Rub the crushed plant part on the sensitive skin of your inner wrist or inner elbow. Wait 15 minutes. If you experience burning, itching, or irritation, the plant is toxic. Stop the test.
Lip test (3 minutes): If the skin test passes, touch a small piece to your lips. Wait 3 minutes. Any burning, tingling, or unpleasant sensation means stop.
Tongue test (15 minutes): Place a tiny piece on your tongue without swallowing. Wait 15 minutes. Check for burning, numbness, or bad reactions.
Chew and spit test (15 minutes): Chew a small amount and hold it in your mouth without swallowing. Wait 15 minutes, then spit it out. Any negative sensations mean the plant fails the test.
Swallow small amount (5 hours): If all previous steps pass, swallow one small piece (about 1/8 teaspoon). Wait five hours. If you experience any stomach upset, nausea, burning, or other symptoms, induce vomiting and drink water.
Eat full portion (8 hours): If the small amount causes no problems, eat about a quarter cup. Wait eight hours. If still no symptoms appear, the plant is likely safe.
Why this takes so long: Some plant toxins have delayed effects. The time intervals give each stage of digestion a chance to reveal problems before you’ve consumed a dangerous amount.
Important caution: This test is not foolproof. Some plants have cumulative toxins that build up over time, and some people have individual sensitivities. Use this test only as an absolute last resort.
Safe Harvesting Practices
Once you’ve positively identified an edible berry, harvest responsibly:
Follow the Rule of Thirds: Take only one-third of the berries you find. Leave one-third for other foragers and one-third for wildlife. Birds, bears, and other animals depend on these berries for food. Over-harvesting can damage plant populations and harm wildlife.
Use clean techniques: Pick berries gently to avoid damaging the plant. Place them in clean containers. Don’t strip entire branches—just take the ripe berries.
Avoid contaminated areas: Never forage within 50 feet of roads, near agricultural spray zones, on treated lawns, or in areas where dogs frequently visit. Pollution and chemicals make berries unsafe regardless of species.
Respect private property: Only forage on public land where it’s permitted, or on private land with explicit permission. Trespassing is illegal and gives foragers a bad reputation.
Check local regulations: Some areas require permits for berry harvesting, have seasonal restrictions, or limit the amount you can take. National forests, state parks, and nature preserves all have different rules. Research before you forage.
Leave no trace: Don’t trample vegetation, break branches, or leave trash. Treat the environment with respect so these wild berry patches remain healthy for future years.
Tools and Resources for Berry Identification
Having the right tools makes foraging safer and more successful. Here’s what you need:
Essential Field Guides
Invest in at least one quality field guide specific to your region. General guides are useful, but regional guides include the exact species you’ll encounter in your area. Look for guides with clear color photos rather than just illustrations.
Top recommendations include Peterson Field Guide to Edible Wild Plants, National Audubon Society Field Guides, and state-specific wildflower or native plant guides. Many state extension services also publish free identification guides for local edible plants.
When choosing a guide, flip through it before buying. Make sure the photographs are clear, the descriptions are detailed, and poisonous lookalikes are clearly marked. The book should be small enough to carry comfortably but large enough for readable text and photos.
Digital Resources and Apps
Several excellent apps can help with plant identification. iNaturalist is a community-based app where experts can help confirm your identifications. PlantNet uses artificial intelligence to identify plants from photos. Picture This is another popular option.
However, never rely solely on apps. They’re helpful tools but not perfect. Use them in combination with field guides and your own knowledge. Take multiple photos from different angles to get the best identification results.
Join online foraging communities on Facebook, Reddit, or dedicated foraging forums. These groups can help verify identifications and share information about local berry patches. Always provide clear photos and location information when asking for help.
Your local extension office website is a gold mine of information. Extension offices provide free, science-based information about edible and poisonous plants in your area. Many offer plant identification services—you can email photos or bring samples for expert identification.
Learning from Experts
Nothing beats learning from someone with experience. Look for foraging workshops, nature walks, or classes in your area. Many nature centers, botanical gardens, and outdoor education organizations offer guided foraging experiences.
Check your local extension office for foraging classes or workshops. Some areas have mycological societies that include wild plant walks along with mushroom foraging. Community colleges sometimes offer continuing education courses on edible wild plants.
Consider finding a mentor—an experienced forager who’s willing to teach. Many enthusiastic foragers are happy to share knowledge with interested beginners. You might find mentors through foraging groups, nature organizations, or by simply asking around in outdoor communities.
What to Do With Your Harvest
You’ve successfully identified and harvested edible wild berries—now what? Here’s how to use and preserve your bounty.
Immediate Use and Fresh Eating
The best way to enjoy many wild berries is fresh and raw. Blackberries, raspberries, blueberries, and strawberries are perfect eaten right away. Rinse them gently in cool water to remove any debris or tiny insects, pat dry, and enjoy.
Wild berries make excellent additions to yogurt, cereal, oatmeal, or salads. Toss them into smoothies for a nutritional boost and intense flavor. Use them as toppings for ice cream, pancakes, or waffles. Some foragers like to mix wild berries with a little sugar and cream for a simple but elegant dessert.
Remember that wild berries are often more tart than cultivated varieties, so you might want to add a touch of sweetener depending on your taste and the specific berries.
Preservation Methods
If you’ve harvested more berries than you can eat fresh, preserve them for later enjoyment:
Freezing (easiest and best): Spread berries in a single layer on a baking sheet and freeze until solid (about 2-3 hours). Then transfer to freezer bags or containers. This method prevents berries from freezing into one big clump and preserves their shape and nutrition. Frozen wild berries last 8-12 months.
Making jam or jelly: Wild berries make intensely flavored preserves. Follow standard canning procedures for safety. Blackberry jam, raspberry jelly, and elderberry syrup are all traditional favorites. Because wild berries are often more tart than store-bought, you might need to adjust sugar amounts in recipes.
Dehydrating: Some berries, like blueberries and huckleberries, dehydrate well. Use a food dehydrator or very low oven (140-150°F) to dry them until they’re leathery. Dried wild berries add flavor to trail mix, granola, baked goods, or tea.
Making syrup: Elderberry syrup is famous for immune support. To make it safely, simmer elderberries with water and spices, strain, and add honey. The cooking process removes toxic compounds. Store in the refrigerator and use within a few weeks, or freeze in ice cube trays for longer storage.
Important Safety Reminder
Even after harvest, safety matters. Always wash wild berries thoroughly before eating to remove dirt, bird droppings, and any tiny insects. Check berries for mold or spoilage—discard any that look questionable.
Remember that elderberries MUST be cooked before consumption. Don’t freeze raw elderberries thinking you’ll cook them later—someone might eat them by mistake. Always process elderberries into cooked products immediately after harvest.
If you’re sharing your harvest with others, make absolutely certain of your identification first. Never give wild berries to someone else unless you’re 100% confident in what you’ve gathered.
Emergency Response: If Poisoning Occurs
Despite all precautions, accidents can happen. Here’s what to do if someone eats a potentially poisonous berry.
Recognizing Berry Poisoning Symptoms
Symptoms of berry poisoning can appear anywhere from minutes to several hours after ingestion. Watch for:
- Nausea and vomiting
- Diarrhea (sometimes bloody)
- Abdominal pain and cramping
- Burning sensation in mouth or throat
- Dizziness, confusion, or disorientation
- Difficulty breathing or swallowing
- Rapid or irregular heartbeat
- Dilated pupils
- Severe headache
- Seizures or loss of consciousness
Symptoms vary depending on which plant was consumed. Some poisonings cause immediate burning and discomfort, while others have delayed effects. Children typically show symptoms faster and more severely than adults due to their smaller body size.
Immediate Actions to Take
If you suspect berry poisoning:
Call Poison Control immediately: 1-800-222-1222 (this number works throughout the United States). Have this number saved in your phone before you go foraging. Poison Control operates 24/7 and can provide expert guidance for your specific situation.
Do not induce vomiting unless specifically instructed by Poison Control or medical professionals. Vomiting can sometimes make certain poisonings worse by causing additional damage to the throat and esophagus.
Bring the berry or plant for identification. If possible, collect a sample of the berry and the plant it came from. This helps medical professionals determine the specific toxin and best treatment. Take photos if you can’t bring the actual plant.
Note the time of ingestion and approximately how many berries were eaten. This information is crucial for treatment decisions.
For severe symptoms (difficulty breathing, loss of consciousness, seizures, severe vomiting or diarrhea), call 911 immediately. Don’t wait to see if symptoms improve—these are medical emergencies.
Stay calm and keep the person calm. Panic increases heart rate and can speed the absorption of some toxins. Keep the person still and comfortable while waiting for help.
Prevention: The Best Medicine
The best way to handle berry poisoning is to prevent it from happening:
- Never eat berries you cannot identify with absolute certainty
- Teach children never to put wild berries in their mouths without adult permission
- Supervise young foragers at all times
- Keep pets away from unknown berries (many berries toxic to humans are also toxic to dogs and cats)
- When in any doubt, don’t eat
Consider keeping activated charcoal in your first aid kit if you regularly forage in remote areas. However, only use it if instructed by Poison Control—it’s not appropriate for all types of poisoning.
Building Your Foraging Skills Over Time
Learning to identify wild berries is a journey, not a destination. Here’s how to build your skills progressively and safely.
Start with just one or two berry species. Master identifying blackberries and raspberries before moving on to more challenging berries. Spend time observing these plants through different seasons—watch them flower, fruit, and go dormant. This deep familiarity makes identification second nature.
Practice throughout the year, not just during berry season. In winter and early spring, you can identify berry plants by their structure, bark, and dried remains. In spring, learn to recognize the flowers that precede the berries. This year-round observation builds comprehensive knowledge.
Keep a foraging journal with photos, notes, and locations. Document what you find, when you find it, and what you learn. Review your journal before each foraging season to refresh your memory.
As your confidence grows, add new species gradually. Learn the common berries in your area first, then expand to less common varieties. There’s no rush—it’s better to know five berries perfectly than twenty berries poorly.
Consider the seasons as your teacher. Each berry has its moment—strawberries in late spring, raspberries in early summer, blackberries in late summer, elderberries in fall. Let the calendar guide your learning progression.
Most importantly, never stop being cautious. Even experienced foragers double-check their identifications and consult guides regularly. Overconfidence leads to mistakes. Maintain that healthy respect for the power of nature—both its gifts and its dangers.
The Joy and Responsibility of Foraging
Learning to identify edible wild berries connects you to nature in a profound way. You start noticing plants you’ve walked past for years. You become attuned to seasons and ecosystems. You participate in an ancient human tradition that sustained our ancestors for millennia.
Wild berries taste different from store-bought varieties—often more intense, more complex, sometimes sweeter, sometimes tarter. They come with the satisfaction of finding and gathering your own food. They’re free, nutritious, and available to anyone willing to learn.
But with this privilege comes responsibility. We must forage sustainably, leaving enough for wildlife and plant reproduction. We must forage legally, respecting property rights and regulations. We must forage safely, never taking unnecessary risks with unidentified plants.
Remember where you started reading this guide—standing in front of a berry bush, wondering if those berries were safe to eat. Now you have the knowledge to answer that question. You understand color-based safety guidelines, you know the key edible berries and their poisonous lookalikes, and you have a systematic process for identification.
Start with the easiest berries—those blackberries and raspberries with their distinctive aggregate structure and hollow centers. Practice identifying them even when you’re not planning to harvest. Build your confidence slowly and carefully.
When you finally pop that first positively-identified wild berry into your mouth—one you’ve researched, identified from multiple features, and confirmed against your field guide—you’ll taste not just the berry itself but also knowledge, caution, respect for nature, and connection to thousands of generations of foragers before you.
Stay safe, forage responsibly, and enjoy the incredible gift of wild berries. Nature is generous to those who approach her with knowledge and respect.