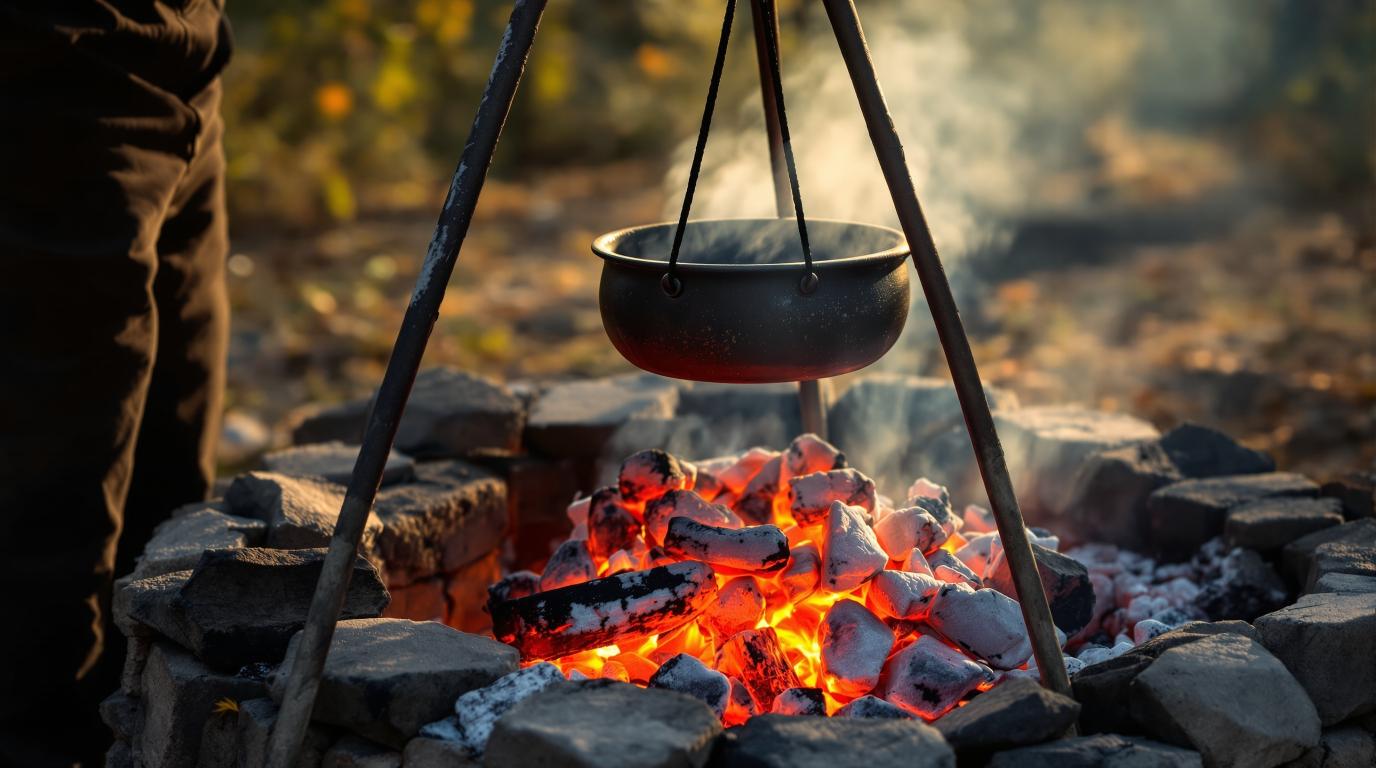
Have you ever stopped to think that the meal you’re about to cook connects you to 780,000 years of human history? When you light a fire and place food over the flames, you’re doing exactly what your ancestors did under starlit skies, in caves, and around campfires across every continent. There’s something magical about open fire cooking—something that makes us feel more alive, more connected to our past, and more present in the moment.
Open fire cooking isn’t just for camping trips or survival situations anymore. People everywhere are rediscovering these ancient techniques because fire-cooked food simply tastes better. The smoky char, the crispy edges, the tender insides—you just can’t get these flavors from a modern stove. Whether you’re interested in off-grid living, want to impress your friends at your next cookout, or simply crave that authentic fire-cooked flavor, learning these traditional methods will change how you think about cooking.
In this guide, you’ll learn the methods that fed humanity for hundreds of thousands of years. We’ll explore techniques from burning coals to hanging pots, from burying food in hot ashes to roasting on wooden spits. You’ll discover why cooking over coals beats cooking over flames every time, which equipment you really need, and how to control temperature without a dial or button. We’ll cover what your ancestors cooked, how cultures around the world approach fire cooking differently, and most importantly, how you can start cooking this way today.
Don’t worry if you’ve never cooked over an open fire before. We’ll start with the basics and build your skills step by step. By the end of this guide, you’ll understand why fire cooking has survived for nearly a million years—and you’ll be ready to join this timeless tradition yourself.
The History of Fire Cooking
How Fire Changed Everything
Picture early humans huddled around flickering flames about 780,000 years ago. That fire changed everything. Before fire, our ancestors ate raw meat, tough roots, and whatever they could chew. After fire, they could eat foods that were previously impossible to digest. Cooking broke down tough fibers, killed dangerous bacteria, and made nutrients more available to our bodies.
Scientists believe that cooking with fire actually changed human evolution. Our brains grew larger because cooked food gave us more calories and nutrients. Our jaws became smaller because we didn’t need massive chewing muscles anymore. We could spend less time eating and more time thinking, creating, and building communities. In a real sense, cooking made us human.
Those early fires were simple—probably just food thrown directly onto hot coals or held near flames on sticks. But even these basic methods worked remarkably well. The smoky flavor that made food taste better also helped preserve it for later. The social aspect of gathering around fire to cook and eat together helped build the communities that would eventually create civilization.
Fire Cooking Around the World
As humans spread across the globe, every culture developed unique fire cooking traditions. Native Americans mastered hot stone cooking—heating rocks in fires and dropping them into water-filled baskets to boil soups and stews. This method let them cook without fireproof containers, using what nature provided.
The Vikings built long fire pits in their homes and outdoor camps. They roasted meat on spits, smoked fish over low embers, and baked flatbreads on hot stones. These simple techniques kept them strong through long winters and dangerous sea voyages. Food cooked over fire wasn’t just sustenance—it was survival.
In Japan, robatayaki turned fire cooking into an art form. Chefs cook food over charcoal grills right in front of diners, creating an experience that’s as much about connection as it is about food. The careful attention to each piece of meat or vegetable shows respect for the ingredients and the ancient cooking method.
South American asado is more than barbecue—it’s a ritual. Large cuts of beef, lamb, or pork cook slowly over wood embers while family and friends gather for hours. The fire becomes the center of celebration, just like it was for our ancestors.
In Southern Africa, braai brings people together across all backgrounds. Whether you’re wealthy or poor, everyone gathers around the fire. The act of cooking outdoors with wood and flame creates equality and community in a way that restaurant meals never could.
Understanding Fire for Cooking
The Golden Rule: Coals, Not Flames
Here’s the most important lesson for fire cooking: those big, dancing flames look impressive, but they’re actually your enemy when it comes to cooking food. Flames are unpredictable and way too hot—we’re talking temperatures well above what your kitchen stove can produce. Try to cook over flames, and you’ll end up with food that’s charred black on the outside and raw on the inside.
What you want is a thick bed of hot coals. Coals glow red or white-hot and give off steady, even heat that lasts for an hour or more. Think of coals as your cooking surface, just like a burner on your stove. The difference is that coals won’t suddenly flare up or die down as dramatically as flames do.
When wood burns completely, it turns into coals. These coals have already released their moisture, gases, and most of their smoke. What’s left is essentially pure heat energy. This is why experienced fire cooks always say, “Build your fire early.” You need time for the wood to burn down into those perfect cooking coals.
How can you tell when your coals are ready? They should be glowing red-orange and covered with a light layer of white ash. During the day, you might not see the glow clearly, but you’ll definitely feel the heat radiating from them. At night, properly prepared coals look like a bed of glowing jewels.
Building Your Cooking Fire
Let’s talk about building a fire specifically for cooking. You’ll want to start with hardwood if possible—oak, maple, hickory, or fruit woods like apple and cherry. These woods burn longer and hotter than soft woods like pine. They also produce better-tasting smoke that adds flavor to your food instead of making it taste like a campfire accident.
Start with small pieces—twigs and sticks about as thick as your finger. Once these catch and begin burning well, add slightly larger pieces. Your goal is to build a fire that’s bigger than you think you’ll need for cooking. Why? Because you’ll need plenty of wood to create an adequate bed of coals.
Here’s a rough guide: if you’re cooking for just yourself, build a fire using 5-6 pieces of wood about as thick as your wrist. For a family of four, double that. For a larger group, you’ll need a fire built from logs about as thick as your arm. Remember, it’s easier to let extra coals die down than to frantically try to create more when your food is waiting.
Let your fire burn for at least 30-45 minutes before you start cooking. During this time, the flames will gradually die down and the wood will transform into coals. You can speed this process slightly by splitting your logs into smaller pieces—more surface area means faster burning.
Creating Cooking Zones
Once you have a good coal bed, here’s a pro trick: don’t spread your coals evenly. Instead, create zones with different heat levels, just like the burners on your stove. Rake most of your coals to one side to create a hot zone. This is perfect for searing steaks or cooking things quickly.
Leave a medium layer of coals in the middle—your medium heat zone. This is where most of your cooking will happen. Then create a cool zone on the far side with just a few scattered coals or none at all. This area is perfect for keeping food warm or for moving things that are cooking too fast.
This zone system gives you amazing control. If something starts to burn, slide it to the cool zone. If it’s cooking too slowly, move it to the hot zone. You’re essentially creating a three-burner stove using nothing but arranged coals.
Essential Equipment
Basic Tools You Need
The good news is that fire cooking doesn’t require much equipment. At minimum, you need a fire pit or ring to contain your fire safely. This can be as simple as a circle of rocks or as elaborate as a built-in stone fire pit. The key is keeping your fire contained and preventing it from spreading.
Next, you’ll want a cooking grate or grill. This sits above your coals and gives you a flat surface to cook on. Look for heavy-duty steel grates rather than flimsy ones—they’ll last for years and won’t warp from the heat. Some grates come with adjustable heights, which is incredibly useful for controlling temperature.
Cast iron cookware is the champion of fire cooking. Unlike modern non-stick pans that can get damaged by high heat, cast iron gets better with use. A cast iron skillet, a Dutch oven with a lid, and maybe a griddle will handle 90% of your fire cooking needs. Cast iron distributes heat evenly, can go directly on coals or flames, and will last for generations if you care for it properly.
You’ll also need long-handled tools. Regular kitchen spatulas and tongs aren’t long enough—you’ll burn your hands. Get tools with handles at least 15-18 inches long. Heat-resistant gloves or thick leather work gloves protect your hands when moving hot cookware.
A tripod for hanging pots is incredibly useful. You can adjust the height of your pot by raising or lowering the chain, giving you perfect temperature control. Tripods fold up for storage and transport, making them great for camping or keeping in your backyard.
Optional but Helpful
A good Dutch oven opens up a whole world of fire cooking. These heavy, lidded pots can bake bread, simmer stews, roast meats, and even make cobblers and cakes. The secret is putting hot coals on top of the lid as well as underneath—this creates oven-like heat from all directions.
If you want to try spit roasting, you can build a simple spit from green wood or buy a metal rotisserie setup. Spit roasting is perfect for whole chickens, roasts, or even whole fish. The slow rotation cooks food evenly and lets fat drip away while basting the meat with its own juices.
A fire poker helps you move coals around, and an ash rake makes it easy to create your cooking zones. A blowpipe (just a hollow metal tube) lets you direct air onto coals to make them hotter when needed. Keep a bucket of sand or water nearby for safety.
Cast Iron Care
Taking care of cast iron is simple. After cooking, let it cool slightly, then scrub it with coarse salt and a little water—no soap needed. Dry it completely over the fire or on your stove, then rub a thin layer of cooking oil over the entire surface. This seasoning process creates a natural non-stick coating that gets better over time.
Never leave cast iron soaking in water—it will rust. If rust does appear, scrub it off with steel wool, re-season the pan, and keep using it. Some of the best cast iron pans in the world have been cooking for over 100 years. With proper care, your pans will outlive you.
Traditional Fire Cooking Methods
Method #1: Direct Coal Cooking
This is how humans probably cooked their first meals over fire—by placing food directly on hot coals. It sounds primitive, but it works beautifully. The intense heat from coals cooks food quickly while creating a delicious charred crust. And here’s something that surprises people: coals that have burned completely are actually sterile. They’re cleaner than most picnic tables!
The best foods for direct coal cooking are flatbreads, vegetables, and thin cuts of meat. Flatbreads cook in literally seconds—you just slap the dough onto hot coals, flip it once, and dinner is ready. The bread puffs up, chars slightly, and takes on a smoky flavor that you’ll never get from an oven.
Vegetables transform when cooked directly on coals. Try this: take a whole ear of corn still in its husk and place it right on the coals. Roll it every few minutes. After about 10-15 minutes, the outer husk will be completely black and burned. But when you peel back those burned layers, inside you’ll find the sweetest, most perfectly cooked corn you’ve ever tasted.
Onions are another revelation. Put a whole onion directly in the coals and let it cook for 15-20 minutes, turning occasionally. The outside will burn completely black and the inner layers will char, but the very center becomes incredibly sweet and soft. Just peel away the burned layers and enjoy pure onion candy.
For thin steaks or lamb chops, create a bed of white-hot coals and place the meat directly on them for about 3 minutes per side. The outside sears perfectly while the inside stays juicy. Just brush off any ash—it won’t hurt you and most of it falls off naturally during cooking.
Method #2: Grill Cooking
Grill cooking is probably what most people think of when they imagine fire cooking. You place a grate over your coals and cook food on that surface instead of directly on the coals. This method gives you a bit more control and keeps smaller items from falling into the fire.
The secret to great grill cooking is patience. Let your grate heat up for at least 10 minutes before you put food on it. A hot grate sears food immediately, creating those beautiful grill marks and preventing sticking. Many beginners make the mistake of putting food on a cold grate—the food sticks, tears, and makes a mess.
Adjust your grate height to control temperature. Most adjustable grates let you raise and lower the cooking surface. Lower it close to the coals for high heat searing. Raise it up for gentler cooking. If your grate doesn’t adjust, you can control temperature by how many coals you put under different areas.
Grilling works beautifully for just about anything: steaks, chicken, fish, vegetables, even fruit. Cut vegetables into large chunks so they don’t fall through the grate. Peppers, zucchini, eggplant, and asparagus all benefit from the char and smoke of grill cooking.
Here’s a pro tip for preventing sticking: oil your food, not your grate. Brush or toss your food with oil before it goes on the grill. If you try to oil a hot grate, the oil just burns off immediately. Oiled food creates its own non-stick surface as it cooks.
Method #3: Dutch Oven and Pot Cooking
A Dutch oven hanging from a tripod is like having a complete kitchen over your fire. You can make soups, stews, chili, rice, beans, bread, cobblers, and even cakes. The heavy lid traps moisture and heat, creating an environment very similar to your kitchen oven.
For most Dutch oven cooking, you’ll hang the pot from a tripod and build your fire underneath. As the fire burns down to coals, you can raise or lower the pot to control temperature—lower for high heat, higher for gentle simmering. It’s like having a temperature dial, except you’re adjusting the pot instead of the heat source.
For baking in a Dutch oven, use a different technique. Set the Dutch oven on a few small rocks or metal feet so coals can sit underneath it. Then pile hot coals on top of the flat lid. This creates heat from above and below, just like an oven. Put more coals on top than underneath—roughly two-thirds on top, one-third underneath works well.
Rotate your Dutch oven every 10 minutes or so to prevent hot spots. Turn the pot one direction and the lid the opposite direction. This ensures even cooking and prevents one side from burning while the other stays raw.
Dutch ovens are perfect for cold weather cooking. While grilling gets tough when it’s freezing outside, a Dutch oven full of stew or chili will simmer away happily in any weather. The fire keeps you warm while your dinner cooks.
Method #4: Spit Roasting
Spit roasting is the original rotisserie—a whole chicken, roast, or even a fish slowly turns above the fire, cooking evenly on all sides. It’s one of the most impressive cooking methods, and it produces incredibly juicy meat because the fat continuously bastes the meat as it rotates.
You can buy metal spit setups with cranks and motors, but the traditional method uses a green wood stick sharpened on both ends. Push one end through your meat and rest the other end on a forked stick stuck in the ground at an angle. The meat hangs at an angle above the coals—not over flames.
Turn your spit every 5-10 minutes to cook all sides evenly. Place a pan or some flat rocks underneath to catch dripping fat—this prevents flare-ups and gives you delicious drippings for sauce or gravy.
Spit roasting works best with larger pieces of meat that benefit from slow cooking—whole chickens, pork shoulders, leg of lamb, or even whole fish. Small items cook too quickly and don’t benefit as much from the slow rotation.
The key is patience. Spit roasting takes time—a whole chicken might need an hour, a large roast even longer. But the results are worth the wait. The outside gets beautifully crispy while the inside stays incredibly moist and tender.
Method #5: Ash and Coal Burying
This method might seem strange, but it produces some of the best-cooked vegetables you’ll ever taste. You literally bury food in hot ashes and coals, creating an underground oven with gentle, even heat all around.
Start by creating a hollow in the middle of your coal bed. Make it about twice as big as whatever you’re cooking. Scrape hot coals and ashes into this depression. Place your food directly on the ashes—potatoes, whole onions, beets, or foil-wrapped packets of vegetables all work great.
Cover your food with more hot coals and ashes, then rebuild your fire on top of it. The food cooks slowly in the residual heat, protected from burning by the insulating layer of ash. After about 20-30 minutes for medium items, use a stick to carefully uncover your food, flip it over, and rebury it for another 15-20 minutes.
Potatoes cooked this way develop a crispy skin and a fluffy, perfectly cooked interior. Just poke a few holes in them first so steam can escape—otherwise they might explode. Brush off the ash (it’s sterile and harmless) and eat.
Sweet potatoes, whole garlic bulbs, corn, and even thick cuts of meat can all be cooked this way. The method is forgiving—food rarely burns when insulated by ashes, and the slow, even heat cooks everything thoroughly.
Method #6: Hot Stone Cooking
Native Americans and other indigenous peoples around the world perfected cooking with hot stones. You heat rocks in your fire until they’re scorching hot, then use them to cook food or boil water. It’s like having portable cooking elements that you can put anywhere.
To heat stones, place them directly in your fire and let them heat for at least 30 minutes. Smooth river rocks work best, but never use stones from a riverbed or shoreline—they might have moisture trapped inside, and they can explode when heated. Use dry stones from dry ground.
Once your stones are glowing hot (use sticks to move them, never your hands), you can drop them into water-filled containers to boil water. The stones heat the water quickly. Drop in more hot stones to keep water boiling. This method lets you cook soups and stews in containers that can’t go over fire—like woven baskets or wooden bowls.
You can also place hot stones directly on meat to cook it from above while it cooks on coals from below. Or nestle stones around food in a pit for slow, even cooking. Flat stones heated in fire make excellent cooking surfaces for flatbreads and pancakes.
This method does take practice and caution. Always move stones carefully and watch out for steam when they touch water. But once you master it, you can cook almost anything with nothing but fire, rocks, and water.
What to Cook Over Open Fire
Meats and Proteins
Fire and meat have been friends for hundreds of thousands of years, so it’s no surprise that meat cooked over coals tastes incredible. For steaks, choose cuts with good marbling—ribeye, strip, or even a simple flank steak all work beautifully. Season simply with salt and pepper and cook over high heat for a perfect sear.
Chicken works great over fire, but be patient. Chicken needs to cook all the way through, so use medium heat rather than searing heat. A whole chicken is perfect for spit roasting or Dutch oven cooking. Cut-up pieces work well on the grill—just move them to cooler areas if they start burning before they’re done inside.
Fish is wonderful over fire but requires a gentle touch. Wrap whole fish in foil or leaves to protect the delicate flesh. Firm fish like salmon can go directly on a well-oiled grate. Fish cooks fast—watch it carefully and it’ll be flaky and perfect in just minutes.
Sausages and hot dogs are classic fire foods for a reason—they’re almost impossible to mess up. Just cook them over medium coals, turning regularly, until they’re heated through and nicely browned. The smoky char makes even ordinary hot dogs taste amazing.
Vegetables
Vegetables might be the most underrated fire food. The high heat caramelizes their natural sugars while adding smoky char that transforms them completely. Cut vegetables into large pieces that won’t fall through your grate—thick slices, halves, or whole small vegetables work best.
Root vegetables like potatoes, carrots, sweet potatoes, and onions are perfect for burying in coals. The slow cooking brings out incredible sweetness you never get from boiling. Corn on the cob in its husk becomes almost candy-like when roasted directly on coals.
Peppers and squash get beautifully charred on the grill. The slightly burned skin adds depth to their flavor. Zucchini, eggplant, and summer squash all grill beautifully—brush them with oil and cook until tender with nice grill marks.
Asparagus and green beans cook quickly over high heat. Toss them with olive oil and place them perpendicular to the grill grates so they don’t fall through. They’re done when slightly charred and bright green—just a few minutes.
Whole heads of garlic wrapped in foil and buried in coals become soft, sweet, and spreadable. Brussels sprouts threaded on skewers and grilled until charred on the outside and tender inside will convert people who swear they hate Brussels sprouts.
Breads and Grains
Flatbreads cooked on hot coals might become your new favorite bread. Mix up a simple dough (flour, water, salt, maybe a little oil), roll it thin, and slap it directly onto clean, hot coals. It puffs up and chars in about 30 seconds per side. Brush off any ash and eat immediately while still warm.
Bannock, sometimes called stick bread or campfire bread, is another traditional favorite. Wrap stiff biscuit dough around a stick in a spiral and hold it over coals, rotating slowly until it puffs up and browns. It’s fun to make and delicious to eat with butter and jam.
Dutch ovens are perfect for baking bread. Cornbread, biscuits, and even proper loaves bake beautifully with coals above and below. The cast iron creates a crispy crust while keeping the inside soft and fluffy.
Rice and other grains cook well in pots over fire. Get water boiling, add your grain, then move the pot to lower heat to simmer. A lid keeps moisture in and makes cleanup easier.
Desserts
Fire-cooked desserts are special treats. Fruit cobblers in a Dutch oven are legendary—spread fruit in the bottom, top with biscuit dough or cake batter, add coals above and below, and wait 30-40 minutes for magic to happen.
Baked apples are simple and delicious. Core apples, fill the center with butter, sugar, and cinnamon, wrap in foil, and bury in coals for 20 minutes. They emerge soft, sweet, and aromatic.
S’mores obviously, but also try roasting other fruits. Peaches, pineapple, and bananas all caramelize beautifully over fire. Drizzle them with honey and sprinkle with cinnamon for an easy but impressive dessert.
Dutch oven cookies and cakes work surprisingly well. Use your favorite recipes but watch the cooking time—fire can be hotter or cooler than your oven. Rotate the Dutch oven regularly and start checking for doneness earlier than the recipe suggests.
Mastering Temperature Control
Testing Fire Temperature
How do you know if your fire is the right temperature when there’s no thermometer? Use the hand test. Hold your hand about 6 inches above your coals and count how many seconds you can comfortably keep it there before the heat forces you to pull away.
If you can only last 1-2 seconds, that’s high heat—perfect for searing steaks or cooking thin items quickly. If you can hold it for 3-4 seconds, you’ve got medium-high heat, great for most grilling. At 5-6 seconds, that’s medium heat, good for chicken and most vegetables. More than 7 seconds means your coals are cooling down—add more or move food closer.
Visually, coals tell you their temperature too. Bright red or orange glowing coals with just a light coating of white ash are at their hottest. As the white ash layer thickens, the coals cool down. When coals look mostly gray with just a dull red glow, they’re in the medium range.
Maintaining Consistent Heat
The secret to maintaining good cooking temperature is adding fuel gradually. Don’t wait until your coals are completely dead to add more wood. When your coals are about half burned down, add another piece or two of wood to the main fire. Let it burn down to coals while you’re cooking.
Create a two-zone fire: active flames on one side creating new coals, and a cooking zone on the other side using existing coals. As you cook, gradually rake new coals from the fire side to the cooking side. This gives you continuous heat without constant temperature swings.
If wind picks up, create a windbreak using rocks, logs, or even a piece of plywood. Wind causes fires to burn hotter and faster, making temperature control difficult. A windbreak also keeps ash from blowing onto your food.
Dealing with Flare-Ups
Flare-ups happen when dripping fat hits hot coals and ignites. A little flare is fine, but big flames can burn food quickly. If you get a major flare-up, immediately move your food to a cooler zone or remove it from the heat temporarily.
Keep a spray bottle of water handy—not to douse your coals, but to spray a mist over flare-ups. The water evaporates and cools things down without drowning your fire. Sand is another option for smothering grease fires—never pour water directly on a grease fire.
Prevent flare-ups by trimming excess fat from meat before cooking and by not overcrowding your grill. Leave space between items so fat can drip away from the food. A drip pan placed under spit-roasted meat catches fat before it can hit coals.
Tips for Success
Before You Start
Prepare everything inside your kitchen before you light the fire. Chop vegetables, season meat, measure ingredients, and organize everything on a tray. Fighting with a stubborn jar of spices while your fire burns and food waits is frustrating. Do all your prep inside where you have good light and counters.
Bring everything outside at once—food, tools, plates, salt and pepper, drinks, even napkins. Make one trip with everything you need. You don’t want to be running back and forth while trying to watch food cook.
Start your fire earlier than you think necessary. Even if you only need 30 minutes for coals, start 45 minutes before you want to cook. Fires don’t always cooperate, and it’s better to have coals waiting for you than to have hungry people waiting for coals.
Stack extra wood near your fire but not too close. You’ll need to add fuel as you cook, and scrambling around in the dark looking for firewood is no fun. At night, keep a flashlight handy—fire provides light, but not enough to see everything clearly.
While Cooking
Stay present. Fire cooking requires attention. You can’t put something on and walk away like you might with a slow cooker. But this attention is part of the experience. Tending the fire, watching the food, adjusting the heat—it’s all part of what makes fire cooking special.
Rotate food regularly, especially when grilling. Even with perfect coals, you’ll have hot spots and cooler areas. Turning and moving food ensures everything cooks evenly. Rotate your Dutch oven every 10 minutes. Turn meat on the grill every few minutes.
Use long tools and keep them handy. Set up a small table or flat rock near your fire to hold spatulas, tongs, and a thermometer. Having tools within reach means you can respond quickly when needed.
Watch for changes in wind direction. Smoke follows the path of least resistance, which usually means it follows whoever is cooking. If wind shifts, move to the other side of the fire or adjust your windbreak.
Common Mistakes to Avoid
The biggest mistake beginners make is cooking over flames instead of coals. Those big, impressive flames look great but they burn food. Remember: coals, not flames.
Starting with a fire that’s too small gives you too few coals to work with. You can’t cook much over a tiny bed of coals. Build a bigger fire than seems necessary—you can always spread coals out to cool them, but you can’t magically create more coals when you need them.
Not preheating your cookware is another common error. Cold cast iron placed on hot coals or flames can crack. Let it warm up gradually. More importantly, a hot grate or pan sears food immediately, preventing sticking.
Walking away from cooking food causes more burned meals than anything else. Fire is less predictable than your stove. What was perfect two minutes ago might be burning now. Stay close and stay attentive.
Overcrowding your grill or grate prevents proper cooking and makes it hard to turn food. Leave space between items. Cook in batches if necessary.
Safety First
Fire Safety
Choose your cooking site carefully. It should be at least 15 feet away from any buildings, trees with low branches, or anything flammable. Clear all dry grass, leaves, and debris from a 10-foot circle around your fire.
Check local regulations before building any fire. Many areas have fire bans during dry seasons. Some places require permits even for small cooking fires. Know the rules and follow them—wildfires start from cooking fires that got out of control.
Never leave a fire unattended, even for a minute. Hot coals can flare up unexpectedly if wind changes. A gust can blow embers onto dry grass. Always have an adult watching the fire.
Keep a bucket of water, sand, or a fire extinguisher within reach. Hope you never need them, but be ready if you do. Water works for most situations, but use sand for grease fires.
Cooking Safety
Burns are the most common fire cooking injury. Always wear heat-resistant gloves when moving hot cookware. Keep long sleeves rolled down to protect your arms. Watch out for steam when lifting lids—it can burn worse than fire.
Keep children and pets away from the fire. Establish a clear boundary—rocks or a circle marked in dirt works well. Make sure kids understand they can watch but not come close without permission and supervision.
Use a meat thermometer to check that chicken, pork, and ground meats reach safe temperatures. Fire cooking can sometimes leave meat looking done on the outside while still raw inside. A thermometer removes the guesswork.
Be aware of smoke. Don’t breathe heavy smoke directly—move to where air is clearer. If you have respiratory issues, maybe have someone else tend the fire while you prep food.
Proper Extinguishing
When you’re done cooking, let coals die down naturally if you have time. Spread them out to cool faster. Never dump water on a large amount of hot coals—the steam can burn you and the sudden temperature change can crack stone fire rings.
Pour water slowly around the edges first, then work toward the center. Stir the wet ashes to make sure everything is cool. Feel carefully with your hand (not touching, but sensing heat) to make sure no hot spots remain.
The fire should be completely cold before you leave it. If you can comfortably place your hand on the ashes, it’s safe. If you’re camping, check the next morning—coals can stay hot for many hours.
Your Fire Cooking Journey Starts Now
You now know techniques that have fed humans for 780,000 years. From direct coal cooking to Dutch oven baking, from spit roasting to ash burying, you have the knowledge to cook amazing meals over nothing but fire and coals. These aren’t complicated methods—they’re actually simpler and more forgiving than many modern cooking techniques.
Start with something easy. Build a fire, let it burn down to coals, and cook something simple directly on those coals—maybe corn in the husk or a flatbread. Feel the connection to countless generations who cooked this exact same way. Taste the difference that real fire makes.
As you practice, you’ll develop an intuition for fire. You’ll know by looking when coals are ready. You’ll sense when to add more fuel. You’ll understand how wind affects temperature and how to adjust for it. These skills come with experience, not just reading.
The beautiful thing about fire cooking is that it brings people together. Friends and family gather around fire in a way they don’t around a kitchen stove. The process becomes as valuable as the meal. You’re not just cooking food—you’re creating an experience, building memories, and participating in humanity’s oldest tradition.
So gather some wood, light a fire, and join the ancient art of open fire cooking. Your ancestors are smiling. And your dinner is going to be delicious.