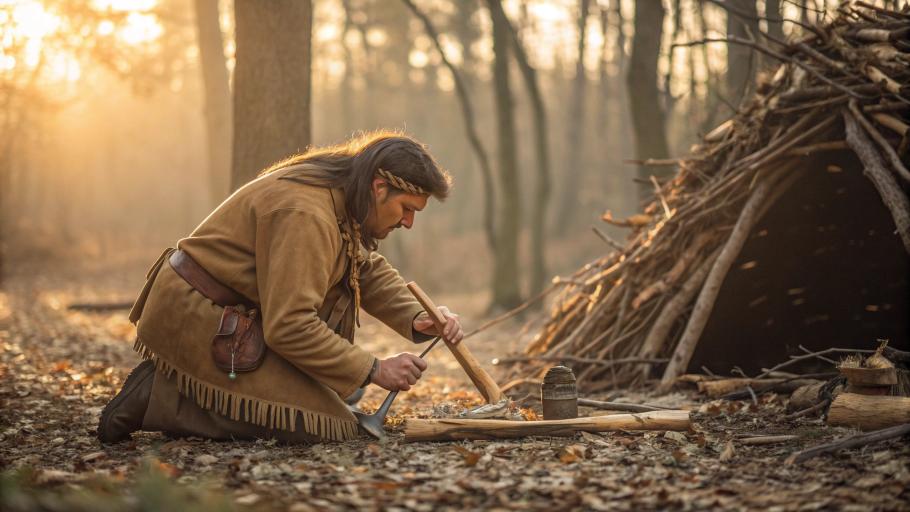
- The Wisdom of Our Ancestors
- Understanding Indigenous Diversity
- The Survival Mindset: Think Like Your Ancestors
- Fire: The Foundation of Survival
- Shelter: Your First Priority
- Water: Finding and Purifying Nature’s Gift
- Food: Hunting, Gathering, and Fishing
- Food Preservation: Making It Last
- Tool-Making: Crafting From Nature
- Tracking and Hunting: Reading the Land
- Trapping: Feeding Yourself While You Sleep
- Medicinal Plants: Nature’s Pharmacy
- Navigation: Finding Your Way Without GPS
- Winter Survival: The Harshest Season
- The Spiritual Side: More Than Just Survival
- Common Mistakes and Safety Warnings
- Practicing These Skills Today
- Conclusion: Honoring the Teachers
- Frequently Asked Questions
The Wisdom of Our Ancestors
Imagine this: You’re dropped in the middle of the wilderness with nothing but the clothes on your back. No phone. No GPS. No lighter. No Swiss Army knife. What would you do?
For thousands of years, this wasn’t a scary thought experiment—it was everyday life. Indigenous peoples across North America thrived in some of the harshest environments on Earth without any of the tools we think we need today. They didn’t just survive. They built communities, raised families, and passed down knowledge that kept them alive for generations.
Today, most of us have lost these skills. We depend on grocery stores, central heating, and emergency services. But what if we could learn from our ancestors? What if we could tap into this ancient wisdom—not just for emergencies, but to reconnect with nature and understand how humans lived for most of our history?
That’s what this guide is all about.
Before we begin, let’s be clear about something important: These survival techniques come from Native American tribes who deserve our deepest respect. These aren’t just “cool tricks”—they’re sacred knowledge passed down through generations. When we learn these skills, we honor the teachers and the cultures that preserved them.
In this article, you’ll discover 15 life-saving skills that indigenous peoples mastered, from starting fire without matches to finding clean water in the wild. Whether you’re a prepper, an outdoor enthusiast, or just curious about history, these techniques could one day save your life.
Let’s dive in.
Understanding Indigenous Diversity
Here’s a mistake a lot of people make: thinking there’s one “Native American way” of doing things.
The truth? Indigenous peoples developed hundreds of different survival strategies based on where they lived. A Lakota hunter on the Great Plains faced totally different challenges than an Iroquois farmer in the forests of New York or an Inuit hunter in the Arctic.
Think about it—would you survive winter in Alaska the same way you’d survive summer in the Arizona desert? Of course not.
Plains tribes like the Lakota and Comanche followed buffalo herds across vast grasslands. They became expert horsemen and developed portable shelters (tipis) that could move with them.
Woodlands tribes like the Iroquois and Cherokee lived in thick forests full of deer, fish, and edible plants. They built semi-permanent villages and became masters at tracking game through dense trees.
Arctic peoples like the Inuit survived in one of the harshest environments on the planet. They hunted seals and whales, built snow shelters, and created incredibly warm clothing from animal furs.
The lesson? Adaptation is the most important survival skill. Indigenous peoples didn’t have a one-size-fits-all playbook. They observed their environment, learned from it, and passed that knowledge to their children.
As you learn these skills, remember: survival isn’t about memorizing rigid rules. It’s about thinking, adapting, and respecting the land you’re in.
The Survival Mindset: Think Like Your Ancestors
Before we get to fire-making and shelter-building, let’s talk about something even more important: your mindset.
You can know every survival technique in the world, but if you panic, you’re in trouble.
Indigenous peoples survived because they understood three key principles:
1. Common Sense and Observation
Native Americans didn’t have weather apps or Google Maps. Instead, they watched everything. They noticed which way birds flew to find water. They read the clouds to predict storms. They tracked animals by studying broken twigs and bent grass.
The skill? Paying attention. When you’re in nature, slow down. Look around. What’s the wind doing? Where’s the sun? What sounds do you hear?
2. Respect for Nature
Survival isn’t about conquering nature—it’s about working with it. Indigenous peoples took only what they needed and gave thanks for what the land provided. They understood that if you disrespect nature, nature won’t help you survive.
A modern example: If you cut down every tree for firewood, you’ll have nothing for shelter. If you scare away all the animals, you’ll have nothing to hunt.
3. The Rule of Threes
Here’s a simple framework modern survivalists use that aligns perfectly with indigenous wisdom:
- You can survive 3 hours without shelter (in extreme weather)
- You can survive 3 days without water
- You can survive 3 weeks without food
Notice the order? Shelter first, then water, then food. Most people obsess over food, but in a real survival situation, exposure to cold or heat will kill you long before hunger does.
Stay calm. Stay observant. Prioritize wisely. That’s the survival mindset.
Fire: The Foundation of Survival
Fire changes everything.
With fire, you can stay warm, cook food, purify water, signal for help, keep predators away, and lift your spirits when you’re scared and alone.
Indigenous peoples saw fire as sacred—and for good reason. It’s the difference between life and death.
But how do you make fire without a lighter or matches?
3 Traditional Fire-Starting Methods
1. The Bow Drill (Most Reliable)
This is the method most Native American tribes used. It takes practice, but once you learn it, you can make fire almost anywhere.
What you need:
- A straight stick (the spindle)
- A curved stick or branch (the bow)
- A flat piece of wood (the fireboard)
- Some cordage (string, shoelace, or plant fiber)
- A small stone or piece of wood (the handhold)
How it works:
- Cut a small notch in your fireboard
- Wrap the bow string around the spindle once
- Place the bottom of the spindle in the notch
- Hold the top of the spindle with your handhold
- Move the bow back and forth rapidly—this spins the spindle
- The friction creates heat and eventually, a glowing coal
- Transfer the coal to a bundle of dry tinder and blow gently
Pro tip: Your spindle and fireboard should be dry and made from softwood like cedar, willow, or cottonwood.
2. The Hand Drill (Harder, But No Tools Needed)
This is the same concept as the bow drill, but you spin the spindle with your hands instead of a bow. It’s tougher because you need to maintain consistent, fast spinning—but it requires fewer materials.
The technique: Roll the spindle between your palms while pressing down firmly. Your hands will move down the spindle, so you need to quickly return them to the top and repeat.
I tried this once on a camping trip. After 20 minutes, my hands were raw and I had nothing but shame and a slightly warm stick. It takes serious practice.
3. Flint and Steel (Fastest if You Have the Tools)
Many tribes adopted this method after contact with European traders because it’s faster and more reliable.
What you need:
- A piece of flint (or other hard stone)
- A piece of steel (or iron)
- Some char cloth (fabric burned in low oxygen to make it catch sparks easily)
How it works: Strike the steel against the flint at a sharp angle. Sparks will fly off and land on your char cloth, creating a glowing ember. Transfer this to your tinder bundle.
Fire Maintenance and Safety
Once you have fire, respect it. Keep it small and controlled. Clear the ground around it to prevent wildfires. Never leave it unattended.
Indigenous peoples also knew how to preserve coals for travel. They’d wrap glowing coals in damp moss or green leaves, storing them in a clamshell or hollowed-out horn. This way, they could carry fire with them and restart it hours later without creating sparks from scratch.
Practice fire-making at home (safely!) before you need it in an emergency. This skill takes time to master.
Shelter: Your First Priority
Remember the Rule of Threes? In extreme weather, you can die of exposure in just 3 hours.
That’s why shelter comes before water or food.
Indigenous peoples built dozens of different shelter types depending on their environment. Here are four you can build with natural materials:
1. The Debris Hut (Best for Temperate Forests)
This is like making yourself a giant pile of leaves—but way more effective.
How to build it:
- Find or make a long ridgepole (a sturdy branch, 9-12 feet long)
- Prop one end against a tree and secure the other end on the ground
- Lean branches at an angle against both sides of the ridgepole to create a frame
- Pile on leaves, grass, pine needles, and other debris—thick (at least 2-3 feet)
- Create a small entrance and crawl inside
The debris acts as insulation. Your body heat gets trapped inside, keeping you surprisingly warm even on cold nights.
2. The Lean-To (Quick Emergency Shelter)
This is the fastest shelter to build, but it’s less insulated.
How to build it:
- Find two trees about 6-8 feet apart
- Lash a horizontal pole between them
- Lean long branches at a 45-degree angle from the pole to the ground
- Layer on bark, leaves, or evergreen boughs to create a roof
- Build a fire in front of the opening to reflect heat inside
Pro tip: Face the opening away from the wind.
3. The Wickiup (Semi-Permanent Structure)
Many Southwestern tribes like the Apache built these cone-shaped shelters.
How to build it:
- Arrange 3-4 long poles in a tripod shape
- Add more poles around the perimeter, leaning them against the tripod
- Cover the frame with brush, bark, grass, or hides
- Leave a smoke hole at the top if you plan to have a fire inside
This design sheds rain well and can house multiple people.
4. The Snow Shelter (Quinzhee)
If you’re stuck in deep snow, you can build a shelter from the snow itself.
How to build a quinzhee:
- Pile up snow into a big mound (at least 6 feet high)
- Let it sit for 1-2 hours so the snow crystals bond together
- Dig out the inside, leaving walls at least 1 foot thick
- Poke a small ventilation hole in the roof
- Block the entrance with a snow block or backpack
Important: Snow shelters work because snow traps air, which insulates you. Inside a well-built quinzhee, temperatures can be 30-40 degrees warmer than outside—even if it’s below zero.
Shelter Placement Matters
Indigenous peoples were careful about where they built shelters:
- Avoid low-lying areas (cold air sinks, and flash floods are dangerous)
- Stay away from dead trees (they can fall on you)
- Don’t camp right next to water (floods, mosquitoes, and predators)
- Face your shelter’s opening away from the wind
Your shelter doesn’t need to be fancy—it just needs to keep you alive.
Water: Finding and Purifying Nature’s Gift
You can survive 3 weeks without food. But without water, you’ve got 3 days at most—less if it’s hot or you’re working hard.
Indigenous peoples were experts at finding water in environments where it wasn’t obvious.
5 Ways to Find Water
1. Follow Animal Tracks
Animals need water just like you do. If you see fresh tracks or game trails, follow them—they often lead to water sources.
Birds are especially helpful. Grain-eating birds (like doves and finches) drink at dawn and dusk. If you see them flying low and fast in a straight line, they’re probably heading to water.
2. Look for Water-Loving Plants
Certain plants only grow near water:
- Cattails (one of the most useful plants—more on this later)
- Willows (they love wet soil)
- Cottonwood trees
- Reeds and rushes
If you see these plants, start digging nearby—you’ll likely find water underground.
3. Collect Morning Dew
Before sunrise, tie absorbent cloth (or even grass) around your ankles and walk through tall grass. The cloth will soak up dew. Wring it out into a container and repeat.
It’s slow, but in desperate times, it works.
4. Dig in Dry Riverbeds
Just because a riverbed looks dry doesn’t mean there’s no water. Dig down a few feet in the lowest part of the bend—you might find damp soil or even a small seep.
5. Read the Terrain
Water flows downhill and collects in valleys. If you’re on a ridge, head down. Look for green vegetation or V-shaped valleys—they’re clues that water is nearby.
3 Traditional Purification Methods
Finding water is one thing. Making it safe to drink is another.
1. Boiling (The Most Reliable)
Indigenous peoples boiled water by heating rocks in a fire, then dropping them into water-filled containers made from bark, hide, or hollowed wood. The hot rocks brought the water to a boil, killing harmful bacteria and parasites.
Modern advice: Boil water for at least 1 minute (3 minutes at high altitude).
2. Solar Distillation
This technique uses the sun’s heat to evaporate and collect clean water.
How to build a solar still:
- Dig a hole in the ground
- Place a container in the center
- Fill the hole with damp vegetation or urine (yes, really)
- Cover the hole with plastic (or bark if you don’t have plastic)
- Place a small rock in the center of the cover so it dips down over the container
- As the sun heats the hole, moisture evaporates, condenses on the cover, and drips into the container
It’s slow but effective in dry environments.
3. Natural Filtration
You can create a basic filter using layers of sand, charcoal, and gravel. Pour water through the layers—it won’t remove all bacteria, but it’ll remove dirt and some impurities.
Important: Filtration isn’t as reliable as boiling. If possible, filter and boil.
Making Birch Bark Containers
Many Northeastern tribes made waterproof containers from birch bark. The bark peels off in large sheets, can be folded and sewn with plant fibers, and sealed with pine resin.
These containers could hold water, be used for cooking (with hot stones), and lasted for years.
Modern takeaway: Improvisation is key. If you don’t have a metal pot, you can still boil water with the right materials and knowledge.
Food: Hunting, Gathering, and Fishing
Let’s be honest—food is what most people worry about first. But remember the Rule of Threes: you can survive 3 weeks without eating.
That doesn’t mean food isn’t important—it absolutely is for long-term survival. But in the short term, shelter and water matter more.
Gathering: The Easiest Way to Get Calories
Hunting sounds exciting, but gathering wild plants was actually the main food source for most indigenous peoples. Why? Because plants don’t run away.
Here are 5 plants that grow across much of North America and are easy to identify:
1. Acorns
Oak trees drop thousands of acorns every fall. They’re packed with fat and calories—but they’re also bitter because of tannins.
How to make them edible:
- Shell the acorns
- Crush them into a coarse meal
- Soak the meal in water (changing the water several times) until the bitterness is gone
- Dry and grind into flour
Indigenous peoples made acorn bread, soup, and porridge. It’s labor-intensive, but worth it.
2. Cattails (The “Supermarket of the Swamp”)
Almost every part of the cattail is edible:
- Roots (rich in starch—boil or roast them)
- Young shoots (taste like cucumber)
- Pollen (mix with flour for baking)
Plus, the fluffy seed heads make great tinder for fires, and the leaves can be woven into mats or baskets.
3. Dandelions
Yes, those “weeds” in your yard are edible. Every part:
- Leaves (bitter, but nutritious—eat them young or cook them)
- Roots (roast them for a coffee substitute)
- Flowers (make tea or batter and fry them)
4. Pine Needles
Pine needle tea is loaded with Vitamin C—more than oranges. Boil a handful of needles in water for 10 minutes. It tastes piney (obviously), but it’s warming and good for you.
Warning: Avoid Ponderosa Pine, Norfolk Island Pine, and Yew—these are toxic.
5. Clover
The flowers and leaves are edible raw or cooked. They’re high in protein for a plant.
Hunting and Fishing
We covered hunting in detail in our previous article on ancestral hunting methods, so we won’t repeat it all here. But here are the basics:
Hunting requires skill, patience, and respect. Indigenous hunters studied animal behavior, tracked game for miles, and used bows, spears, and traps.
Fishing was often easier and more reliable. Techniques included:
- Spear fishing (in shallow water)
- Weirs and traps (fences built in streams to funnel fish into a pen)
- Bare-hand fishing (feeling under rocks for fish and grabbing them)
Poisonous Plants: What to Avoid
Here’s a scary truth: many wild plants will kill you if you eat them.
Some rules to stay safe:
- Never eat mushrooms unless you’re 100% certain it’s safe (even experts make fatal mistakes)
- Avoid plants with milky sap (except dandelions)
- Stay away from white or red berries (most are poisonous)
- Don’t eat anything that smells like almonds (sign of cyanide)
The universal edibility test (last resort only):
- Rub the plant on your skin—wait 15 minutes for a reaction
- Touch it to your lip—wait 3 minutes
- Touch it to your tongue—wait 15 minutes
- Chew and spit—wait 15 minutes
- Swallow a small amount—wait 8 hours
If you have ANY reaction at any stage, stop immediately. This test takes over 24 hours—so it’s not practical unless you’re stuck long-term.
Better idea: Learn to identify common edible plants before you need them.
Food Preservation: Making It Last
You just caught a deer. Great! But you can’t eat 100 pounds of meat before it spoils.
Indigenous peoples mastered food preservation long before refrigeration. Here are four methods they used:
1. Smoking
Smoke dehydrates meat and adds chemicals that prevent bacterial growth.
How to build a simple smoker:
- Build a small, controlled fire
- Hang strips of meat on a rack above the fire (not too close—you want smoke, not flame)
- Keep the fire going for hours (or even days) with green wood to produce lots of smoke
- The meat should dry out completely
Smoked meat can last for months if kept dry.
2. Sun Drying (Jerky)
Slice meat into thin strips and hang it in direct sunlight (or near a fire). Make sure air circulates around it.
In dry climates, meat can dry in a day or two. In humid climates, you’ll need more heat.
3. Pemmican (The Ultimate Survival Food)
Pemmican is a traditional food of Plains tribes. It’s a mixture of dried meat, fat, and berries—and it’s incredibly calorie-dense.
How to make it:
- Dry meat completely and pound it into a powder
- Melt animal fat (tallow)
- Mix the meat powder with the fat at a 1:1 ratio
- Add dried berries (optional, but they add flavor and Vitamin C)
- Form into cakes and store
Pemmican can last for years without refrigeration. Explorers and fur traders relied on it for survival.
4. Fermentation
Some tribes fermented fish or meat to preserve it. This sounds weird (and it smells worse), but fermentation creates an acidic environment that prevents harmful bacteria from growing.
Modern note: Fermentation is tricky. If you don’t do it right, you can get seriously sick. Stick with smoking and drying unless you really know what you’re doing.
Tool-Making: Crafting From Nature
“Survival is making works of art.”
That’s a philosophy some indigenous teachers use. It means every tool you make should be crafted with care—because your life depends on it.
Let’s look at three essential skills:
Stone Tools: Flint Knapping Basics
For thousands of years, humans made cutting tools by chipping pieces off certain types of stone.
How flint knapping works:
- Find a hard stone like flint, obsidian, or chert
- Use a hammerstone (a round, harder rock) to strike flakes off the edge
- Each strike removes a sharp flake and shapes the edge
With practice, you can make hand axes, arrowheads, scrapers, and knives.
Warning: This is harder than it looks. The flakes are razor-sharp—wear gloves and eye protection.
Cordage From Plants
Rope, string, and cordage are essential for making shelters, traps, fishing nets, and bows.
Indigenous peoples made cordage from:
- Inner bark of trees (basswood, cedar, willow)
- Plant fibers (yucca, milkweed, nettles)
- Animal sinew (dried tendons)
How to make a 3-strand braid:
- Gather long fibers
- Split them into three bundles
- Twist each bundle tightly in one direction
- Braid them together in the opposite direction (this locks the twist)
The result is surprisingly strong rope.
Bone and Antler Tools
After processing game, indigenous peoples saved the bones and antlers to make:
- Awls (for punching holes in leather)
- Needles (for sewing clothing and shelters)
- Scrapers (for removing hair and fat from hides)
- Fish hooks
These tools lasted for years and were passed down through generations.
Modern takeaway: In a survival situation, use everything. Waste nothing.
Tracking and Hunting: Reading the Land
Even if you’re not hunting, tracking is an essential skill. Why? Because tracks tell stories.
You can learn:
- What animals are nearby
- How recently they passed
- Whether they were running (danger?) or walking calmly
- Where they’re heading (probably toward food or water)
Basic Tracking
Here’s how to read common animal tracks:
Deer tracks: Two teardrop-shaped hooves pointing forward. If the tips are sharp, the track is fresh. If they’re rounded, it’s old.
Rabbit tracks: Four prints in a cluster. The two larger hind feet land in front of the smaller front feet—it looks backward!
Bear tracks: Large, with five toes and claw marks. If you see these, be cautious. Make noise, back away slowly, and never run.
Sign Reading (Beyond Tracks)
Experienced trackers look for more than just footprints:
- Scat (animal droppings): Tells you what animals are eating and how recently they passed
- Rubs and scrapes: Deer rub their antlers on trees; bears claw bark
- Broken twigs and bent grass: Show the direction of travel
Hunting Ethics
Indigenous peoples had deep respect for the animals they hunted. They believed animals gave their lives willingly—and in return, humans had responsibilities:
Take only what you need. Don’t kill for sport.
Give thanks. Many tribes performed gratitude rituals before and after hunts.
Use every part of the animal. Meat, hide, bones, sinew, organs—nothing wasted.
This isn’t just spiritual—it’s practical. If you waste resources, you might not have them when you need them most.
Trapping: Feeding Yourself While You Sleep
Here’s a survival secret: traps work while you’re doing other things.
Instead of spending all day hunting, you can set traps and focus on building shelter, finding water, or gathering firewood.
5 Traditional Trap Types
1. Deadfall Trap
This trap drops a heavy log or rock onto prey when triggered.
How it works:
- Find a large, flat rock
- Prop it up with a stick figure-4 trigger (three sticks notched together)
- Bait the trigger
- When the animal disturbs the bait, the trigger collapses and the weight falls
Best for: Squirrels, rabbits, and other small mammals.
2. Snare
A snare is a loop of cordage that tightens when an animal steps through it.
How to set one:
- Make a loop with a slip knot
- Position it along a game trail at head height for the animal you’re targeting
- Anchor the other end to a tree or stake
- Use small sticks to guide the animal through the loop
Best for: Rabbits, birds, and small game.
3. Fish Trap (Weir)
Build a fence across a stream with an opening that funnels fish into a pen. The fish swim in but can’t figure out how to escape.
4. Bird Snare
Similar to a ground snare, but placed where birds land (like a branch or feeding area).
5. Pit Trap
Dig a deep hole, cover it with branches and leaves, and wait for an animal to fall in.
Historical note: Many tribes used pit traps for large game like deer or elk. However, this method is illegal in most places today and dangerous for humans and non-target animals.
Legal and Ethical Considerations
Here’s the reality: In most modern situations, trapping wild animals is illegal without a license—and for good reason. Indiscriminate trapping can harm endangered species, pets, and even people.
If you’re in a true survival emergency, laws about self-preservation may protect you. But in any other situation, learn these skills for knowledge—not for casual use.
Medicinal Plants: Nature’s Pharmacy
In indigenous cultures, women were often the experts on medicinal plants. They knew which plants healed wounds, which reduced fever, and which eased pain.
This knowledge was passed down through generations—and some of it is backed by modern science.
5 Essential Medicinal Plants
1. Yarrow (Wound Healing)
Yarrow stops bleeding and fights infection. Indigenous peoples crushed the leaves and applied them directly to cuts.
Modern studies confirm yarrow has anti-inflammatory and antimicrobial properties.
2. Willow Bark (Pain and Fever)
Willow bark contains salicin, which your body converts to salicylic acid—the active ingredient in aspirin.
How to use it: Strip the inner bark, boil it in water, and drink the tea.
3. Plantain (Stings and Bites)
Not the banana—plantain is a common “weed” with broad, ribbed leaves. Chew it into a poultice and apply to bee stings, mosquito bites, or minor cuts.
4. Pine Resin (Antiseptic)
Pine sap is sticky and antimicrobial. Indigenous peoples used it to seal wounds and prevent infection.
Modern use: You can also use pine resin as waterproof glue.
5. Cattail (Food and Medicine)
We mentioned cattails earlier for food—but the gel inside the roots can also be applied to burns and wounds.
Safe Harvesting
Only use plants you’re 100% certain about. Misidentification can be deadly.
Take only what you need, and never harvest rare plants.
When to Seek Modern Medical Help
Let’s be real: herbal medicine has limits. If you have a deep wound, broken bone, or serious illness, you need professional medical care.
These remedies are for minor issues or emergencies when no other help is available.
Navigation: Finding Your Way Without GPS
What happens if you’re lost?
Indigenous peoples navigated vast distances without maps or compasses. They used the sun, stars, landmarks, and animal behavior.
5 Traditional Navigation Methods
1. Sun Navigation
The sun rises in the east and sets in the west (roughly). In the Northern Hemisphere, it’s to the south at midday.
Shadow stick method:
- Push a stick vertically into the ground
- Mark the tip of the shadow
- Wait 15-20 minutes and mark the new shadow tip
- Draw a line between the marks—this line runs east-west
- The first mark is west; the second is east
2. Star Navigation
At night, find the North Star (Polaris). It stays fixed above the North Pole.
How to find it:
- Locate the Big Dipper
- Follow the two stars at the edge of the Dipper’s “cup”
- They point directly to the North Star
In the Southern Hemisphere, use the Southern Cross to find south.
3. Natural Landmarks
Pay attention to rivers, mountains, and unique rock formations. Use them as reference points.
Pro tip: Look back regularly as you travel. Landmarks look different from different directions.
4. Tree Growth Patterns (Myth Debunked)
You’ve probably heard “moss grows on the north side of trees.” That’s not reliable. Moss grows where it’s damp—which could be any side depending on wind and shade.
Tree branches do tend to grow fuller on the south side (in the Northern Hemisphere) because they get more sun—but this is a subtle clue, not a rule.
5. Animal Behavior Clues
Birds migrating in spring fly north; in fall, they fly south. If you see large flocks, note their direction.
Creating Mental Maps
Indigenous peoples didn’t have paper maps—they memorized the landscape.
As you travel, constantly update your mental picture: “The river is on my left. The mountain is behind me. I turned right at the big oak tree.”
If you get lost, stop and think before wandering farther.
Winter Survival: The Harshest Season
Winter is when survival skills are tested most.
Cold kills faster than hunger or thirst. Here’s how indigenous peoples survived brutal winters:
Heat Storage and Transfer
We mentioned this earlier with fire, but it’s worth repeating:
- Heat rocks in your fire and place them inside your shelter or wrap them in cloth to hold against your body
- Preserve coals in moss or green leaves for carrying fire
Layered Clothing
Indigenous peoples wore multiple layers of fur and leather. The layers trapped air, which insulates.
Modern equivalent: Wear a moisture-wicking base layer, insulating middle layer (fleece or down), and windproof outer layer.
Ice Fishing
Tribes near lakes and rivers fished through the ice using spears or hooks.
How it worked:
- Chop a hole in the ice
- Use a shelter or cover to block light (fish are easier to see in the dark water)
- Attract fish with bait or a carved “lure”
- Spear or hook them when they approach
Snow Travel
Snowshoes: Woven frames strapped to your feet that distribute your weight so you don’t sink into deep snow.
Sleds: Wooden sleds or toboggans for hauling gear and game.
Cold Water Immersion Training
Some northern tribes practiced cold water immersion to build tolerance and regulate core temperature.
Modern science backs this up: Controlled cold exposure can improve circulation and resilience—but it’s risky. Never try this without proper knowledge and supervision.
The Spiritual Side: More Than Just Survival
For indigenous peoples, survival wasn’t just about staying alive—it was a way of life.
Every hunt was a ceremony. Every plant gathered was a gift. Every tool crafted was an art.
Why does this matter for survival?
Because mindset affects outcomes. If you see survival as a miserable struggle, you’ll give up. If you see it as a connection to something bigger—to your ancestors, to the land, to the cycle of life—you’ll find meaning even in hardship.
Gratitude and Ceremony
Many tribes performed rituals before hunting or gathering:
- Asking permission from the spirit of the animal or plant
- Offering tobacco or other gifts in return
- Giving thanks after a successful hunt
This wasn’t superstition—it was a way to stay humble, focused, and respectful.
Connection to Community
Indigenous survival was never about “lone wolves.” It was about community.
People shared food, taught skills, protected each other, and made decisions together.
Modern takeaway: In a survival situation, teamwork vastly improves your chances. Even just having one other person with you makes everything easier.
Common Mistakes and Safety Warnings
Let’s talk about what not to do.
Overconfidence (The Biggest Killer)
Just because you read this article doesn’t mean you’re ready to survive alone in the wilderness.
These skills take practice. Start small: practice fire-making in your backyard, learn to identify 5 local plants, try building a debris hut.
Don’t overestimate your abilities.
Poisonous Plant Lookalikes
Wild carrot looks almost identical to poison hemlock—but one is edible, the other will kill you.
Never eat a plant unless you’re 100% certain.
Hypothermia Signs
Hypothermia happens when your core body temperature drops. Early signs:
- Shivering
- Confusion
- Slurred speech
- Clumsiness
If you notice these, get warm immediately. Remove wet clothing, get into a shelter, and warm up gradually.
Fire Safety in Dry Conditions
Wildfires destroy forests and kill people. Always:
- Clear the ground around your fire
- Keep it small
- Never leave it unattended
- Fully extinguish it before leaving
When to Stay Put vs. Travel
If you’re lost, staying put is often the best strategy—especially if people know where you were headed.
Build a shelter, signal for help (three fires in a triangle is a universal distress signal), and conserve energy.
Only travel if:
- You’re certain of the direction to safety
- No one knows where you are
- Your current location is dangerous
Practicing These Skills Today
Want to learn these techniques? Here’s how:
Legal and Ethical Considerations
- Don’t practice hunting or trapping without proper licenses
- Respect private property and protected lands
- Follow Leave No Trace principles
- Never harm endangered species
Start Small
Begin with fire-making. Then try shelter-building. Learn 5 local plants. Practice knot-tying.
Master one skill at a time.
Take a Course
Many wilderness schools teach these skills in safe, legal environments. Look for courses taught by or in partnership with indigenous educators.
Resources for Deeper Learning
Books:
- Survival Skills of the North American Indians by Peter Goodchild
- Bushcraft 101 by Dave Canterbury
- The SAS Survival Handbook by John Wiseman
Organizations:
- Wilderness Awareness School
- Jack Mountain Bushcraft School
- Local survival and bushcraft groups
Connect With Indigenous Educators
The best way to learn these skills is from indigenous teachers themselves. Seek out workshops, cultural centers, and tribal programs.
Respect their knowledge and give credit where it’s due.
Conclusion: Honoring the Teachers
Indigenous survival techniques aren’t just ancient history—they’re living wisdom that can teach us about resilience, respect, and resourcefulness.
Whether you ever need these skills in a real emergency or not, learning them connects you to thousands of years of human ingenuity. It reminds you that your ancestors survived impossible odds—and so can you.
But remember: These skills come from cultures that deserve our deepest respect. Learn them with humility. Practice them with care. Honor the teachers.
And most importantly, get out there and practice. Read all you want, but survival skills only become real when you use them.
Stay safe. Stay curious. And may you always find your way home.
Frequently Asked Questions
1. What is the most important survival skill?
Shelter. In extreme weather, you can die of exposure in just 3 hours. Shelter protects you from heat, cold, wind, and rain—making it your top priority.
2. Can I learn these skills on my own?
You can learn the basics from books and videos, but hands-on practice is essential. Consider taking a wilderness survival course for expert guidance and safety.
3. Are these techniques still used today?
Yes! Many indigenous communities still practice traditional skills, and modern survivalists, bushcrafters, and outdoor enthusiasts learn these techniques for recreation and preparedness.
4. How long does it take to master fire-making?
With practice, most people can reliably make fire with a bow drill in a few weeks. Hand drill methods take longer—sometimes months of practice.
5. What’s the difference between Native American tribes’ techniques?
Techniques varied based on environment. Plains tribes focused on hunting buffalo and portable shelters. Woodlands tribes used more traps and semi-permanent structures. Arctic peoples mastered ice and snow survival.
6. Is it legal to practice hunting or trapping?
Hunting and trapping require licenses in most places. Check your local laws. In a true survival emergency, self-preservation laws may apply—but casual practice usually isn’t legal.
7. What plants should I absolutely avoid?
Avoid mushrooms (unless you’re an expert), plants with milky sap (except dandelions), white or red berries, and anything that smells like almonds. When in doubt, don’t eat it.
8. How do I find clean water in the wild?
Follow animal tracks, look for water-loving plants (cattails, willows), check low-lying areas and valleys, and dig in dry riverbeds. Always purify water by boiling or filtering.
9. What’s the best shelter for beginners?
A debris hut is simple, effective, and made entirely from natural materials. It provides excellent insulation and can be built in a few hours.
10. Where can I learn more from indigenous teachers?
Look for tribal cultural centers, indigenous-led workshops, and wilderness schools that partner with Native educators. Always approach with respect and a willingness to listen.